Bloom.

Navigation
  • About

A Corny Post.

September 4, 2013 by theblogbloom.com 2 Comments

I first visited the home Adam grew up in about five years ago. We were about to go on a canoe trip and he needed to pick up some of his camping supplies. While there, he also decided to change the oil in his truck.

(… I have said it before and I will say it again: The guy is handy.)

It was pre smart phones so I got bored rather quickly. While he was elbow deep in his truck, I decided to walk around. His childhood home was surrounded by fields that are farmed each year rotating between soybeans and corn. That year it was corn. We were there in late August and the corn was as tall as Adam.

033

As I walked towards the edge of the driveway and up to the start of the corn field, I remember being so surprised. Each stalk only had one ear, maybe two, of corn.

032

Really? That’s it?

As a Midwestern girl, born and raised, I have driven on highways surrounded by corn fields all my life. I could have sworn there were at least six ears to a stalk.

I walked back into the garage and squatted down to Adam’s level.

“Hey Bud. Random question… Are there really only one or two ears of corn on a corn stalk?” I asked.

Adam slid out from under his truck with a confused look on his face.

“Well, I thought there would be, like, six or seven ears. The corn out there only has one.” I tried to explain, what apparently was, a weird question.

“Yep. Just one. Sometimes two. Depends.”

Hmm, I thought looking back at the field.

Field corn surrounding our new home.  (And the chickens.  Arn't they cute?!)

Field corn surrounding our new home. (And the chickens. Arn’t they cute?!)

Now I was the confused one. “It seems kind of inefficient. It’s just, a stalk takes up a lot of space. And you only get one ear?”

“Yep,” Adam said, sliding back under the truck.

Still looking out at the corn, still perplexed, I asked another question: “So, when can we eat it?”

Adam laughed.

“Babe. We won’t eat that. That’s not sweet corn. It’s field corn. Sweet corn is a different kind of plant. It’s mainly grown in the south.”

Umm. What?

All these years of driving around Illinois, Indiana and Ohio I thought I was looking at what would wind up at a picnic and here I am, at twenty-one years old, learning all this?

Later, I shared my newfound knowledge with my east coast raised father. In his mid fifties, he had the same reaction to the news that corn stalks only have one or two ears: “Really? Never knew that. That seems inefficient.”

That’s what I am saying..!

However, he was in on the sweet corn versus field corn thing…

And while Indiana is home to acres of field corn that will eventually become oils or ethanol, many farmers and home gardeners in Indiana do grow sweet corn.

However, this year, Adam and I were not one of them.

Sweet corn is a little challenging to grow. Its success relies on the amount of rain during the growing season and the amount of attention the grower is able to give it. Two things we couldn’t guarantee at the beginning of the summer.

But, it was okay. We also knew we wouldn’t be without corn. Everyone around us grows sweet corn. It pops up on every other corner within ten miles of our home at temporary farm stands throughout the late summer.

Fortunaly, rain was not an issue this summer. Everyone who grew sweet corn had success. Many of Adam’s clients grew sweet corn and he would receive ears of it by the bushel every day. Free of charge.

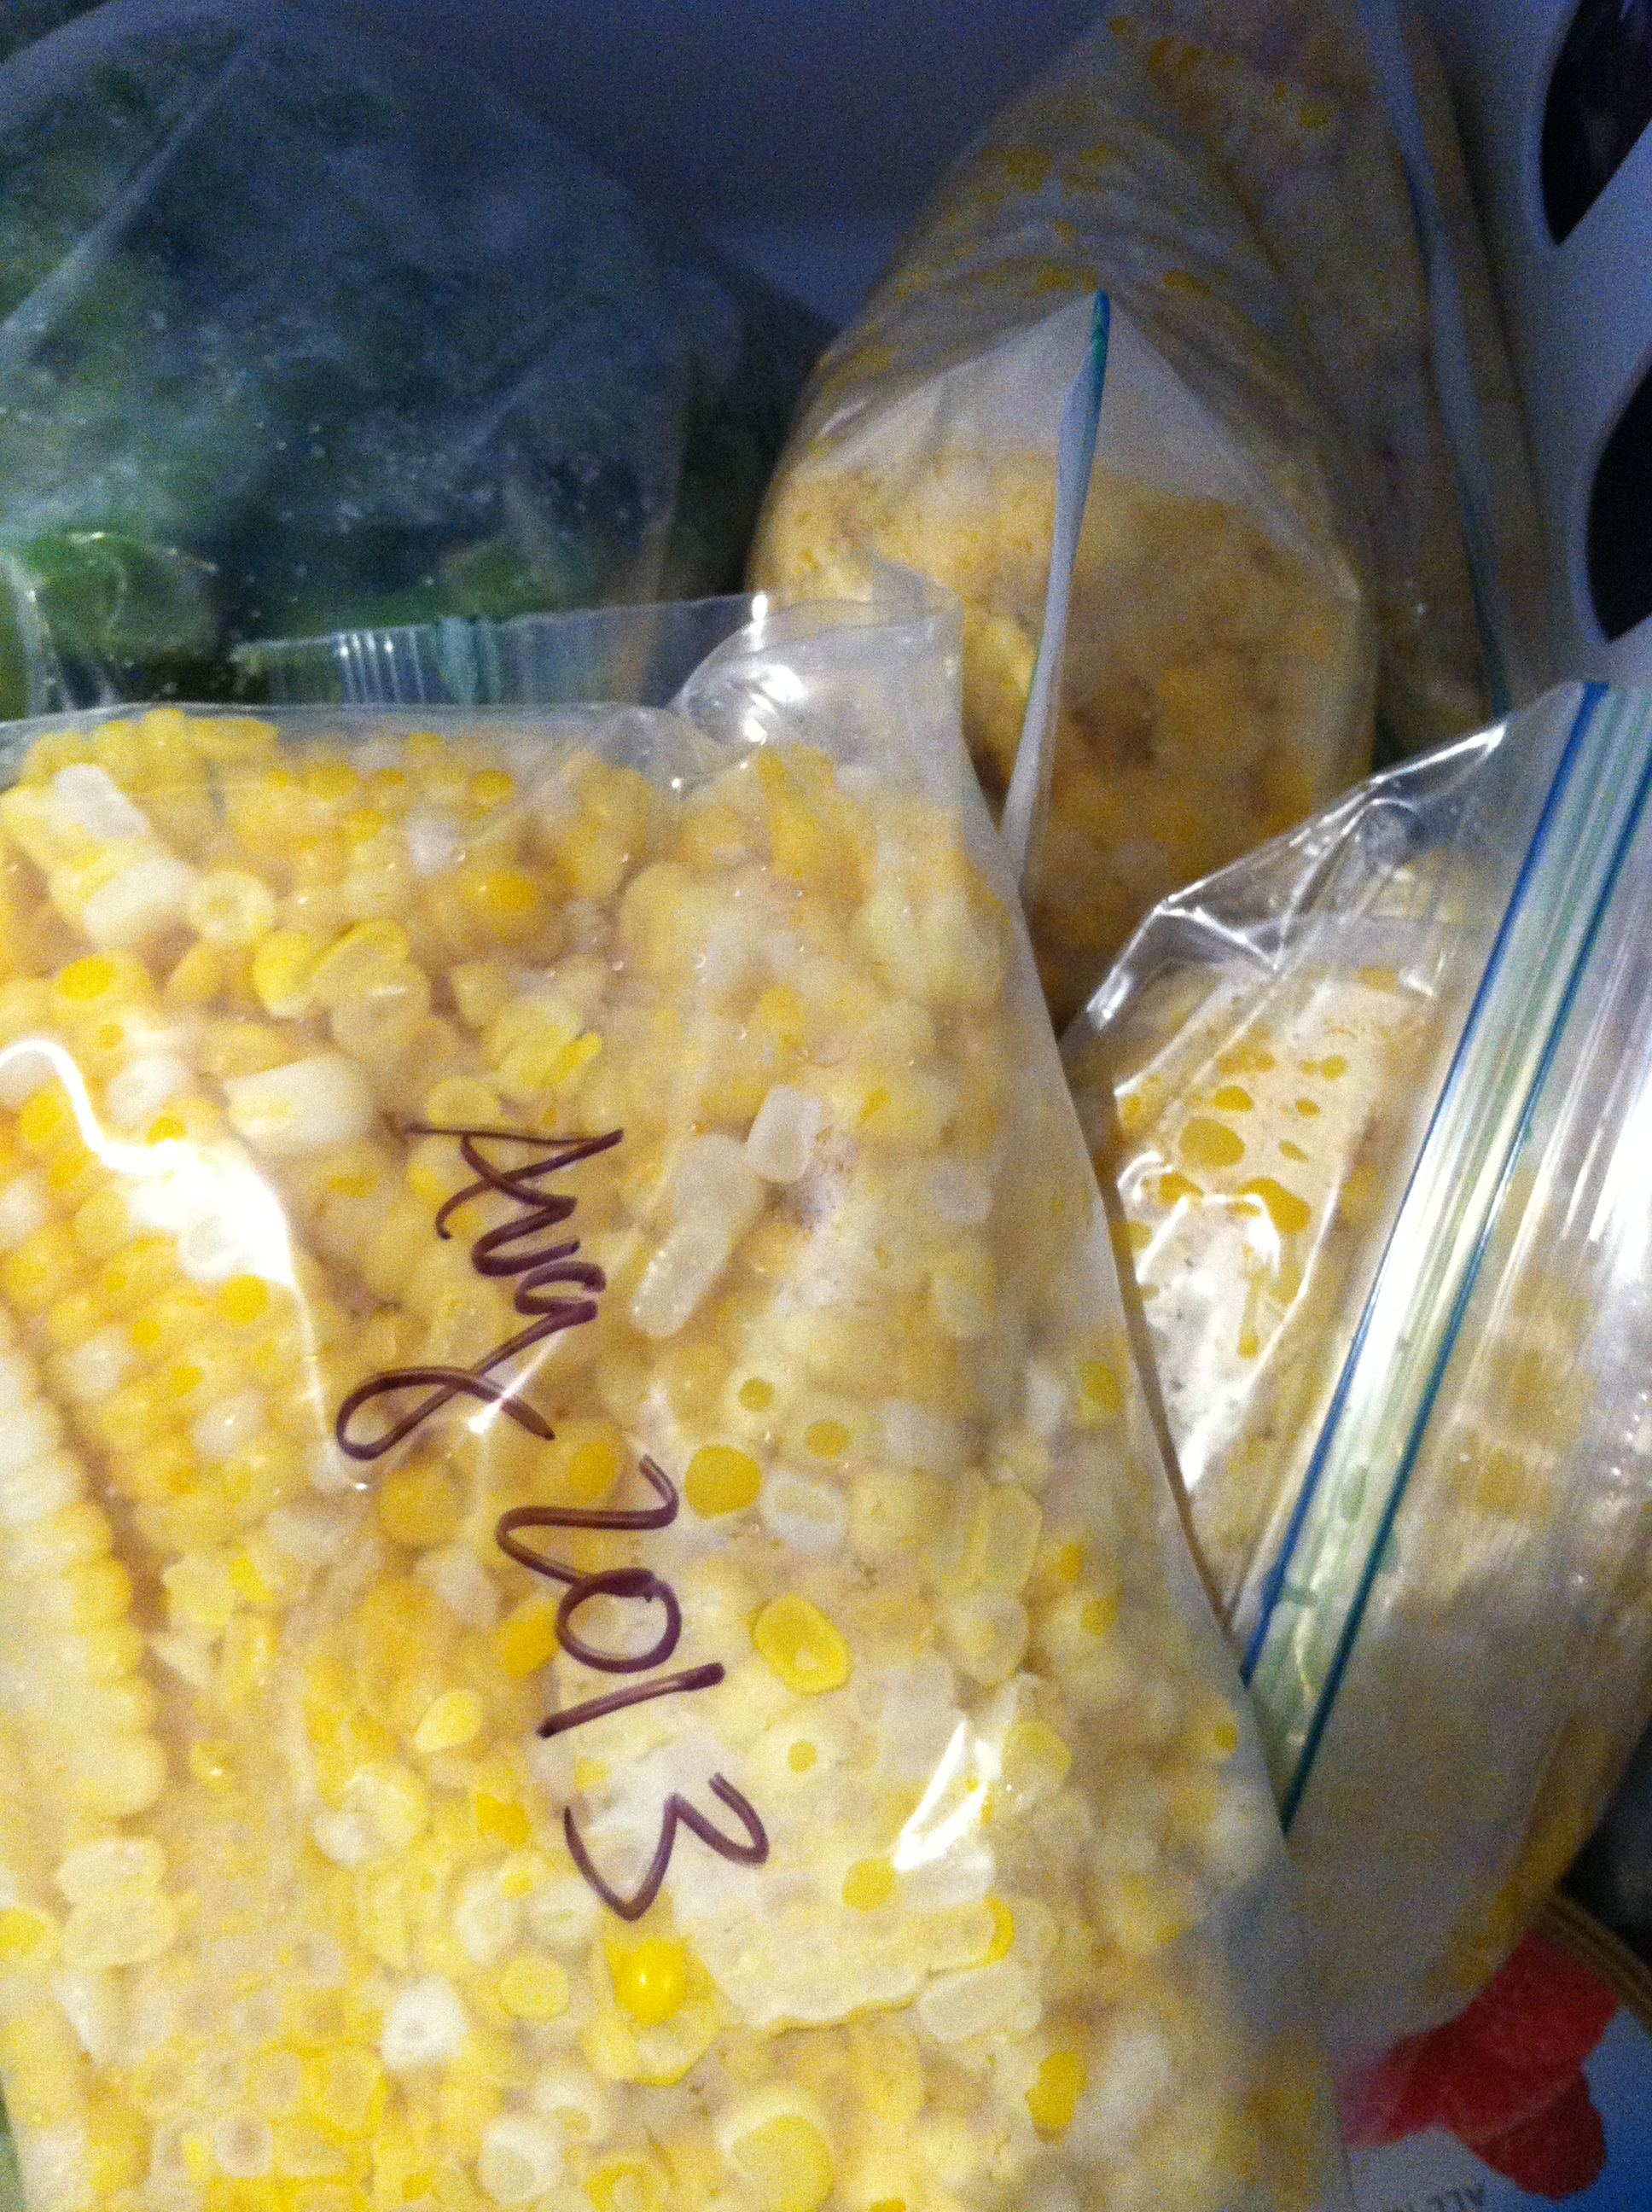
We couldn’t eat it fast enough so we decided to freeze it. Freezing any vegetable, especially corn, is a great way to lock in fresh, natural flavor.

Here is how we did it:

Note: You want to either eat or process corn as soon as possible. The longer ears of corn sit untouched the more nutrients and flavor are lost.

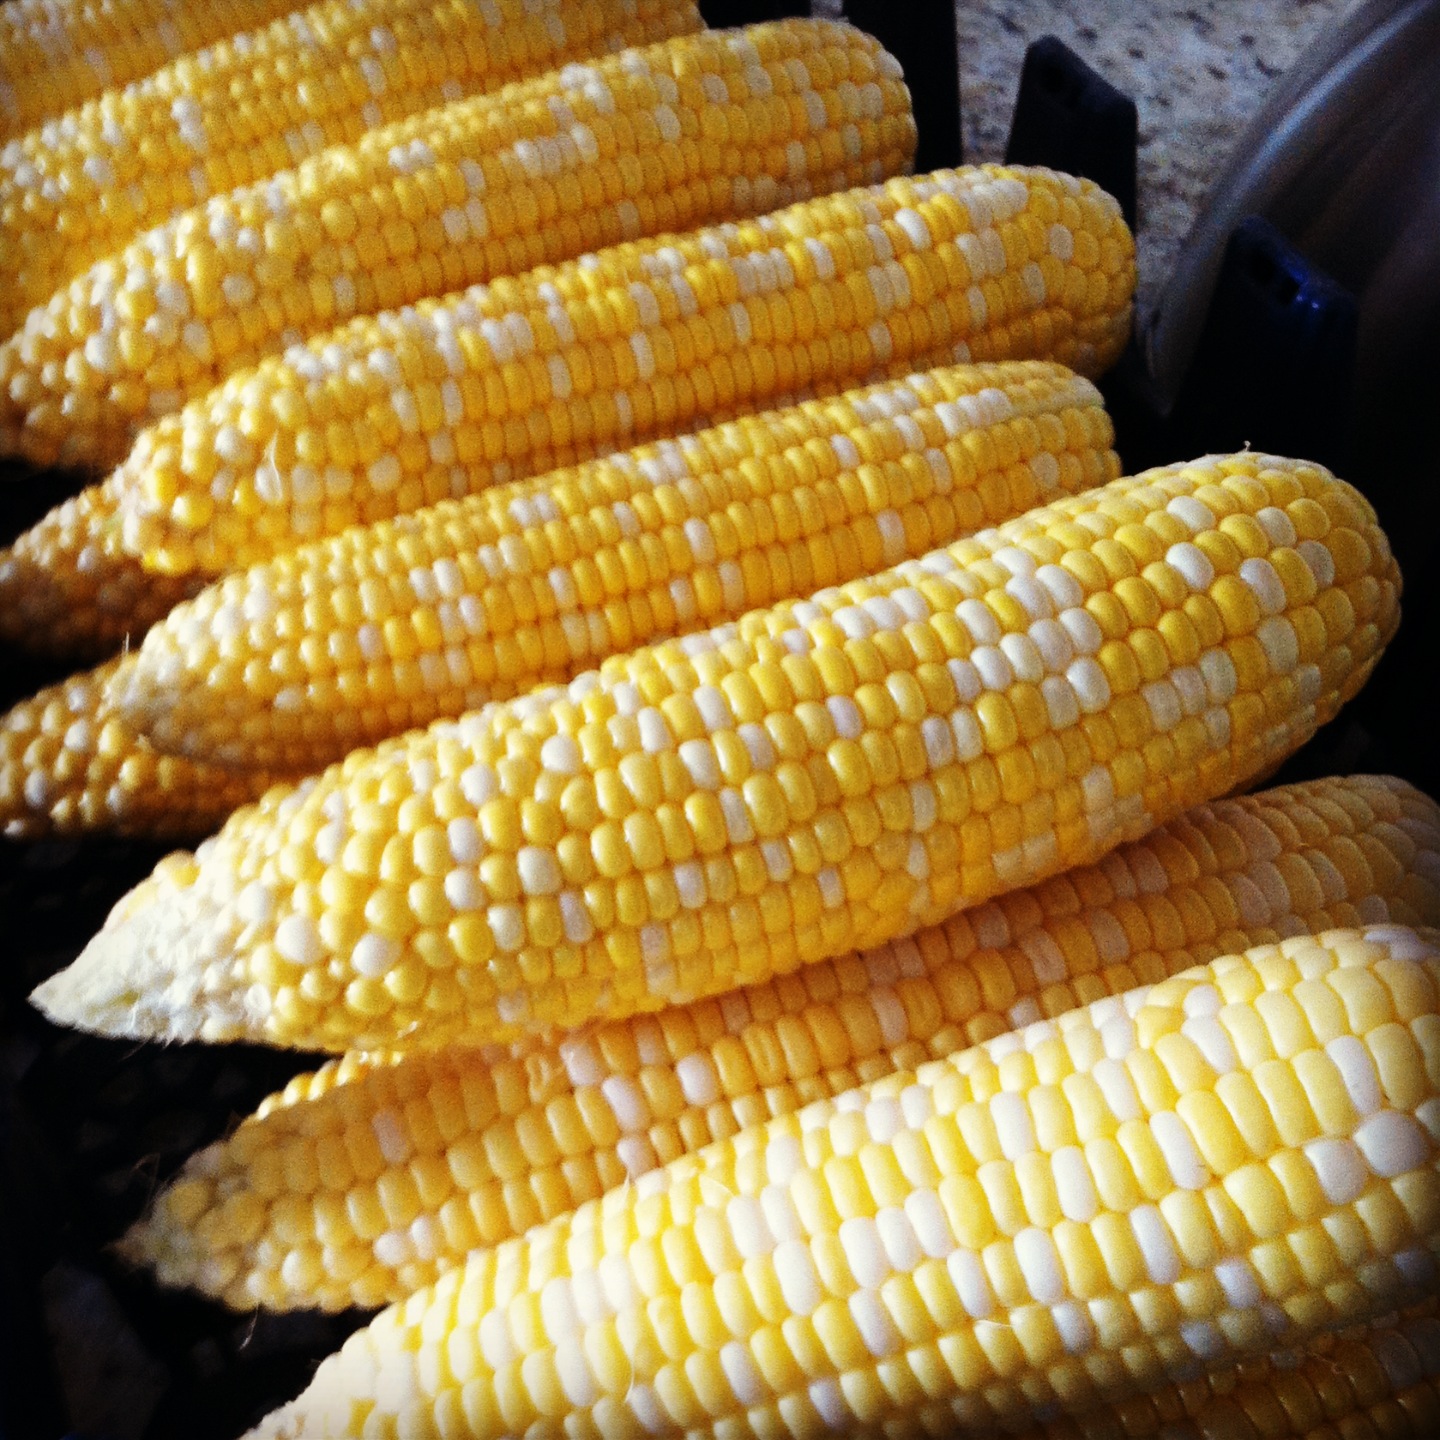
Step One: Shuck all the corn. Pull all greens and silks from the ears.

IMG_1675

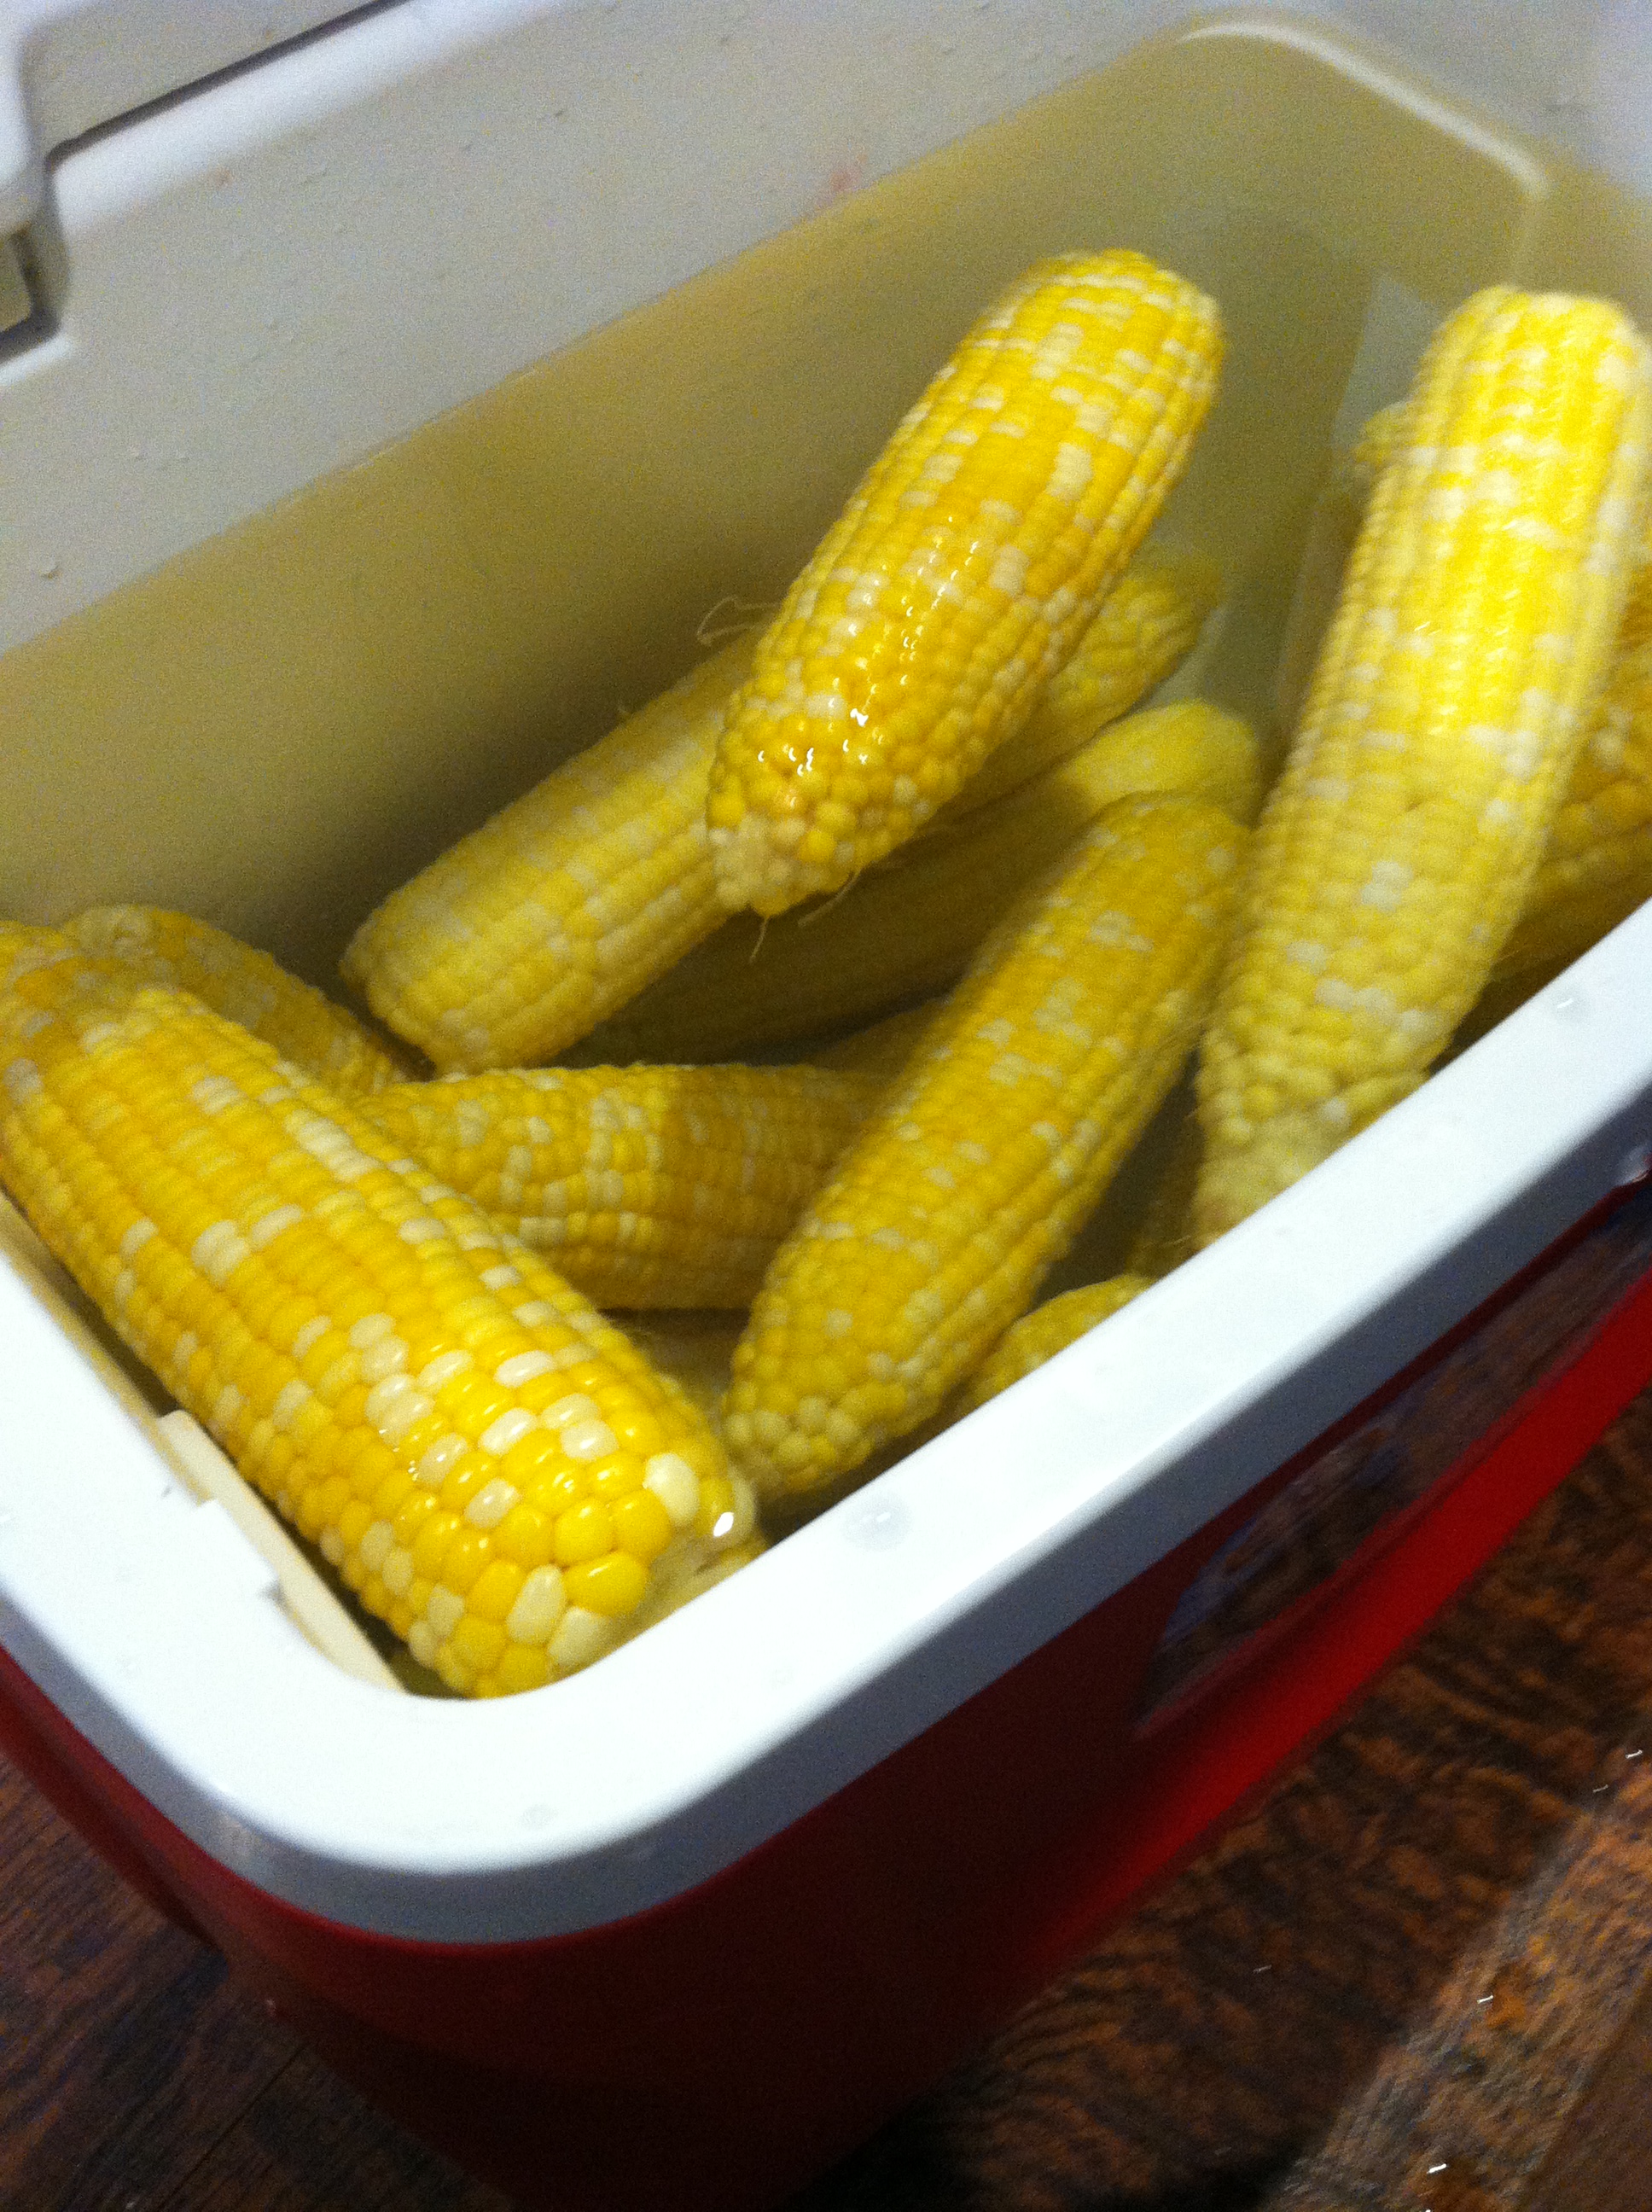
Step Two: Get set up. Bring a pot to a boil and get a bowl of ice and water ready. We actually used a clean cooler filled with ice water because we were working with so much corn.

photo (68)

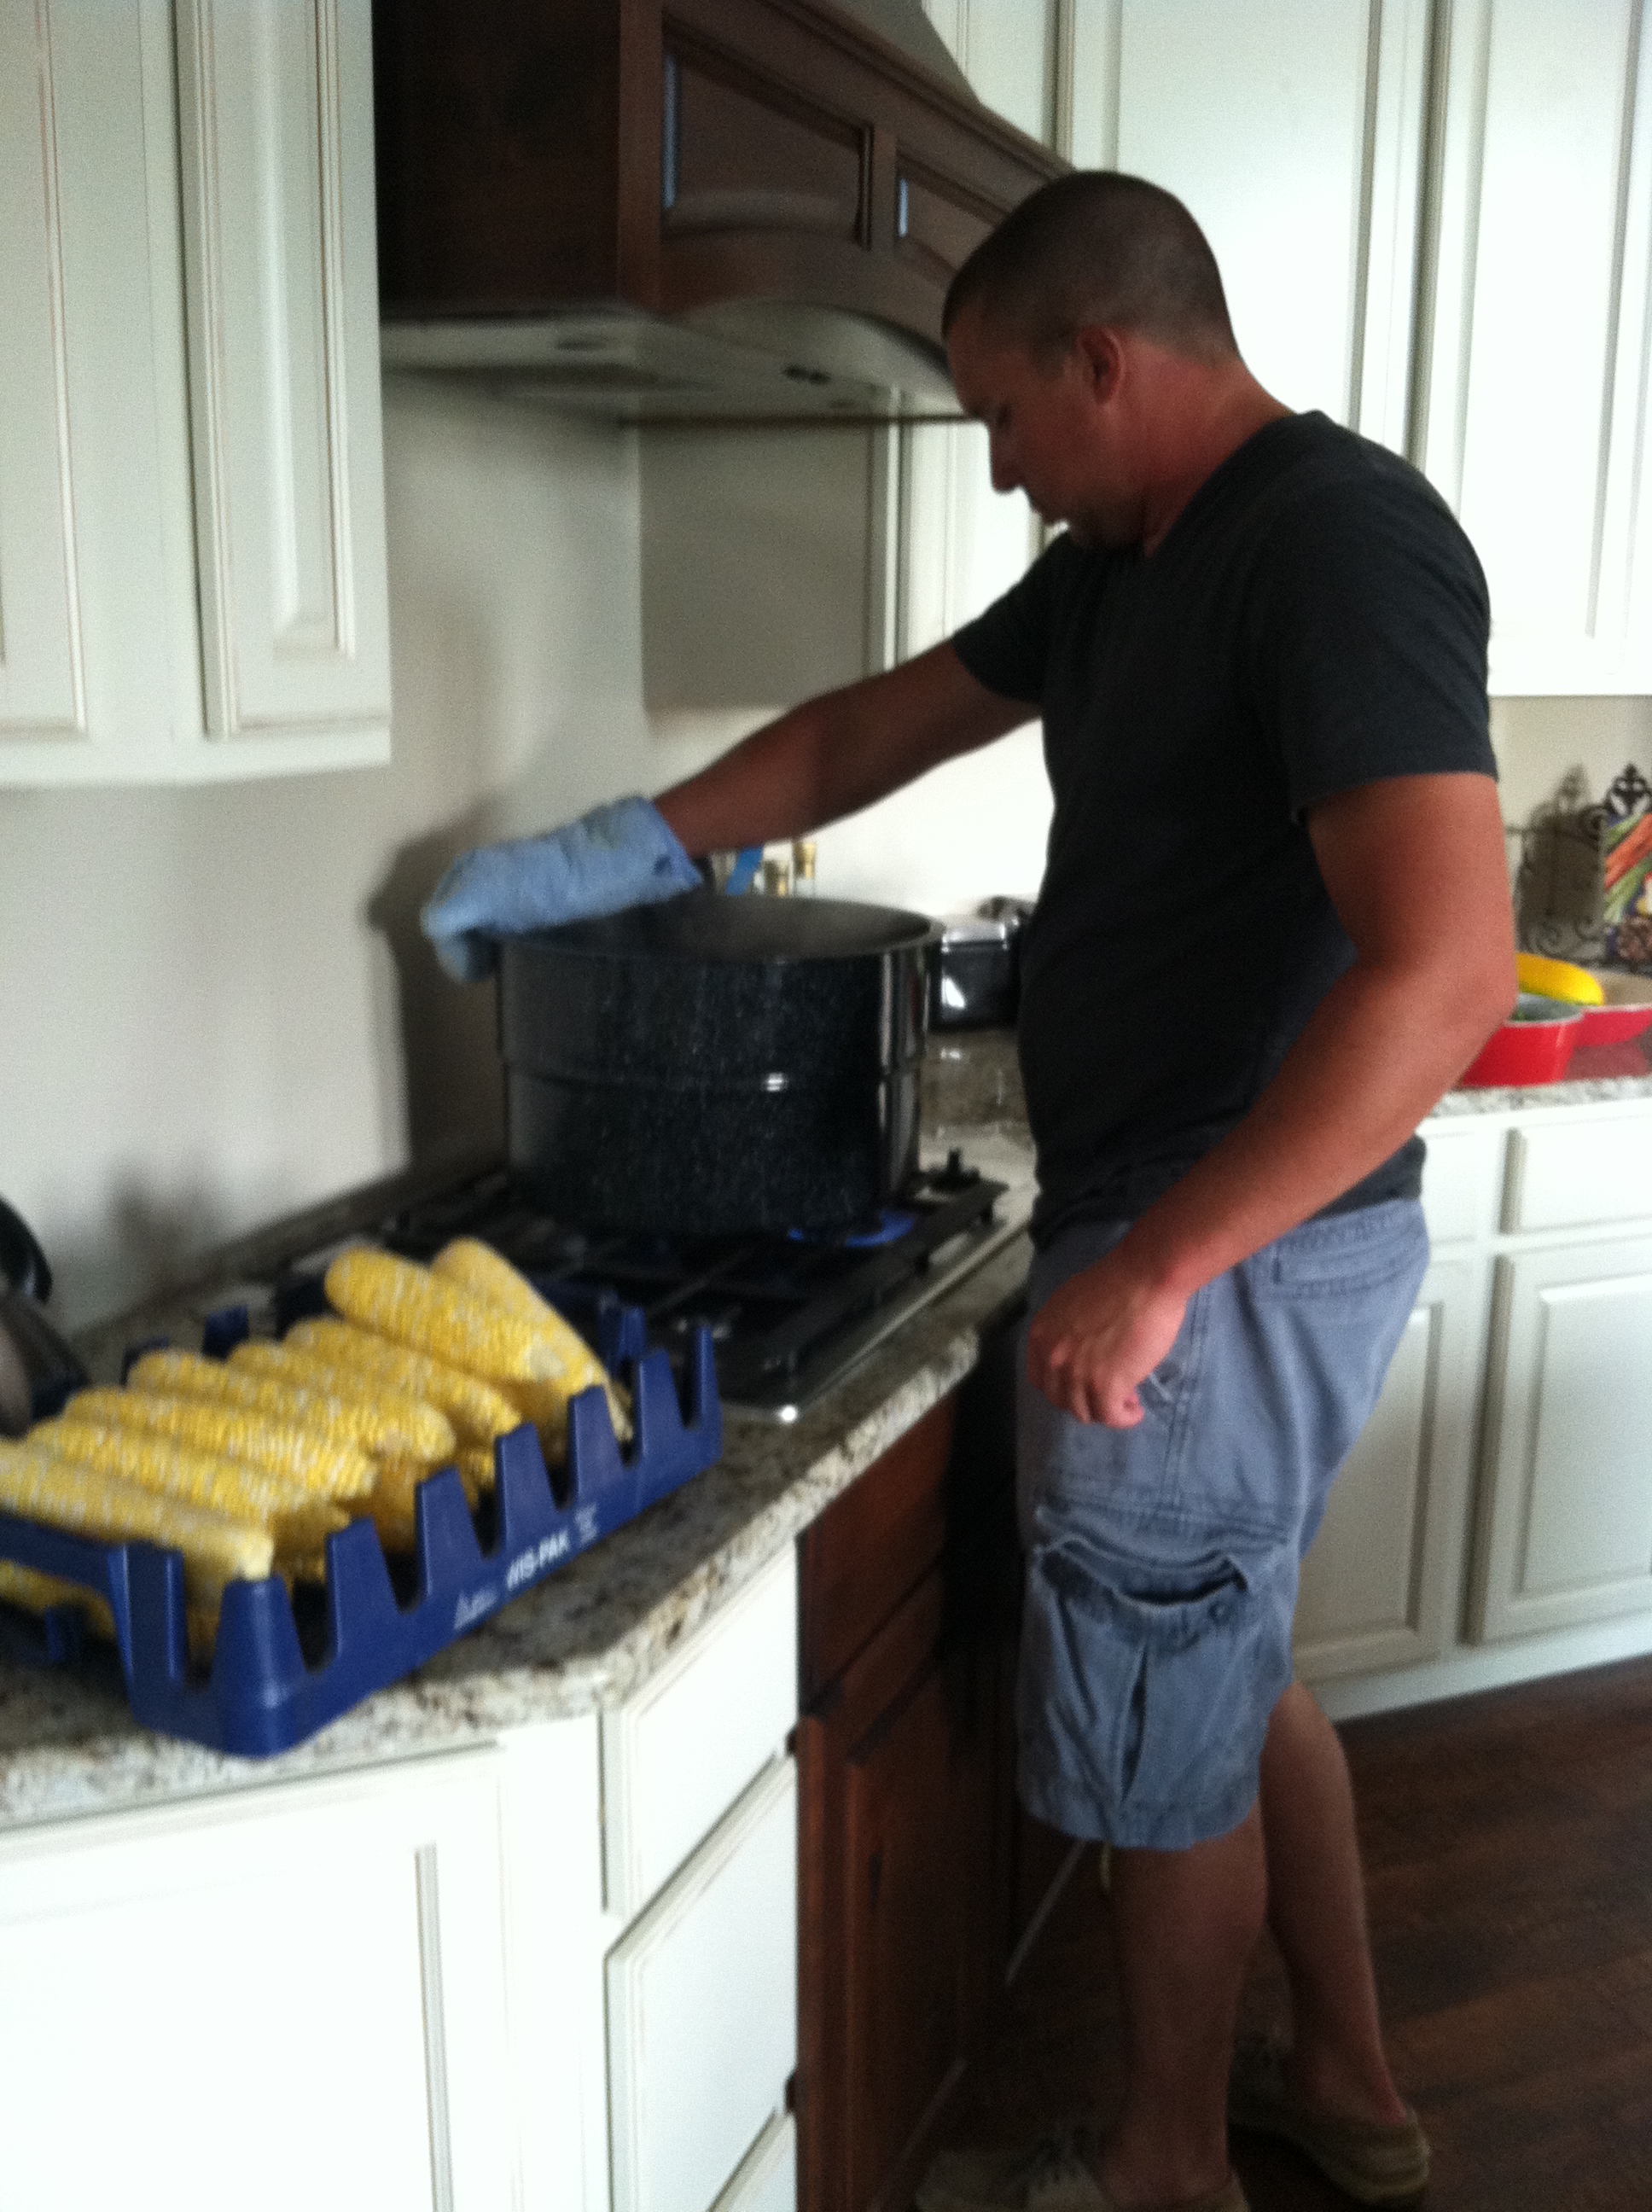
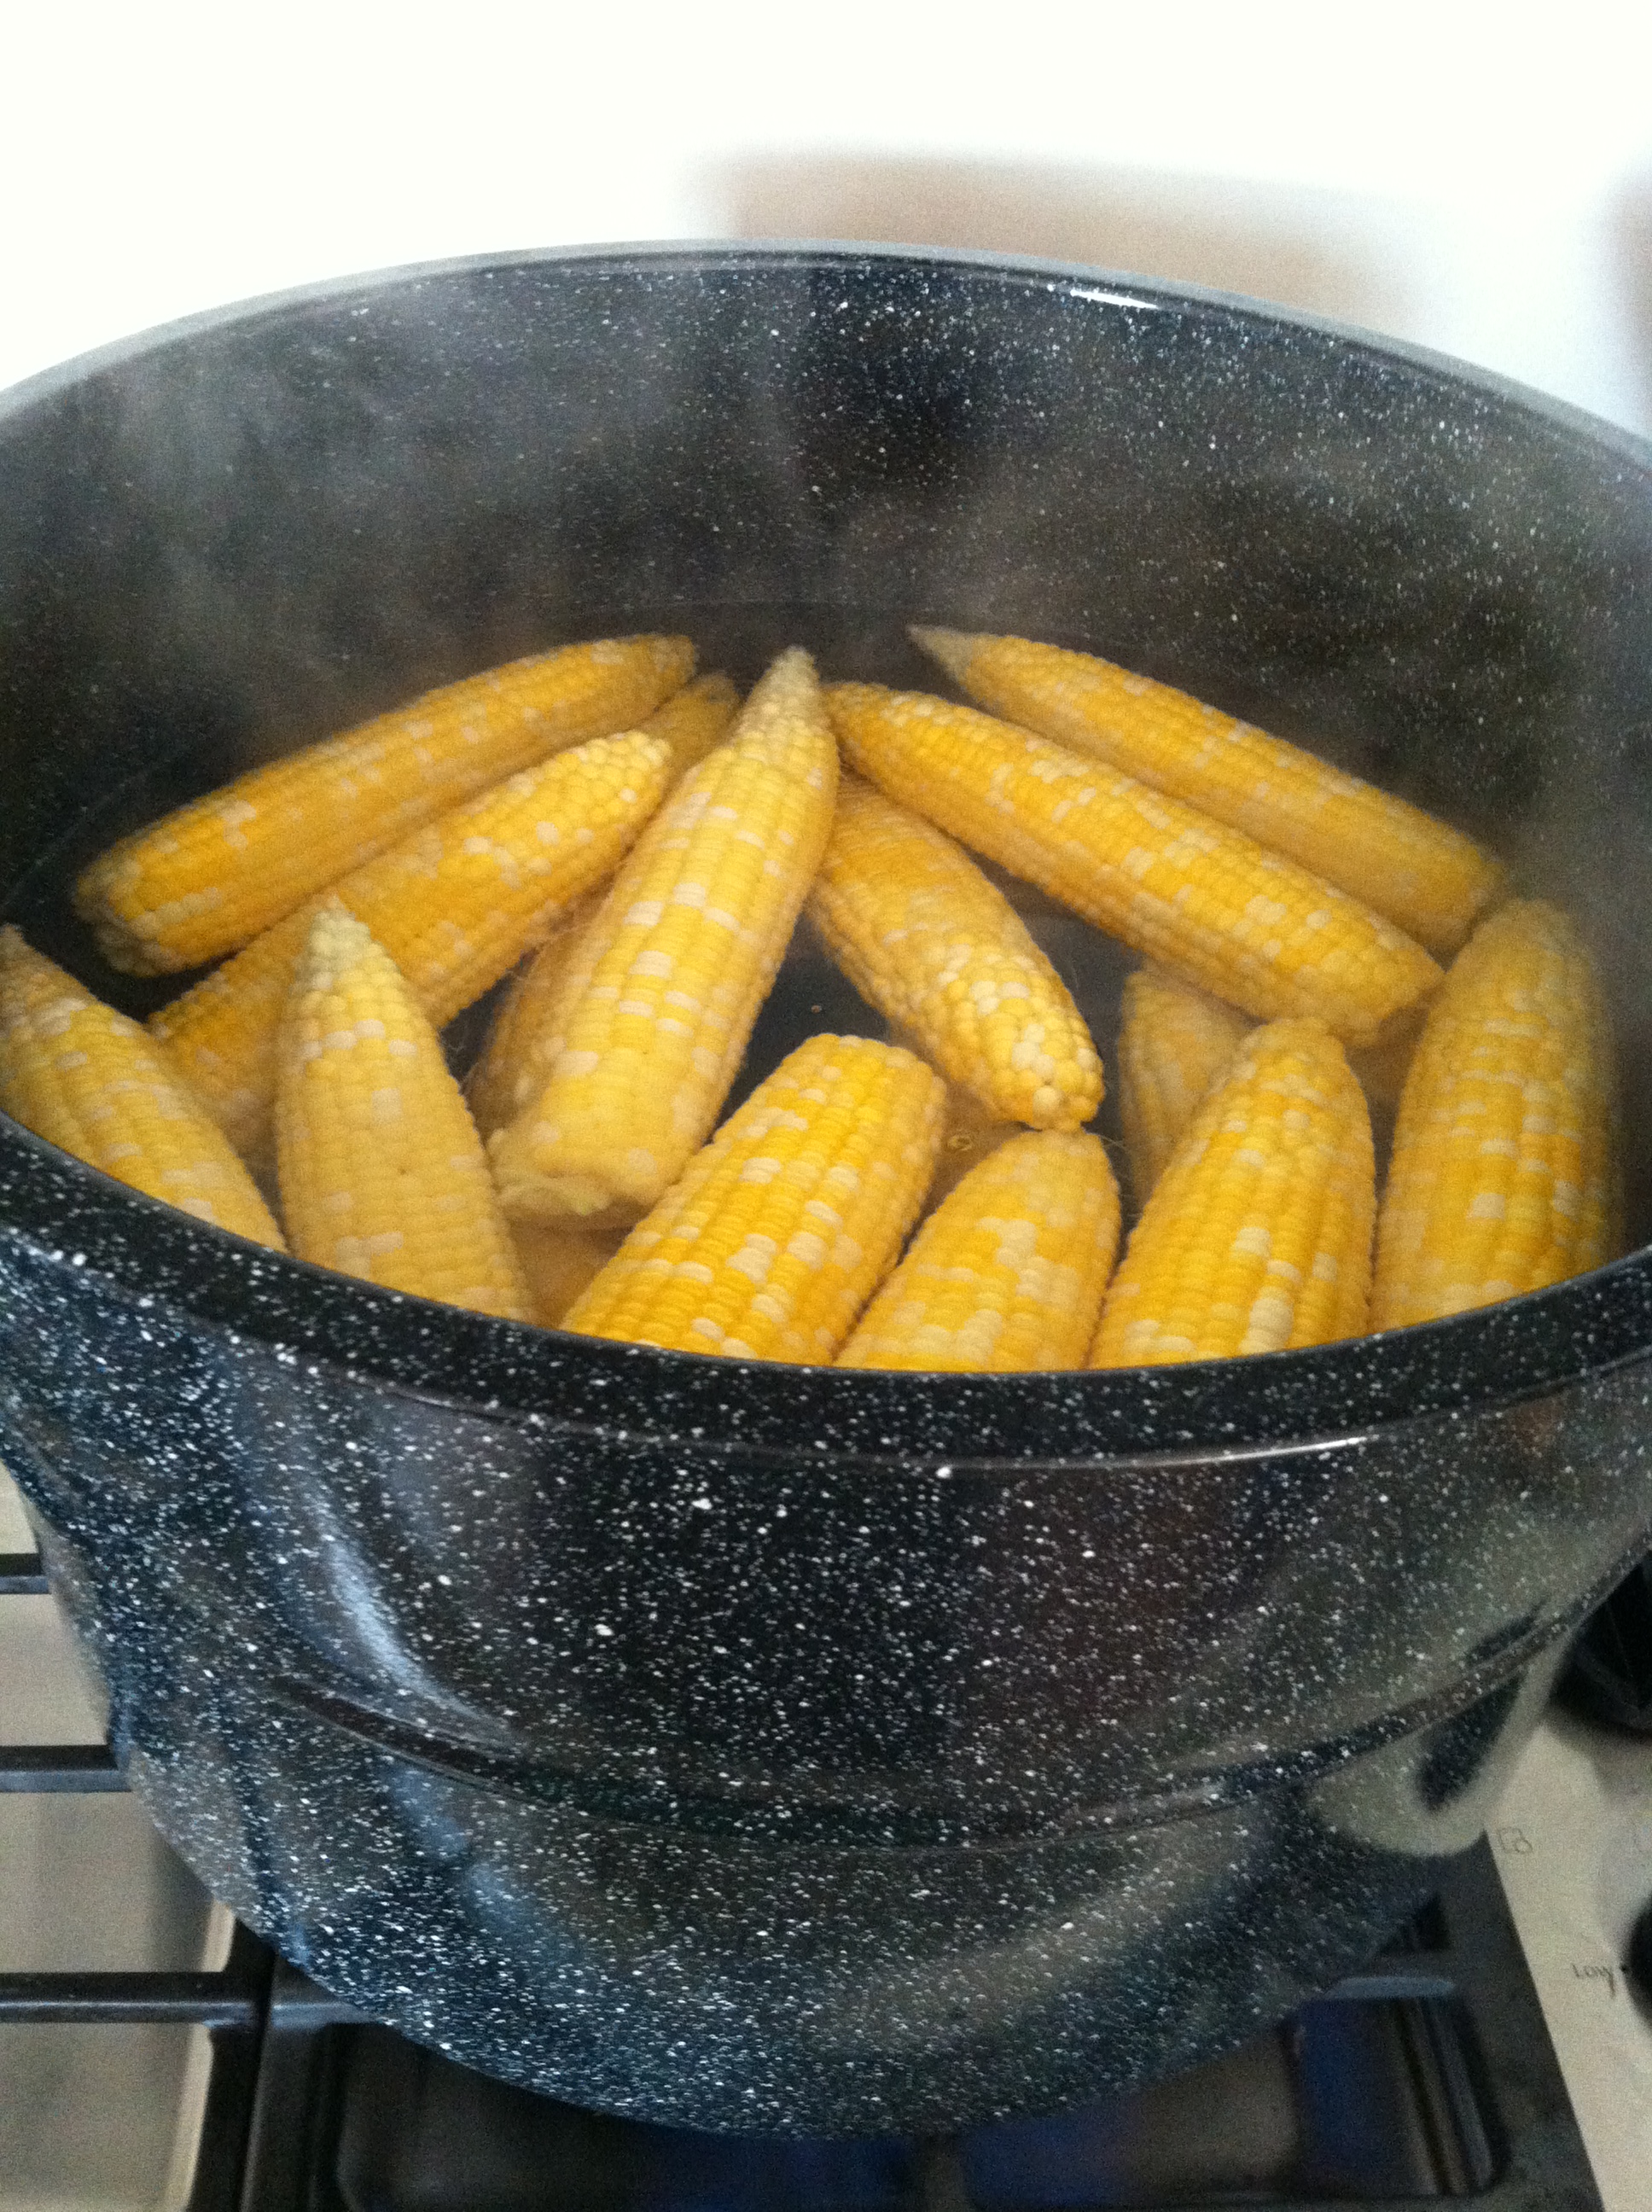
Step Three: Boil corn for about five minutes.

photo (69)

Step Four: Remove corn from boiling water and immediately place into ice water. This will stop the cooking process and ensure all the sweet corn flavor that you know and love will remain with the corn.

photo (70)

Step Five: Remove corn from ice water after about five minutes. Remove kernels from corn cob.

There are a lot of neat gadgets out there to make the removal of corn kernels easy, but a knife works just fine. What we did here was turn a small bowl upside down and place in the center a large skillet. Running the knife along the cob as it’s held on top of the small bowl, the kernels will fall into the skillet making collecting the kernels (and clean up) easy.

photo (71)

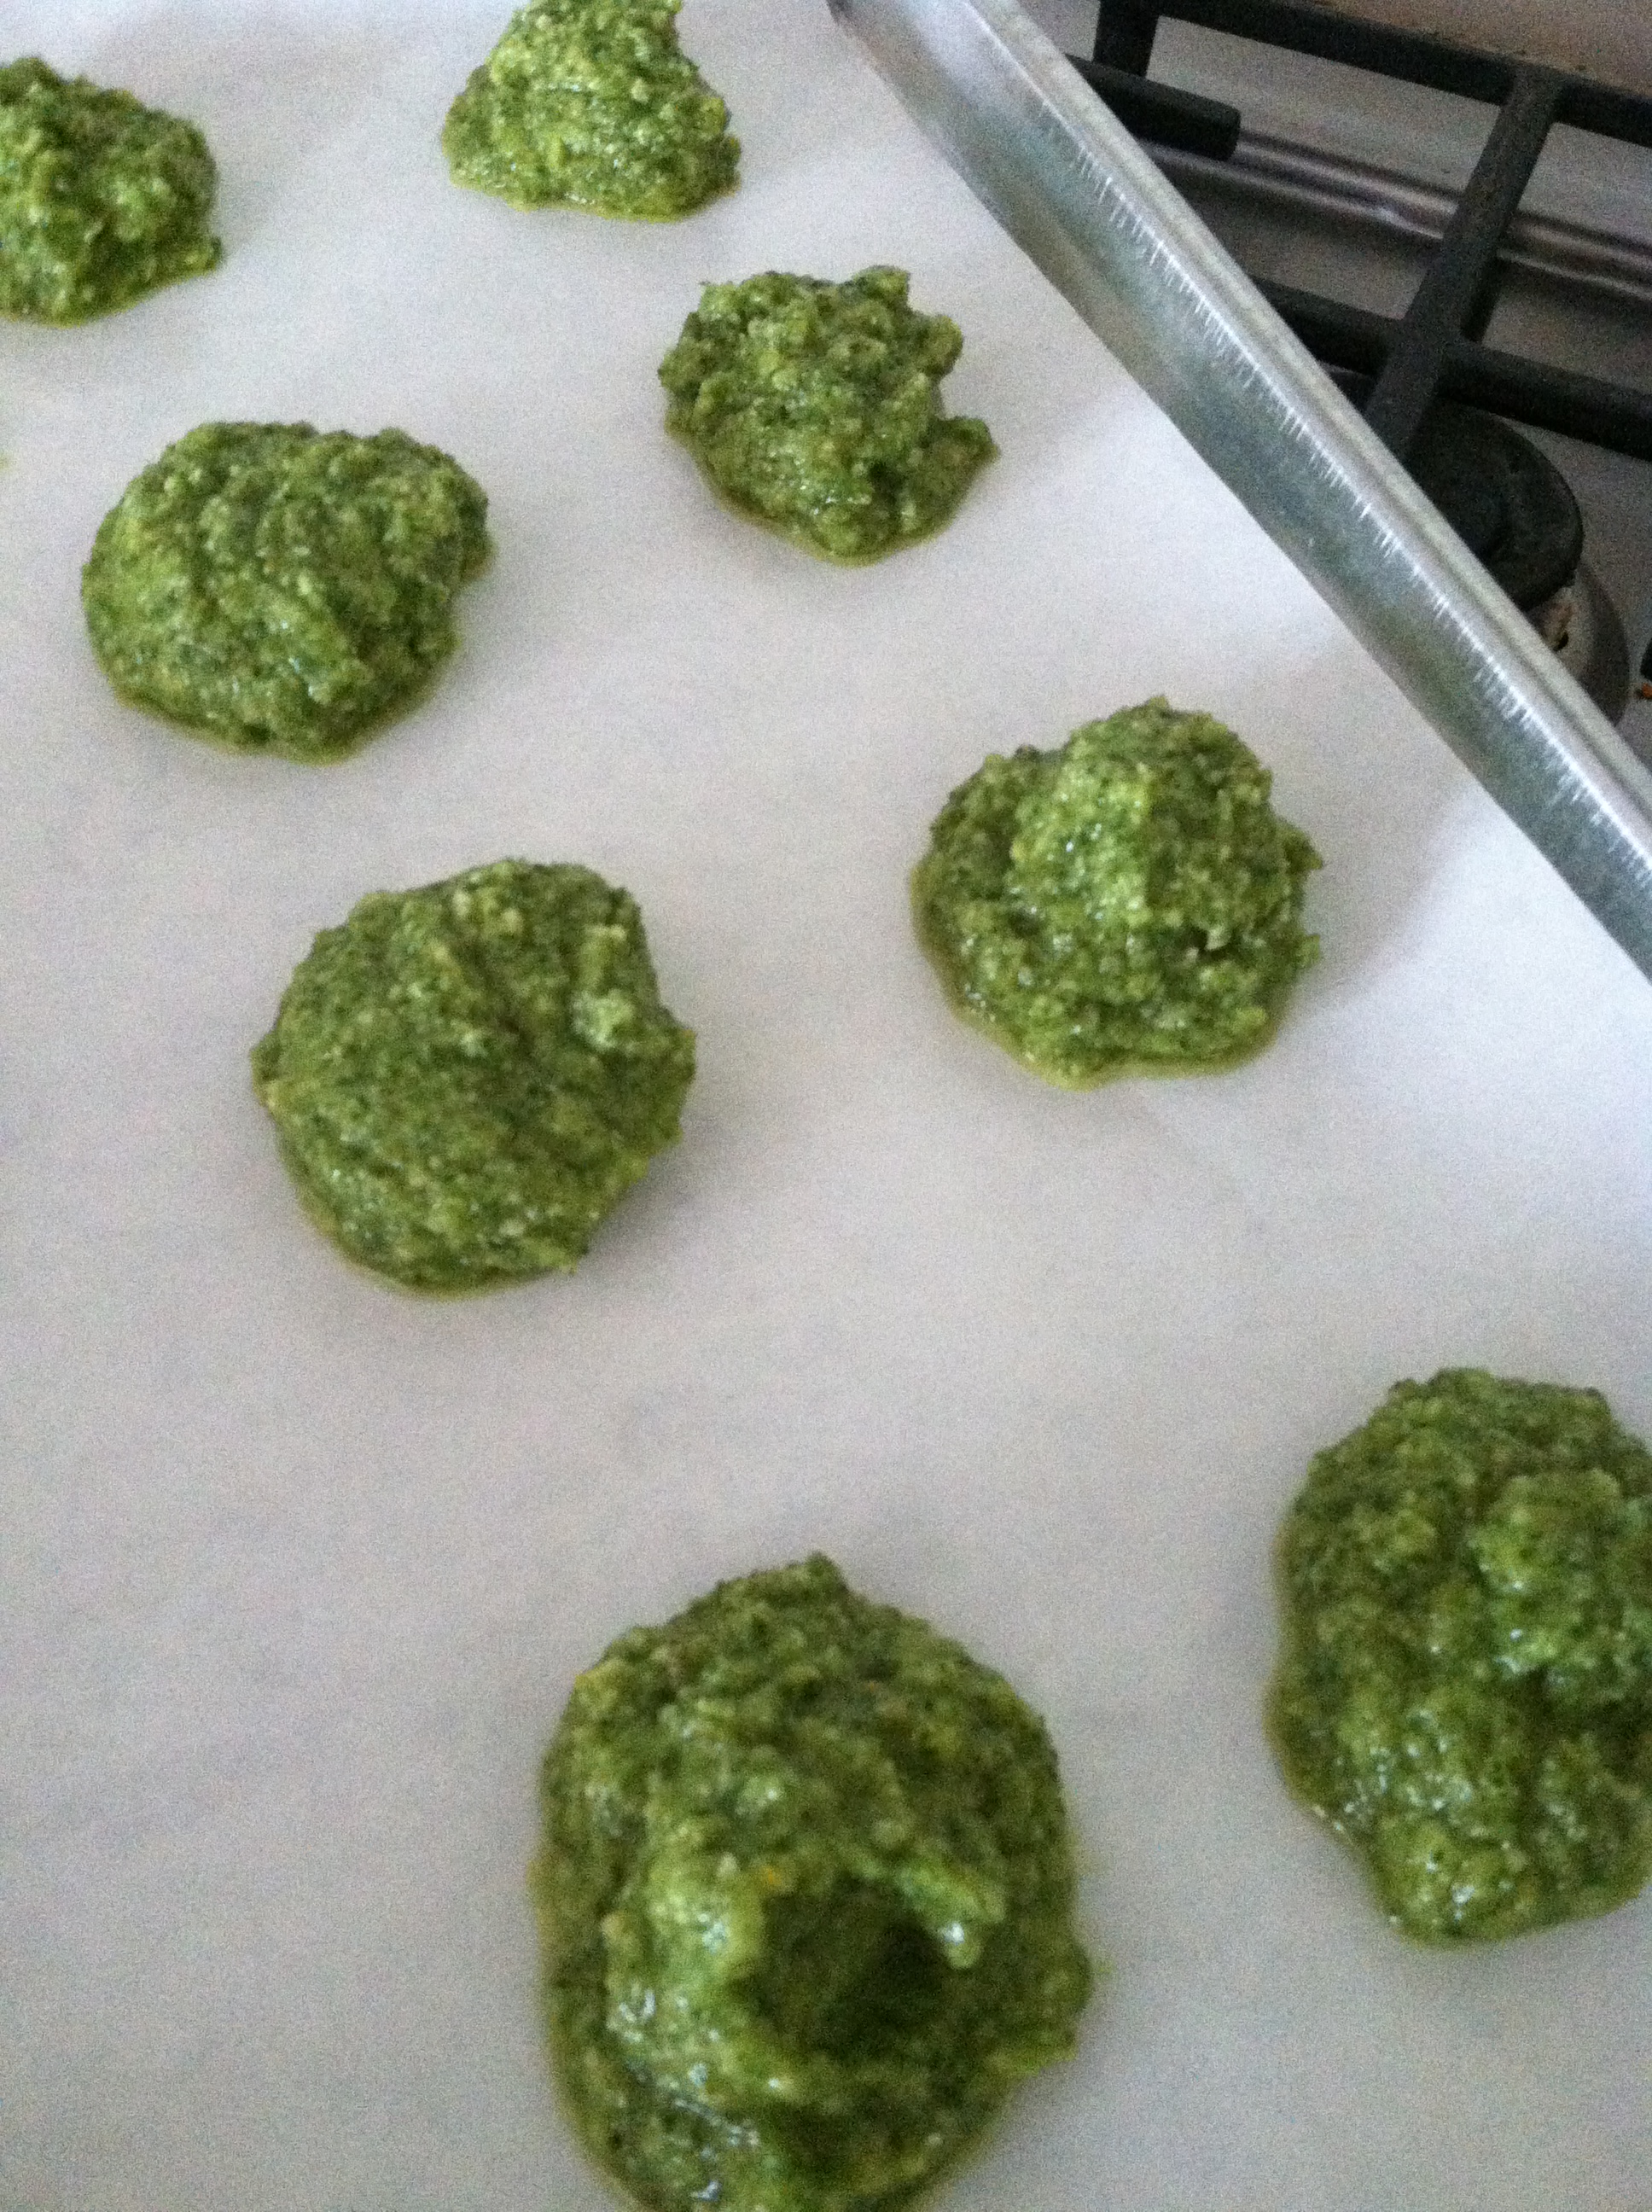
Step Six: Place corn onto baking sheets and freeze. Once frozen, use a spatula to remove corn from baking sheet and fill into freezer bags, squeezing out as much air as possible. Keep in the freezer for up to a year.

photo (72)

The flavor of sweet corn frozen at home is so much sweeter and authentic than corn from major frozen vegetable companies. This is because those companies remove so much of the corn’s natural sugars in their processing as it can make their continually used equipment very sticky. Not to mention, they would have to get the corn frozen much more quickly than they do. Otherwise, they are going to go into whiskey making business fast.

But there are some businesses trying to break the traditional manufactured sweet corn mold.

Last week, I had the opportunity to meet two incredibly inspiring Indiana entrepreneurs who are trying to bring the “Home-Preserved” fresh flavor of sweet corn to the commercial market. I even got to tour their brand new processing facility.

Working the big hair net on the tour... Looking good, right?!

Working the big hair net on the tour… Looking good, right?!

Through their new business, Husk, they are purchasing sweet corn straight from farmers just around the corner from their processing plant. With a little creativity (Example of this? French friers full of boiling water versus oil to cook the many corn cobs received every day.) and a ton of motivation they are changing the frozen corn market in Indiana.

1157614_631641993520893_1738933582_n

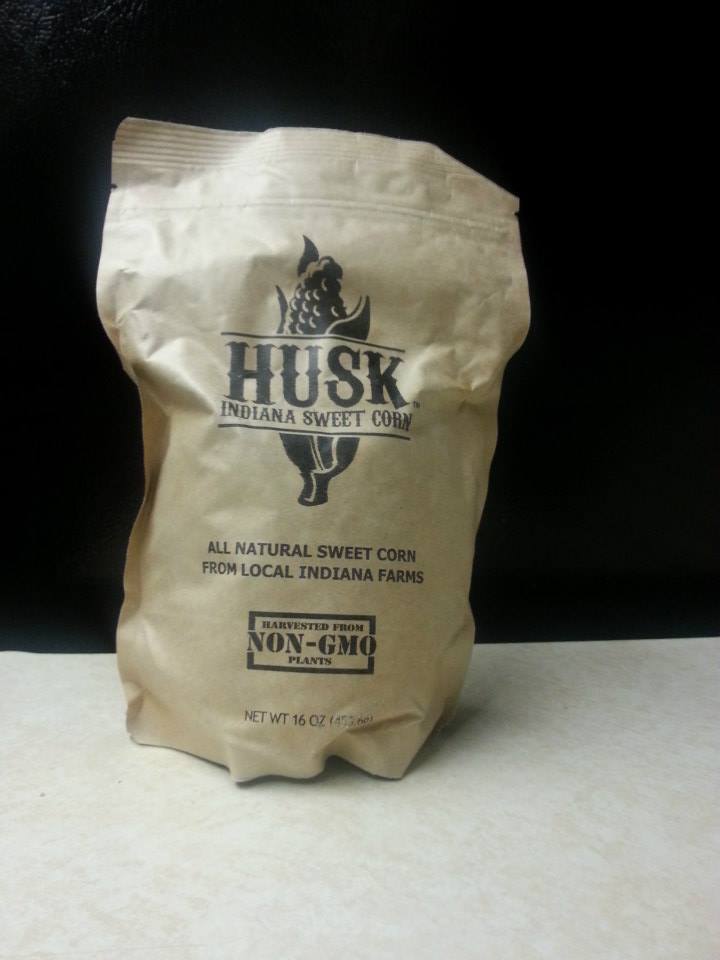
Since their inception at the start of this year’s sweet corn season, they have cut and frozen 60,000 pounds of sweet corn. Check them out: http://huskfoods.com/

And, Hoosiers, If you can’t find their product at your favorite grocery store, request it!

Filed Under: Canning and Preserving, Plant, Uncategorized Tagged With: Corn, Freezing, Husk, Indiana, Plant, Preserving

Mozzarella and Marinara: An Irish Girl’s Attempt at Italian

August 27, 2013 by theblogbloom.com Leave a Comment

There is a little part of me that has always -secretly- wished I was Italian.

But, I am Irish.

Very Irish.

My name is Claire, after County Clare in Ireland. My sister is Kerry, after County Kerry (the home of Dublin). And my brother is Danny… Danny Boy. My maiden name? Sullivan.

My dad was raised the sixth of eight Irish Catholic children and went to Notre Dame for undergrad. “Cheer, Cheer for ole Notre Dame” was in my childhood repertoire, just behind “The ABC’s” and “Twinkle Twinkle, Little Star.” I even went to high school in Dublin, Ohio where our mascot was “The Shamrocks.”

Very Irish.

As a housewarming gift my dad gave me this little garden fairy.

My "Green Gal"

My “Green Gal”

He said, “It’s an Irish Fairy for your garden!”

Let’s be serious for a quick second… The “Luck of the Irish” is not exactly what anyone wants in their garden.

The Irish are famously bad at gardening. Umm, hello?! That’s why we are all here.

Not to mention, we are not that good on the culinary front. Outside of Shepard’s Pie and Guinness, it’s pretty bleak.

Don’t even try to argue with me on this one. Especially with Irish Soda Bread.

In third grade we had “Culture Day” where we had to bring in food from our background. I remember my mom looking over the assignment and reluctantly saying, “Well, I guess we could make Irish Soda Bread…?”

She knew something I didn’t know.

But, I was excited. Soda and bread? Mixed together? My ancestors had it right!

Boy, was I in for a surprise.

On top of the weird flavor in something that looked like a dessert, there were raisins in there. Yuck.

Not something to build a deep connection back to the homeland on…

I have been to Italy twice and, despite my Irish roots, I couldn’t help but fall in love with their lifestyle and food culture. The fresh, light food. The importance and enjoyment of a meal. The wine. The gelato. At times it has felt like I was meant to be there.

And with my dark skin and dark hair I could maybe pull it off?

At Trevi Fountain cerca 2008

At Trevi Fountain cerca 2008; caught by papparazzo Dad.

So, last week I decided to give Italian my best effort. With tomatoes flowing from the garden I was confident this would be great.

photo (67)

I started my Italian adventure with canning marinara sauce made completely from scratch.

I used this recipe I found on Pinterest: http://www.theyummylife.com/marinara_sauce

I chose it because it featured lots of fresh herbs like parsley and basil. I was excited to use these in addition to the tomatoes from the backyard.

photo (66)

The recipe also called for a cup of red wine, which obviously called for a cup for me too. I figured this was what a true Italian would do.

photo (65)

This marinara is flavorful and sweet. I am excited to have it in the pantry for quick weeknight dinners in the winter.

The Italian adventure I was most eager to try was making mozzarella. I know, it sounds crazy, and a little ambitious, but I really wanted to make a caprese salad with my tomatoes, my basil and my mozzarella.

In Animal, Vegetable, Miracle, Barbara Kingsolver writes about a family vacation when they visit “The Cheese Queen.” She was located in New England, and while there, they all learned to make mozzarella. Ever since reading the book last winter, I had been looking forward to making my own mozzarella.

The Cheese Queen is a woman named, Ricki Carroll. Ricki has established a true name for herself in the world of making cheese. She puts on workshops in her Massachusetts home for new and experienced cheese makers. She also sells cheese making supplies and kits online.

I purchased the citric acid and rennet on her website that I needed to make mozzarella. After the supplies arrived at my post office, I couldn’t wait to get started.

I went straight to the grocery store to grab a gallon of milk and head to my kitchen.

Making mozzarella is a little scientific. You have to dilute the citric acid and rennet in water before adding it to the milk. The temperature has to be controlled, and the milk cannot get too hot, too fast. Thank goodness Adam was willing to help. It requires a lot of hands at the stove.

photo (62)

I was following this recipe from the Pioneer Woman: http://thepioneerwoman.com/cooking/2012/07/making-fresh-mozzarella/

By the time I got to the point where we “cut the cheese” (…which Ree and her friends thought was hilarious. My friends –embarrassingly- would too), I knew we were doing something wrong. The cheese wasn’t becoming solid. It was runny and resembled ricotta when I tried to drain it from the whey.

Blast!

I had failed.

photo (64)

I had a lump of cheese that didn’t want to hold together and by no means was mozzarella. It did taste like cheese.

The blog world said at this point we had cheese spread. So I added some seasonings, busted out some crackers and another glass of wine and sat down at the computer with Adam to see what we had done wrong.

Ten minutes later Adam and I looked up from our designated screens.

“You want to try again?” I asked.

“Yes,” Adam responded without hesitation.

Adam went back to the store to get more milk and I prepared the stove top.

We got the milk mixture going following directions from The Cheese Queen’s website: http://www.cheesemaking.com/howtomakemozzarellacheese.html

We made it to the “cutting the cheese” step, same result.

What the heck?!

We read that over pasturized milk can be the problem. Whole milk is a necessity, which we had been using all along.

This “cheese spread” became part our dinner as I whipped up a quick pizza using a splash of the marinara that didn’t fit into the canning jars, cherry tomatoes, and basil from the backyard.

photo (63)

Overcome with determination, I arrived at a natural food store the next morning ten minutes before they opened. I bought the most expensive gallon of milk I had ever bought in my life. It was from a local Indiana dairy and had minimal processing.

“This is it,” I excitedly thought as I got to work back at home.

Same result.

Grainy cheese curds that wouldn’t come together.

Now I really did resemble an Italian lady. “Fired up” was the best way to describe me. I had not had so much trouble trying to make anything since a lab in college where I had to make chocolate mousse with chocolate (… that I had to chop off the largest, most dense block of chocolate ever) and eggs on an industrial kitchen double boiler. I continually wound up with chocolate scrambled eggs. YUCK.

I remembered the gallons of raw milk at the natural food store. Raw milk isn’t processed at all. It is straight from the cow. It had to work, so I went back to the store to give it a try. I continued to talk myself into the $8.00 purchase by saying this is probably what cheese mongers in Italy use too.

Raw milk is actually illegal in Indiana for human consumption. As scary as it was reading that on the label, I got to work. I figured I was altering the milk. The heat would kill anything lingering in there… right?!

Within twenty minutes I had the same blob I had seen three other times.

Scusami!

This was the last straw.

This cheese blob was thrown in the corn. Mainly out of frustration… and, if we are being honest, a little bit out of concern of the illegal raw milk.

So, all in all, my attempt at being an authentic Italian was a failure.

But, what is so great about being an Irish American is that I can still enjoy the Italian food I love without having to pretend to be anyone.

… And, that the grocery store sells mozzarella year round for less than a gallon of raw milk.

august 27 001

You could say that I can have my caprese and eat it too.

... and so I did.

… and so I did.

Or you can say this Irish Meal Time Prayer:

“Bless us with good food,
The gift of gab,
And hearty laughter.
May the Love and Joy we share
be with us ever after.”

And if that’s the Irish Food Culture, I am proud to be a part of it, and I know it’s where I am meant to be.

Filed Under: Canning and Preserving, Plant, Recipes Tagged With: Barbara Kingsolver, Basil, caprese, Italy, Marinara, Milk, mozzarella, Plant, The Cheese Queen, The Pioneer Woman, Tomato, wine

Natural, Roasted Chicken. It’s What’s for Dinner.

August 21, 2013 by theblogbloom.com 7 Comments

It’s hard to believe that it really is late August.

School has started and is in full swing.

The sun is down before nine.

The corn is tall.

And the garden is full of produce.

Like these peppers.

002

And tomatoes.

003

Tomatoes.

009

Tomatoes!

009

With so much naturally raised produce in the kitchen I decided to cook the naturally raised chicken from my Farmer’s Market trip in July for dinner on Monday night.

I had never cooked a whole chicken and used the website 100 Days of Real Food as a stepping stone. I visit this site often as it is a great resource for cutting out over processed food from your diet. The author takes a realistic and relatable approach as she has (precious) kids and she doesn’t want to “worry” about food, but rather be confident in her family’s food choices.

On the website there is a post about roasting a whole chicken: http://www.100daysofrealfood.com/2013/05/14/recipe-how-to-roast-whole-chicken-safely-defrost-meat/

Perfect.

A chicken seasoned with lemons, garlic and rosemary.

Even more perfect. Some of my favorite flavors and I already had local rosemary and garlic in the house.

The post begins with how to properly defrost a chicken. She mentions that even though she has lived to tell about defrosting meat on the counter, the USDA recommends that meat should be defrosted slowly in the refrigerator.

… Something that made this ServSafe certified, hospitality professional proud.

Once defrosted, I mixed the herbs, seasonings, and oils together in a small bowl.

The next order of business was to remove the “giblets or bag of ‘parts’ that may be stored inside the chicken.”

The chicken man at the market had mentioned the “giblet bag” was in there. I remember thinking when I made the purchase, “Oh wow. That’s nice. He bagged those up and put them back in. I bet there are people who want to keep those.”

I looked in my defrosted chicken’s butt. I didn’t see any evidence of a ziplock baggie or saran wrap like I was expecting.

Weird.

I opened the rear end more. A sleek brown, jelly-ish mass was in plain sight.

I had just read the chapter in “The Omnivore’s Dilemma” where Michael Pollan processes free range chickens on Joel Salatin’s Virginia farm. Pollan wrote about removing the chicken’s insides after the bird bleeds out.

I knew what I was looking at… it was the bird’s liver.

There was no actual “bag.”

I had been lied to…? Maybe he just forgot to bag up this one…?

Or, it’s an expression. Slang, if you will.

… For chicken organs.

I also remembered from my read that removing these organs needs to be done carefully. Pollan warned that a ruptured gall bladder can be a big mess.

“What the heck am I supposed to do?” I thought, desperately wishing Adam was home. He could handle this.

I looked at the clock. Adam wouldn’t be home for about an hour. And the bird would take that long in the oven. I couldn’t wait.

So, I did what every girl who didn’t know what 4-H was until she was eighteen would do: I Googled it.

The first page I saw said to “Gently reach in and simply remove the giblets.”

Seriously? That’s all you got, Google?!

After many other failed searches and confusing youtube videos, I decided to suck it up.

“Like a band aid,” I told myself, sticking my hand in the bird’s rear end. I wrapped my fingers around the bundle in the cavity of the chicken, wincing, eye’s shut and gave it a pull.

“Ohhhhmyyyygodddd,” I squealed out loud as my hand emerged.

Browns, pinks, yellows and blues made up the still slightly frozen mass. (Thank God. Had that been any squishier we would have had issues.)

Just be glad I didn’t take a picture.

Once I recovered (and threw the giblets away), I brushed the bird with the herbed oil marinade, stuffed the lemon peels in the chest cavity, and placed him in the oven for about an hour.

001

Right around the time Adam got home from work the chicken had reached 170 degrees. I let it rest on the stove top while I chopped up some tomatoes and cucumbers to serve as a side with a splash of red wine vinegar. Light and easy.

The aroma of the rosemary, garlic, and lemon married well with the chicken, filled the kitchen and demolished any traumatizing mental images of giblets.

010

By the time I plated everything I couldn’t wait to give it a try.

It seems crazy, but the natural, free range bird did taste different than the chicken breasts from the grocery store that I am used to. It was moist, flavorful, and felt as though I could really taste the chicken.

012

I am looking forward to having more natural birds from our own backyard this winter.

… And having someone else do the processing.

Filed Under: Plant, Recipes Tagged With: August, Chicken, Cucumber, Farmers Market, food blog, free range chicken, garlic, michael pollan, naturally raised, Pepper, Plant, recipe, Rosemary, Tomato

Indiana’s Wine Country

August 19, 2013 by theblogbloom.com 1 Comment

With the craziness of summer, especially this summer, weekends with just Adam have been nonexistent. We have either been running in two different directions or in fast forward with groups of people for some sort of celebration.

While this summer has been a great time, it is sometimes nice to just be a couple.

Last March I reserved a tour of Oliver Winery’s Creekbend Estate Vineyard. It was hard to book something so far in advance but, it was nice to know through all the jam-packed, full throttle weekends this summer, there was this day to look forward to.

Oliver Winery is a very successful Indiana Winery just north of Bloomington, which is home to Indiana University and, is at the forefront of the local food movements across the state. At Oliver, there are a handful of wines made from grapes shipped from California and others that are grown locally at their Creekbend Vineyard, a few miles away from the main tasting room.

Oliver's Bloomington Tasting Room.

Oliver’s Bloomington Tasting Room.

Adam and I have been to the tasting room at the winery many times and fall even more in love with it every time. One of our first road trips together was to Oliver after a long, stressful few weeks in the first year of our careers. Adam even proposed to me over a bottle of Oliver’s Merlot.

Thanks to this special place in our hearts for Oliver, I was excited to have the opportunity to tour the private vineyard.

On Sunday, Adam and I headed out on the two hour drive to Bloomington, looking forward to the afternoon. The drive from the tasting room to the vineyard was windy, hilly and amazingly scenic.

We were welcomed into the vineyard by vast grape vines as far as we could see in either direction. Adam pulled up to an old farm house where two men were sitting on the porch. The older man introduced himself as Bernie, the vineyard manager. The younger man, about our age, was a farm hand named Jay. Bernie told us that we were the first to arrive and that as we wait for everyone else we could explore the farmhouse or the table grape vines planted in the back.

After the long drive, we both needed to use the restroom so we headed into the house to visit the facilities. While I was waiting for Adam, I read a plaque in the kitchen stating that the home dated back to the 1830’s and the original owners were buried on the land. Much of the house is still intact, including the unique chestnut floors in the kitchen.

Adam and I headed out to the back to check out the table grape vines. These grapes are sold in the cheese and fruit platters in the tasting room. I excitedly tested out my birthday present, a new Nikon camera, while Adam was looking around to try and figure out what bird was making this weird call he kept hearing.

august 18 2013 007

august 18 2013 014

august 18 2013 013

august 18 2013 015

The tour was kept to twelve people and once everyone arrived Jay brought out some champagne to kick off the tour.

Bernie told us the basics about the vineyard, including that the vineyard is located in a microclimate making the growing days and temperature during those growing days very similar to Napa Valley. The soils are great and thanks to the limestone and hills that are predominate in the area, rain runs off easily. There are about 69 acres of vines in the vineyard which re-opened in 1994 after Professor Bill Oliver began making wines in the sixties.

We began our walk around the vineyard with a fresh glass of Chardonel, which was a delicious hybrid grape that is similar to chardonnay.

One of the first questions asked was about the foil ribbons on the end of all the rows of the vines.

Red foil designed to keep birds away.

Red foil designed to keep birds away.

“Bird Control,” Bernie explained.

He mentioned that when the sun hits the flapping foil it reflects light keeping the birds away. They also use recordings of bird distress or attack calls.

I looked at Adam and laughed. That was the crazy bird he was looking for!

The next wines we tried were the Catawba and Traminette. Both of these we had tried before. The Catawba is one of Adam’s sister’s (many) favorites. Bernie snipped a few bunches of grapes and let us try the Catawba grapes. They were approaching harvest and were juicy and sweet.

Tasting some Catawba.

Tasting some Catawba.

august 18 2013 024

Next we headed up a large hill which actually serves as a landing strip for pilots that can land on grass. Along the landing strip were new grape vines which were planted this spring. We learned that grapes cannot be harvested until they reach three years of maturity, but, if taken care of, can last thirty years.

Adam in the landing strip, with vines as far as the eye can see!

Adam in the landing strip, with vines as far as the eye can see!

While walking up the hill, I asked Bernie how he got the job as the vineyard manager.

He laughed.

“Yeah. What did you study? Did you come from farming?,” Adam asked.

Two farmers, chatting it up.

Two farmers, chatting it up.

“Nope. Definitely did not come from farming,” Bernie smiled. “That’s a good one for the whole group to hear. I will answer that in a bit.”

Bernie, the vineyard manager, teaching the group about the grapes.

Bernie, the vineyard manager, teaching the group about the grapes.

We continued on the last leg of the walking tour. We passed some Merlot and Cabernet Sauvignon rows. Here, Bernie grabbed a handful of the Cab grapes and handed them out for us to try. These weren’t as sweet as the other grapes and he asked if we tasted green pepper.

The whole group lit up. Yes!

He explained these grapes were not ripe yet and if you ever have a bottle of Cabernet that tastes similar to a green pepper, it means the grapes were not ready for harvest.

As we walked back to the Farmhouse, Adam and I brought up the rear of the group taking a few more pictures and checking out the last few rows of grapes.

I looked at Adam. “You having fun?”

“A blast,” he beamed. “This is a perfect day.”

Perfect Day.

Perfect Day.

A gourmet cheese platter was waiting for us in the farmhouse complete with Indiana cheeses, including one from Fair Oaks Dairy, as well as a glass of Chamboursin, a dry red wine. Adam and I both declared it our favorite of the day.

august 18 2013 039

The final bottle uncorked of the tour was an ice wine. This incredibly sweet wine was paired with Lindt chocolates and reminded me of honey. It was good enough for me to appreciate but was much too sweet for any more than a couple sips. I looked at Adam, who seemed to be feeling the same way, and wished we had split a glass, so not to waste the wine.

Bernie thanked everyone for joining him and asked if anyone had any other questions.

I reminded him that he had not answered mine about how he got his start.

“Oh, that’s right! Thanks for reminding me.”

He told us his career actually began in the military and he took a government job that brought him back to Indiana in 1997. Prior to this he worked as a bomb specialist. During the grape harvest, he volunteered at the vineyard with his wife and became good friends with Bill and Kathleen Oliver.

Over a bottle of wine at the end of a festival in Indianapolis, Bill asked Bernie to be the vineyard manager. Bernie said three jaws dropped that afternoon. His, his wife’s, and Kathleen’s.

Bernie replied, “Thank you for the offer but, I don’t know anything about growing grapes.”

Bill responded “You are a bomb specialist with all ten fingers, I can teach you to grow grapes.” Three weeks later, Bernie accepted the job and has been there ever since.

And, he hasn’t looked back.

“My grandfather was a farmer,” Bernie winked, “And I know he’s sending me a big, old high five from heaven.”

Creekbend Vineyard Quick Facts

http://www.oliverwinery.com/vineyardevents
7508 North Woodall Street
Ellettsville, IN 46429

Tours are only offered a handful of weekends in late summer and book up fast. As mentioned, I made this reservation in March. It’s because I tried last summer and spots were not available.

It’s a walking tour (about one mile total) so dress accordingly. Wear good shoes. Prepare for the weather as it could be chilly or hot. They provide umbrellas if it’s drizzly.

Prices are $40 for an individual or $70 for a couple. Heck of a deal. We tried nearly ten wines, some of which are not offered in the tasting room, were fed a beautiful cheese and chocolate platter, and the tour was given by the incredibly knowledgeable vineyard manager.

It’s a hilly, twisty drive on back roads to the vineyard. Use the map on the website versus trying to use a GPS. According to the vineyard manager over 85% of the time the GPS will get you lost.

Creekbend also offers picnic’s in the vineyard throughout the summer where you can bring your own meal, take a stroll through the vineyard on your own, and purchase estate wines by the bottle or glass for the evening. Sounds amazing!

Even if you can’t make it out to the vineyard, check out the tasting room on 37 just north of Bloomington. It’s beautiful, and a lot of fun.

… We made a stop by the tasting room to purchase a case of the estate wine. We already can’t wait to bring some of these bottles out during special occasions in the year to come!

Checking out the Creekbend brand back at the tasting room.

Checking out the Creekbend brand back at the tasting room.

Creekbend wines back at home.

Creekbend wines back at home.

... 'til next time.

… ’til next time.

Filed Under: Agroturism, Plant Tagged With: Agroturism, Bloomington, Champange, Creekbend Vineyard, Day Date, Indiana, Local Wine, Oliver, Photography, Plant, wine

Pesto Changeo.

August 13, 2013 by theblogbloom.com 2 Comments

You know that article that every woman’s magazine runs at least once a year sharing the buzzwords to watch for so that you avoid “calorie overload” when ordering a meal at a restaurant?

Crispy. AKA Fried.

Smothered. Probably with colossal amounts of cheese.

Creamy. Unnecessarily calorie dense.

So on and so on…

Here are the buzzwords used in menu items that I just can’t avoid:

Goat Cheese. So rich and so delicious.

Truffle. The epitome of decadence.

Avocado. Yes, like much of America, I to, am Avocado Obsessed. “Have you seen my new Avo-CAR-do?” Cracks me up. I love a good food pun.

Pesto. I just can’t get enough of it.

I can’t get enough of pesto at home either. It is great on nearly any kind of meat. Works well as a sauce for pizza or pasta. And even compliments some vegetables.

Thanks to my basil plants looking abundant as ever, I decided to give making pesto a try. My mom makes and freezes pesto often. This allows her to enjoy her basil plants throughout the winter.

I visited her over the weekend and asked for her recipe.

She laughed.

“Oh, that’s easy. Just some oil, garlic, parmesan, pine nuts and your Cuisinart.”

… Easy for the Pesto Pro to say.

Wanting to be a little more precise I looked it up on Google and sure enough, that really was it. And it really was easy. Quick too.

So, I am now a Pesto Pro.

… Or maybe more a Pesto Magician because it seemed like the instant I hit the “On” button my ingredients turned into a beautifully, green and delicious pesto paste.

Here is what I did:

Gather two cups of fresh basil (Basil should be packed pretty well.)

1/3 cup olive oil

½ cup grated Parmesan Romano Cheese

½ cup Pine Nuts (… I read online that you could also use walnuts or almonds. The wonderful Barefoot Contessa uses both walnuts and pine nuts. Things I will try next time.)

3 cloves garlic (I used some from the Farmer’s Market and the cloves were huge! I would tone it down next time if I were working with such big garlic cloves again.)

A touch of salt

I threw it all in the food processor, turned it on and then the magic happened.

7

Instantaneously, I had pesto.

6

I stopped it twice to push down the pesto on the sides with a spatula until it was nearly smooth.

From there you can either put your pesto in the fridge and enjoy it within three days or you can freeze it like I did. (Although, I am sure I would have had no problem finishing it all well before three days were up… the flavor was amazing.)

There are a few ways you can freeze pesto.

I scooped small mounds of the pesto onto a cookie sheet lined with parchment paper and put the sheet into the freezer. Once solid, I removed the mounds from the parchment paper and put them into a ziplock bag. This way I can grab a serving to add to whatever I am cooking.

5

My friend’s mom uses an ice maker mold to freeze the pesto and then stores them in ziplock bags once frozen.

Baby food jars also work well.

I did reserve a little pesto to use with our meal last night. Adam grilled shrimp that I had coated with the fresh pesto. As I scooped the pesto on to the shrimp I told Adam to give it a try.

I also dressed some shrimp with BBQ sauce and others with lime and tequila.

I also dressed some shrimp with BBQ sauce and others with lime and tequila.

As he did his face lit up. “Mmm,” he admired, “You made that?”

Heck yes I did!

Another thing that magically changed last night was me. I went from twenty five to twenty six.

2

My good friend Betsy came up to our house from Indianapolis with these amazing cupcakes from The Flying Cupcake, a local and very successful cupcake chain in Indy. I had the Birthday Cupcake, of course. Adam and Betsy both had the one that looks like a “Ho-ho.”

3

But, what was even more magical than the pesto or slipping into my upper twenties was the awe-inspiring sunset we were blessed with as a backdrop for my celebratory dinner.

Cheers to twenty six!

Filed Under: Plant, Recipes Tagged With: Basil, birthday, cupcakes, garlic, pesto, Plant, recipe, shrimp, sunset

Enjoying a Hiatus from the Grocery Store

August 5, 2013 by theblogbloom.com 3 Comments

Today I had a weird thought.

Outside of a trip to get a couple lemons and some milk, I have not been to the grocery store in two weeks.

For a girl who frequents the super market at least twice throughout any other week this is kind of monumental.

The farmer’s market visit, frozen meat from Adam’s hunting trips last winter and the garden’s current bounty set us up for a great week of easy, cheap meals. It also helped to remind me that things don’t need to be complex to be delicious. So long as I have a little oil, salt and pepper, and some seasonings such as herbs, I am good.

To compliment some bacon wrapped steaks that were still in the freezer from the baby shower in July, I made this recipe with my farmer’s market beets: http://www.foodnetwork.com/recipes/roasted-beets-with-lemon-thyme-dressing-recipe/index.html

I had never made beets, outside of the Chopping Block class, and was surprised how simple it was.

The lemon juice and thyme was a perfect way to bring out the beets natural, sweet flavor. Adam had never eaten a beet before and compared the flavor to sweet corn.

Beautiful Beets.

Beautiful Beets.

One thing to be aware of, beets have a very strong magenta color that can dye your fingers, clothes, table cloth, floor, counter top (etc, etc…), if you are not careful.

Another night, Adam grilled the pork from the Farmer’s Market, and I made this recipe that I found on Pinterest: http://andreasrecipes.com/sauteed-zucchini-with-tomatoes-mushrooms-peppers-and-basil-the-kids-cook-monday/

It was seriously summer on a plate, and it was made with many different garden veggies including summer squash, zucchini, bell peppers and tomatoes. I subbed a little corn shaved off a cob for the mushrooms because we had it.

My basil is still booming, flavorful as ever, and was so perfect and fresh in this dish.

“Chiffonade” is a cutting technique where a leafy vegetable or herb, like basil, is cut into small strips. This can be nearly impossible (… or at least really annoying) to accomplish when cutting a single leaf at a time.

... this is annoying.

… this is annoying.

A great skill I learned at a catering event a couple years ago when I was making bruschetta is to roll a handful of basil leaves as if you were rolling it like a cigar.

Rollin', Rollin', Rollin'...

Rollin’, Rollin’, Rollin’…

Basil Cigar?

Basil Cigar?

Hold the bunch together as you thinly slice the roll and it is so much easier to achieve many little thin strips, quickly.

Ahh, this is better!

Ahh, this is better!

Perfect, easy Chiffonade.

Perfect, easy Chiffonade.

Our favorite of the week didn’t come from the internet or Pinterest, but was made up on a whim. I baked some summer squash in the oven that was dressed with a little grape seed oil, salt, pepper, and finished with a sprinkle of Parmesan. It was easy and tasty.

Here’s what I did:

Preheat the oven to 400 degrees.
Evenly slice, or mandolin, squash into about ¼ inch coins, place onto an ungreased cookie sheet
Drizzle with oil, salt and pepper and toss with hands to coat
Place in the oven for about seven minutes, then flip and cook for about another seven minutes. With about three minutes left sprinkle Parmesan on squash. Parmesan should just melt.
Serve immediately.

I shared this with a woman at work when I was trying to get her to take some zucchini and squash off my hands. (It was beginning to take over my kitchen…) Thankfully, she did, and she even made the recipe for her girlfriends. I received a text from her this morning asking if I could bring her more squash. Apparently, everyone loved it, and she wants to make it again for a party she’s hosting later this week.

Besides the taste and the fact that you probably have all the ingredients in your kitchen every day of the week, this recipe is so great because it is so versatile. You can grill, bake, or sauté not just zucchini or summer squash this way, but it works great with other vegetables like asparagus, brussels sprouts, or cauliflower.

Tonight, I roasted carrots from the garden this way with a little fresh rosemary.

Yummy roasted garden carrots!

Yummy roasted garden carrots!

Side note: Pulling my first carrots out of the ground was maybe one of the most proud moments of the garden so far. I couldn’t see them growing so when I pulled the large, orange roots from the ground I can’t even explain the feeling that came over me. I was thrilled with my carrots. I felt a sense of accomplishment. (And a little relief, as I didn’t know what to expect.)

All of this was followed by a little laughter.

I was super excited about a carrot.

What has my life come to?!

Filed Under: Plant, Recipes Tagged With: Basil, Beets, Carrots, knive skills, Plant, squash

Saturday at the Farmer’s Market.

July 28, 2013 by theblogbloom.com 1 Comment

Weekends at home this summer have been rare.

We are constantly on the road for weddings, family events, visits with friends, concerts, sporting events, trips to the lake, etc. etc.

So, yesterday when I woke up, in my own bed with no plans until dinner, I was in a great mood. It was a gorgeous, sunny, yet unseasonably cool morning. Adam had some errands he needed to run so I saw the time to myself as a great opportunity to go to the Farmer’s Market in town.

A Farmer’s Market is one of my favorite places. I grew up going with my mom and have tried to make an effort to go when I can since living on my own. I love the spirit of the market. There are families, dogs, amazing produce, baked goods and crafts. You can see some people just enjoying the morning and others clearly doing their shopping for the week.

Even with everything coming out of my garden these days, I wanted to look for fresh eggs and herbs. I also was inspired to try to cook some beets after the Chopping Block class.

So, I made a quick list of things I wanted to look for while there based on items I knew were in season and not in my garden. Making this list I knew I may not be able to find any of these items but I think it helps to have an idea of what to look for.

I actually got to take sweet corn off the list because two friends from college surprised us with a quick visit when they were in town visiting family and ten ears of sweet corn!

I actually got to take sweet corn off the list because two friends from college surprised us with a quick visit when they were in town visiting family and ten ears of sweet corn!

Below are a few other tips I have for a trip to the Farmer Market based on my experiences:

Bring cash and make sure you have small bills. It will be easier on the farmers so they don’t have to make change. They probably are prepared, but if everyone else is paying with twenties this may eventually be hard for them. (More and more Farmer’s Markets are becoming technology friendly and can take credit cards. Many also beginning to accept food assistance stamps or cards, which is awesome.)

BYOB. Bring your own bags. Farmers Markets are a great way to give plastic shopping bags another use or just invest in a few reusable bags before you go. They are for sale everywhere and a lot of grocery stores will knock a little bit off your bill when you use them. (When at the grocery you can also ditch the cart and just load up your bags throughout the store. You get the added bonus of a little arm workout while you shop!)

Cher, in the nineties classic, Clueless, suggests that when at a party to “do a lap before we commit to a location.” The same is true for the Farmers Market. I always take a lap, see what each vendor is offering, maybe price shop a tad, check out quality, and then make a purchase.

I know it seems, like, totally “Saturday Chic” to grab a latte after yoga and hit the Farmer’s Market but having the grande Starbucks in your hand the whole time is annoying for you and the farmers. You will need your hands to touch and smell the produce. To carry your shopping bags. To pay. Not to mention, it can spill. (Remember how I said all of these were based on actual experience…?) Just swing by the drive through on your way home.

I have heard mixed reviews on this one, and I can understand both ways, but I say get there early. I want to make sure that I have the farmer’s best products to choose from. I don’t want the picked through produce. Also, farmers can, and often do, sell out of things. The flip side to this is that at the end of the market some farmers may give you a deal so that they don’t have to take things home. I am bad at finding shoes I like on sale, let alone food. So, that’s your call.

Things won’t look like they do in the store. A good example is tomatoes. Typical grocery store tomatoes are bright red and round. A Farmer’s Market tomato may be short and fat. It may have ripples. It’s because that is how a tomato grows naturally. It will still be great, if not better. Farmers Market produce will also be straight from the ground so don’t be alarmed by roots, stems, or dirt.
Here are some red flags and things to be aware of when picking out produce:
– Tomatoes continue to ripen, even after they are picked. It’s okay to have some green on the top.
– Berries do not continue to ripen after they are picked so pick ones that have full, vibrant color.
– Like I mentioned above: Use your hands and nose. Melons should smell sweet. Herbs should smell fresh and not be brown. Produce should be soft. Pass on wrinkled or squishy items.
– Inspect the produce to ensure there isn’t any mold, decay, or evidence of insects.

Remember, the produce at the market is fresh and should be consumed sooner rather than later! So, get cooking!

And that is what I plan to do with my beets and brown eggs from a young man on the eastern edge of our county.

photo (48)

Garlic, thyme, and rosemary from a woman who grows her produce on her mother-in-laws property at the northern most part of the county.

photo (47)

photo (49)

A whole chicken from this passionate guy from northern Indiana who claimed he has perfected chicken in determining the best age and weight it should be.

Pork Chops that were raised in a good friend’s hometown by a family who told me “They all are great!” when I asked for their suggestion for the best cut of the pig.

I also, with the help of the chicken man’s wife, designed a gorgeous summer floral bouquet with flowers from their farm. The colors even match the theme to my brother-in-law’s wedding next weekend!

photo (50)

So, stay tuned… and in the mean time, find a Farmer’s Market close to you!

Love this info graphic about Farmer's Markets.

Love this info graphic about Farmer’s Markets.

Filed Under: Plant Tagged With: Farmer, Farmers Market, fresh, Plant, produce, summer

Ice Cream and Me… “Mint” to Be.

July 24, 2013 by theblogbloom.com 6 Comments

Fun Fact #1: July is National Ice Cream Month.

Fun Fact #2: Indiana is the #2 producer of regular and low fat ice creams in the Nation.

Fun Fact #3: I love making (… and eating) ice cream.

Adam and I received an ice cream maker for our wedding from my cousin. It wasn’t on the registry and it was one of those small appliances I wondered if I would ever use. My mom made ice cream from time to time growing up but, I had never given it a try. I was entertaining taking it back, but something told me just to open the box and take a look at it.

Thank goodness I did.

I now joke that ice cream brought me to life.

… But, there is a little truth to this.

The summer after Adam and I got married there were changes with my role across the nation and because I was not in the position to move, I had to walk away from the company. And work all together.

Jobs in my field and skill-set were nonexistent within an hour drive from our country home, so I was, >gulp< unemployed.

A word I never thought I would be. I graduated on Deans List. I had worked one job, if not two, since I was fifteen. Every day was hard.

You may be thinking, “Are you kidding? No work? Sounds wonderful.”

And it was for… oh, about five days.

I could only apply for jobs so much without going crazy. I had no schedule. No need to get out of gym shorts. No need to turn off The Kardashian’s, even though I had already seen the episode four times. All of my friends were at least an hour away and, weird, at work. Like I should have been. I was pretty pathetic. I even remember one –bad– day wondering if I would ever work again.

Then you realize you have spent a whole day and have not said one word aloud. Then you snap.

And then, I opened the ice cream maker.

It wasn’t the kind with ice and a hand crank that I remembered from childhood. It was sleek and ran electronically. And there were recipes in the manual. A recipe for Peanut Butter Cup Ice Cream; Adam’s all-time favorite. I had to make it. (Side note: Who was the genius who put chocolate and peanut butter together? I mean, seriously. Genius.)

I beamed to my mom on the phone about how easy and fun it was to make and how great it turned out. She must have beamed to her girlfriends about how wonderfully domesticated I was becoming (God knows she wasn’t talking about how great I was at my job…) because a couple weeks later I received a late wedding gift from one of her friends who lived in the neighborhood. It was the, then very brand new, Jeni’s Splendid Ice Cream at Home Cookbook and a check with “For lots and lots of heavy cream!” in the memo.

photo (45)

Jeni’s Ice Cream originated in my hometown of Columbus. She is now very well known for her unique flavors and fresh ingredients, but when she was just starting out years ago she had one shop (She now has multiple and is expanding like crazy out of Ohio) near my uncle’s house.

He was a bachelor until he married a wonderful woman from England in 2008 and he would often take my little sister and me on “dates.” They were to neat places and are all so memorable. One time we wanted to try sushi, so he took us to his favorite sushi restaurant and ordered a BOAT of sushi for the three of us just so we could try a lot of different rolls. There were also dates to a trendy stone oven pizza place and even fancy steak houses. But one thing was always the same: the night ended with ice cream at Jeni’s.

Jeni’s is a far cry from the typical vanilla. She uses crazy spices like lavender and cayenne. Sounds nuts, I know. But, it’s wonderful! As far as I know, Jeni’s was the first to create the flavor “Salty Carmel.” It was at Jeni’s that I learned I loved bourbon, even though I was well below the drinking age, with her bourbon butter pecan. The warmness of the bourbon mixed with the creamy ice cream and salty nuts. Divine.

The cookbook is beautiful. Playful, rustic photos adorn the colorful pages. The recipes vary in difficulty. I will be honest; the ice creams can be difficult for novice cooks. I made the Salty Carmel ice cream when I got the book and was challenged. I felt like I had fifty things going on. My kitchen was MESS when it was all said and done. But, it was good, so I will still consider it a win.

The sorbets are much simpler. I made her Watermelon and Lemonade Sorbet last summer and the hardest thing about it was cutting the watermelon.

A few days ago, Jeni’s Twitter account began posting about the “Backyard Mint” flavor. Different tweets mentions how it “Has returned!” and that the ice cream in her stores is made with “fresh-picked organic peppermint from Jorgenson Farms.” (Jorgenson Farm’s is just outside Columbus.)

This got me thinking. I have fresh, organic peppermint in my backyard. And I was yet to use my ice cream maker this summer. Perhaps I should give it a try?

photo (44)

Sure enough, it was in the cookbook so I made plans to get it going after work yesterday.

I will list my take away’s from this creation, but I am not going to list the recipe because:

1. I feel like I am friends with Jeni after eating at her store for nearly a decade and before she made it big. It feels wrong to do it without her permission.
2. I am new to the blogging world and I am not real-life friends with Jeni. I am not sure what copyright laws are out there.
And, 3. You should probably just go buy the book. You won’t regret it.

The process of making the ice cream was pretty easy. I loved tearing into my fresh mint leaves before adding them to the sugar cream mixture. They smelled so strong and vibrant.

photo (43)

The mint needed to steep in the finished cream for at least four hours. I kept mine in the fridge for about six.

Before bed last night, I strained the mint leaves out, put the flavorful cream into the frozen ice cream bowl and let the machine spin for about fifteen minutes. Then the mixture looked like ice cream and was pulling from the sides of the bowl.

photo (42)

I slopped the finished product into a container and let it freeze until after dinner tonight.

As Adam and I split the bowl, we both commented on how rich and creamy it was. We loved the light, freshness of the mint.

photo (41)

I asked him what he thought a good mix in might be for next time. To get ideas going, I said, “Peppermint Patties.” Adam chimed in with “Oreos.” Then, after taking a bite and thinking for a while, it came to me. “Thin Mints.”

Adams face lit up.

Nailed it.

Filed Under: Plant, Recipes Tagged With: Columbus, Herbs, Ice Cream, Ice Cream Maker, Jeni's, Jeni's Splendid Ice Creams at Home, Mint, Ohio, Plant, recipe

Local Food in the City.

July 22, 2013 by theblogbloom.com 8 Comments

This weekend I left my provincial life in the country for champagne, yachts, stilettos and… um… drag queens.

It was my “Little Sister” from the sorority, Lauren’s, bachelorette party in Chicago. It was a fabulous time. A few of us took Friday off and spent the day on a boat on Lake Michigan. It was so relaxing and the view of the city from the water was outstanding. We spent Saturday shopping, catching up and then hit the town in the evening. Dinner was at a delicious Tequila Bar and followed by a very entertaining drag show.

Babes on a boat for the Bachelorette!

Babes on a boat for the Bachelorette!

It’s always fun to spend a couple days laughing with the girls. (Cocktails at breakfast doesn’t hurt either…)

I started my weekend even earlier and came into the city on Thursday evening to take a cooking class at The Chopping Block, a recreational cooking school that I had been dying to try for a while. I found it while researching culinary school last winter.

For a hot minute I thought culinary school might be my next step. Based on the course catalogs listed for different schools and programs I looked into I decided to pass because it was so similar to the curriculum I had in college. Not to mention I would be a in a WORLD of debt.

I then started looking up cooking workshops and classes to just fine tune my skills and learn more. This is how I came across The Chopping Block’s class calendar. They offer classes every day of the week and each has a specific theme or skill, such as pasta or dessert classes to grilling or knife skills. Throughout the summer a Farmer’s Market Tour was listed for every Thursday.

The description said the class would tour the Lincoln Square Farmer’s Market and purchase items to make an improvisational meal back at the classroom.

It sounded right up my alley. My friend, Stephanie, even eagerly agreed to join me so we made plans to meet at the class. The class was a demonstration class versus a hands on course. (They offer both.) Despite this, I still learned A LOT. You will see this with my “take-away” notes.

On Thursday, the traffic getting into Chicago was horrendous. Like, worse than it has ever been any time I have ever tried to get into the city. So, I arrived thirty minutes after the start of the class (even after giving myself an hour extra).

As I was basically running to the class I was able to notice that Lincoln Square is awesome. It is a neighborhood that further north of the city than I had ever been in my visits to the city. There were plenty of cute coffee shops, restaurants and boutique-y shops. People, with their children and dogs, were out enjoying the night at the farmers market or listening to a couple bands playing on side streets. I really wished I had that hour I had planned for. This place looked like my kind of heaven. I need to go back.

I got to The Chopping Block just as the class was getting back from the market. I was a tad disappointed, but looking at the produce the chef was pulling from their shopping bags I knew it would still be great.

photo (40)

They found little golden plums, black raspberries, sweet corn, beets, gypsy peppers, knob onions, oyster mushrooms and carrots. The chef reached out to us for ideas for our meal based on the produce from the market and the pork tenderloin that would serve as our protein.

The meal was started with a little “amuse-bouche” of baked polenta with caprese salsa.

Take Away: Amuse-bouche translates to “Mouth Pleaser” and is a small plate before a meal, even an appetizer. You might see them in French restaurants. They are not ordered, but are offered by the chef without a charge to prepare the guest for the meal.

The class decided on ceviche for an appetizer using the mushrooms from the market. We topped the ceviche with fried tortilla strips for a little crunch.

Take Away: Ceviche means to cook, or make soft, with acid. You can actually “cook” things, like shrimp, with citrus, to make a ceviche.

photo (37)

The mushrooms were perfect. They had just the right amount of tang and the crunch of the tortillas worked great.

Next it was onto the salad. We roasted the whole beets in the oven without any seasoning or marinade.

Take Away: This helps to concentrate the flavor of the beet. They were seasoned once they had cooked.

photo (36)

The cooked beets were topped with thinly julienned carrots as well as the greens from the carrots and beets. These greens are slightly bitter and full of nutrients. The colors in this salad were spectacular and all the flavors went well together. I need to try cooking beets at home sometime soon.

The main dish was made up of the pork tenderloin and a succotash made of the corn and onions. The pork was marinated in achiote paste, giving it a bit of a Mexican flare. Achiote paste can be found in Latin grocery stores and has an earthy, spice flavor. The succotash was made by caramelizing the onions and corn in a skillet on the stove top.

photo (35)

Take away: Whenever I cook something in a skillet, I move the food items around with a spatula a lot. To get the veggies, like the corn and the onions for the succotash, to caramelize and to maximize their sweet flavors you should push the vegetables out in the skillet and leave them. Make sure the skillet is warm but won’t burn the vegetables.

Another take away from this step: Extra Virgin Olive Oil has a low smoke point, meaning it should not be used with cooking something. It should just be used for finishing or vinaigrettes. Your mind blown yet? Just wait… When the EVOO gets above 350 degrees, or its smoke point, it loses all the nutrients and creates a carcinogen. Grape seed oil is a better alternative when cooking, grilling or baking over 350 degrees. (Grape seed oil is fortunately not that much more expensive.)

Finally, for dessert we had slightly sweet biscuits with whipped cream and macerated plums and berries. This was phenomenal. I am (weirdly…) not a huge fan of fruit, especially berries, but I finished and loved every bite.

Prepping the sweet biscuits.

Prepping the sweet biscuits.

photo (34)

After everything was done, we were given the opportunity to shop around a bit. I picked up a bottle of grape seed oil after I learned that I might be giving Adam and me cancer… every day. Stephanie got some fun beer and cocktail items. As the other class participants were leaving, Steph and I got an opportunity to chat with the Chef and the Sous Chef a bit. I asked about the farmers market since I missed that part of the trip. He said that most of the produce in the market is from Illinois, but there are some vendors from Indiana. I also asked about their culinary education because it, in a way, inspired my trip. Both chefs never went to culinary school, but rather, worked in restaurants since they were young and picked up skills along the way.

I had a blast the whole evening. I learned so much, had a fantastic meal and got to catch up over a bottle of wine with a great friend.

With Stephanie and her sister, Jackie, before we dug into our local entrees.

With Stephanie and her sister, Jackie, before we dug into our local entrees.

The Chopping Block Quick Facts:

There are two locations:

Lincoln Square: 4747 N. Lincoln Ave, Chicago
Merchandise Mart: The Merchandise Mart Plaza, Suite 107, Chicago

http://www.thechoppingblock.net/

You can register for classes online. It’s a simple process and they charge you then. You cannot cancel once your class is less than a week out, but you can send a friend in your place.

You can purchase wine or beer at the classes or you can bring your own bottles. They are subject to a corking fee.

There are numerous “Boot Camps” that last up to five days. The topics for this cooking boot camps range from cooking basics to cupcakes or even sushi. Other classes last a few hours.

If you are in Chicago but cannot make a class, you can shop in the retail stores at each location. They are great and full of fun cooking tools. It’s really worth checking out.

Filed Under: Plant, Restaurant Tagged With: Bachelorette, Chicago, Cooking Tips, Culinary Education, Farmers Market, local food, Plant, The Chopping Block

It’s 95 Degree’s Out and I am Freezing…

July 17, 2013 by theblogbloom.com 3 Comments

For the last week or so we have had HUGE takes from the garden every day. While this is exciting, it’s also a tad overwhelming. I finally had the feeling of, “Oh, geez… How are we ever going to eat all this food?”

The baby shower was great timing last weekend because I was able to use plenty of produce from the garden. I made a big salad with the mixed greens and just had different toppings and dressings so people could make it their own. I also prepared this great cucumber salad we have already made multiple times this summer. It’s really simple to make and only requires a few ingredients. That’s always a win for me.

photo (32)

Recipe: http://www.takingonmagazines.com/cucumber-salad-from-all-you/

Another recipe that we made for the party is also a go to in the summer is this sautéed zucchini side dish. We have been making this recipe for two years now; I pretty much know it by heart. The flavors go together so well and compliment any meal.

… Sorry no awesome iPhone picture. But, there is one at this link to the recipe: http://www.tasteofhome.com/recipes/Garden-Zucchini—Corn-Saute

Thanks to the bounty of produce accumulating on my counter top, I decided it was time to do some freezing. Freezing is a great way to preserve fruits and vegetables and is much simpler than canning. Frozen veggies are good for about twelve months.

Or, so I read.

I, of course, had never done this before, but it really didn’t seem too bad.

I started with snap beans because ours were towering and full of peas. I have been picking them for about two weeks. They make great additions to salads and even serve as a great snack with some hummus or without. The flavor of these peas has been incredible.

photo (24)

After work I spent about thirty minutes picking as many of the larger beans that I could find (…in the massive heat wave that is hitting the Midwest currently) I headed in to get to work in the kitchen.

photo (25)

I cleaned and snipped the end of the beans with a knife.

photo (23)

Next, I got everything set up to blanch the beans.

Blanching is when you heat up veggies and then quickly cool them to lock in flavor and nutrients. I actually had not blanched anything since lab courses in college, but it is, fortunately, really easy.

I set a pot on the stove top to bring to a boil, a big bowl full of ice and cold water, and a cookie sheet lined with paper towels. The beans were put in boiling water for two minutes. I then lifted them with a large straining spoon and dunked them into the ice water.

photo (28)

The instant they hit the water they turned a bight, beautiful green, just like I remembered would happen from that early morning lab. The beans were in the ice water for two minutes as well. I then strained them out and placed them on the cookie sheets. The paper towels quickly absorbed their moisture.

photo (27)

I repeated the process until my many snap beans were blanched and drying on the cookie sheets. I took another paper towel and pressed it on top of them to pick up any remaining water.

Next, you can put them directly into a ziplock bag to freeze or you can freeze them on the cookie sheets, then put them in ziplock bags after they had frozen. I choose the put them in the freezer on cookie sheets because it will prevent the beans from freezing stuck together.

photo (29)

I am so looking forward to using a handful of these summer beans throughout the winter in side dishes or stir fry’s.

Next, it was onto the zucchini. I thought I was in the clear with zucchini after the shower. I had sliced the nine zucchini’s I had in my kitchen to serve the crowd. After all that I was certain I wouldn’t have to worry about zucchini for little while.

Silly me…

Today- two days later- there were already six on my counter top.

photo (26)

You can blanch sliced or diced zucchini and it is great for stews and casseroles, but my poor little refrigerator ice maker needed to play catch up after the ice bath for all the snap beans. Maybe some other day.

Instead, I grated two zucchini’s and portioned them into ½ cup servings.

photo (30)

photo (2)

I wrapped each portion in saran wrap, put them into a zip lock bag, and placed them in the freezer. (Helpful Tip: Be sure to date and label whatever you freeze. This will help you out nine months from now when you cannot remember what you did today!)

photo (31)

This grated zucchini will be great for all sorts of baked goods, like zucchini cakes or muffins. I put them in half cup portions to make it easy to add to any batter. I was able to get eight cups out of two zucchini’s.

All in all, not bad and it really didn’t take too long. Now I can combat that feeling of panic that we will never be able to eat everything by knowing we will be eating from this garden all year long.

I already cannot wait to use these frozen items on a day in December, when I am feeling frozen myself, and remember how HOT it was today.

Filed Under: Canning and Preserving, Plant, Recipes Tagged With: Cucumber, Freezing, Garden, Plant, Preserving, Recipes, Snap Peas, Zucchini

  • « Previous Page
  • 1
  • …
  • 3
  • 4
  • 5
  • 6
  • Next Page »

Meet Claire

Hi, thanks for visiting! I am Claire and I have been sharing my life and thoughts on Bloom since 2013. Welcome to 2023's project, The Farmers Market and The Library. For more about me...

Follow Bloom.

RSS
Follow by Email
Facebook
Twitter
Pinterest
Instagram

Be a Bloom Insider

Enter your email address to subscribe to Bloom and receive notifications of new posts and a bi-weekly love letter from Claire by email.

Archives

Copyright © 2025 · Foodie Theme by Shay Bocks · Built on the Genesis Framework · Powered by WordPress