Bloom.

Navigation
  • About

Celebratory Chimichurri

August 16, 2014 by theblogbloom.com 2 Comments

In the last post I wrote about my current love affair with sage. 

But, honestly, I really can’t play favorites when it comes to herbs.  I love any and all herbs.

I wrote about sage’s ability to ward off evil spirits and negative vibes just with it’s scent, but I think all herbs are able to elevate anyone’s low mood.  Even just walking past my potted herbs, I can feel my head clear and a better mood come on, just because of their scent.

Pretty parsley.

Pretty parsley.

But fresh herbs don’t just elevate moods, they also elevate any dish.

Herbs add a subtle interest, extra freshness, and even more “Mmm” to anything from pasta to meats to veggies and even eggs!

This week we celebrated my Birthday and celebrations at our house usually include steak.  We do filets for our anniversary because that is what Adam had prepared the night he proposed.  Adam’s about as “guy” as it comes, so steak is always on the menu for his Birthday.  And I, by no means, would ever turn down a good steak so it seemed appropriate for my day too.

But, I decided to switch it up from big filets and chose to do flank steaks topped with fresh and flavorful chimichurri sauce starring many of my garden’s herbs.

DSC_0997

Chimichurri can pull double duty as a marinade and a topping for beef, seafood, chicken, or whatever you want.  It’s super versatile and the variety of fresh herbs and spice will enhance the flavor of a meal without covering it up.

I topped our steaks with the sauce to add some dimension to the super easy to prepare (just a few minutes on the grill!) cut of beef. Making it simple enough for a midweek dinner, but special enough for a Birthday.

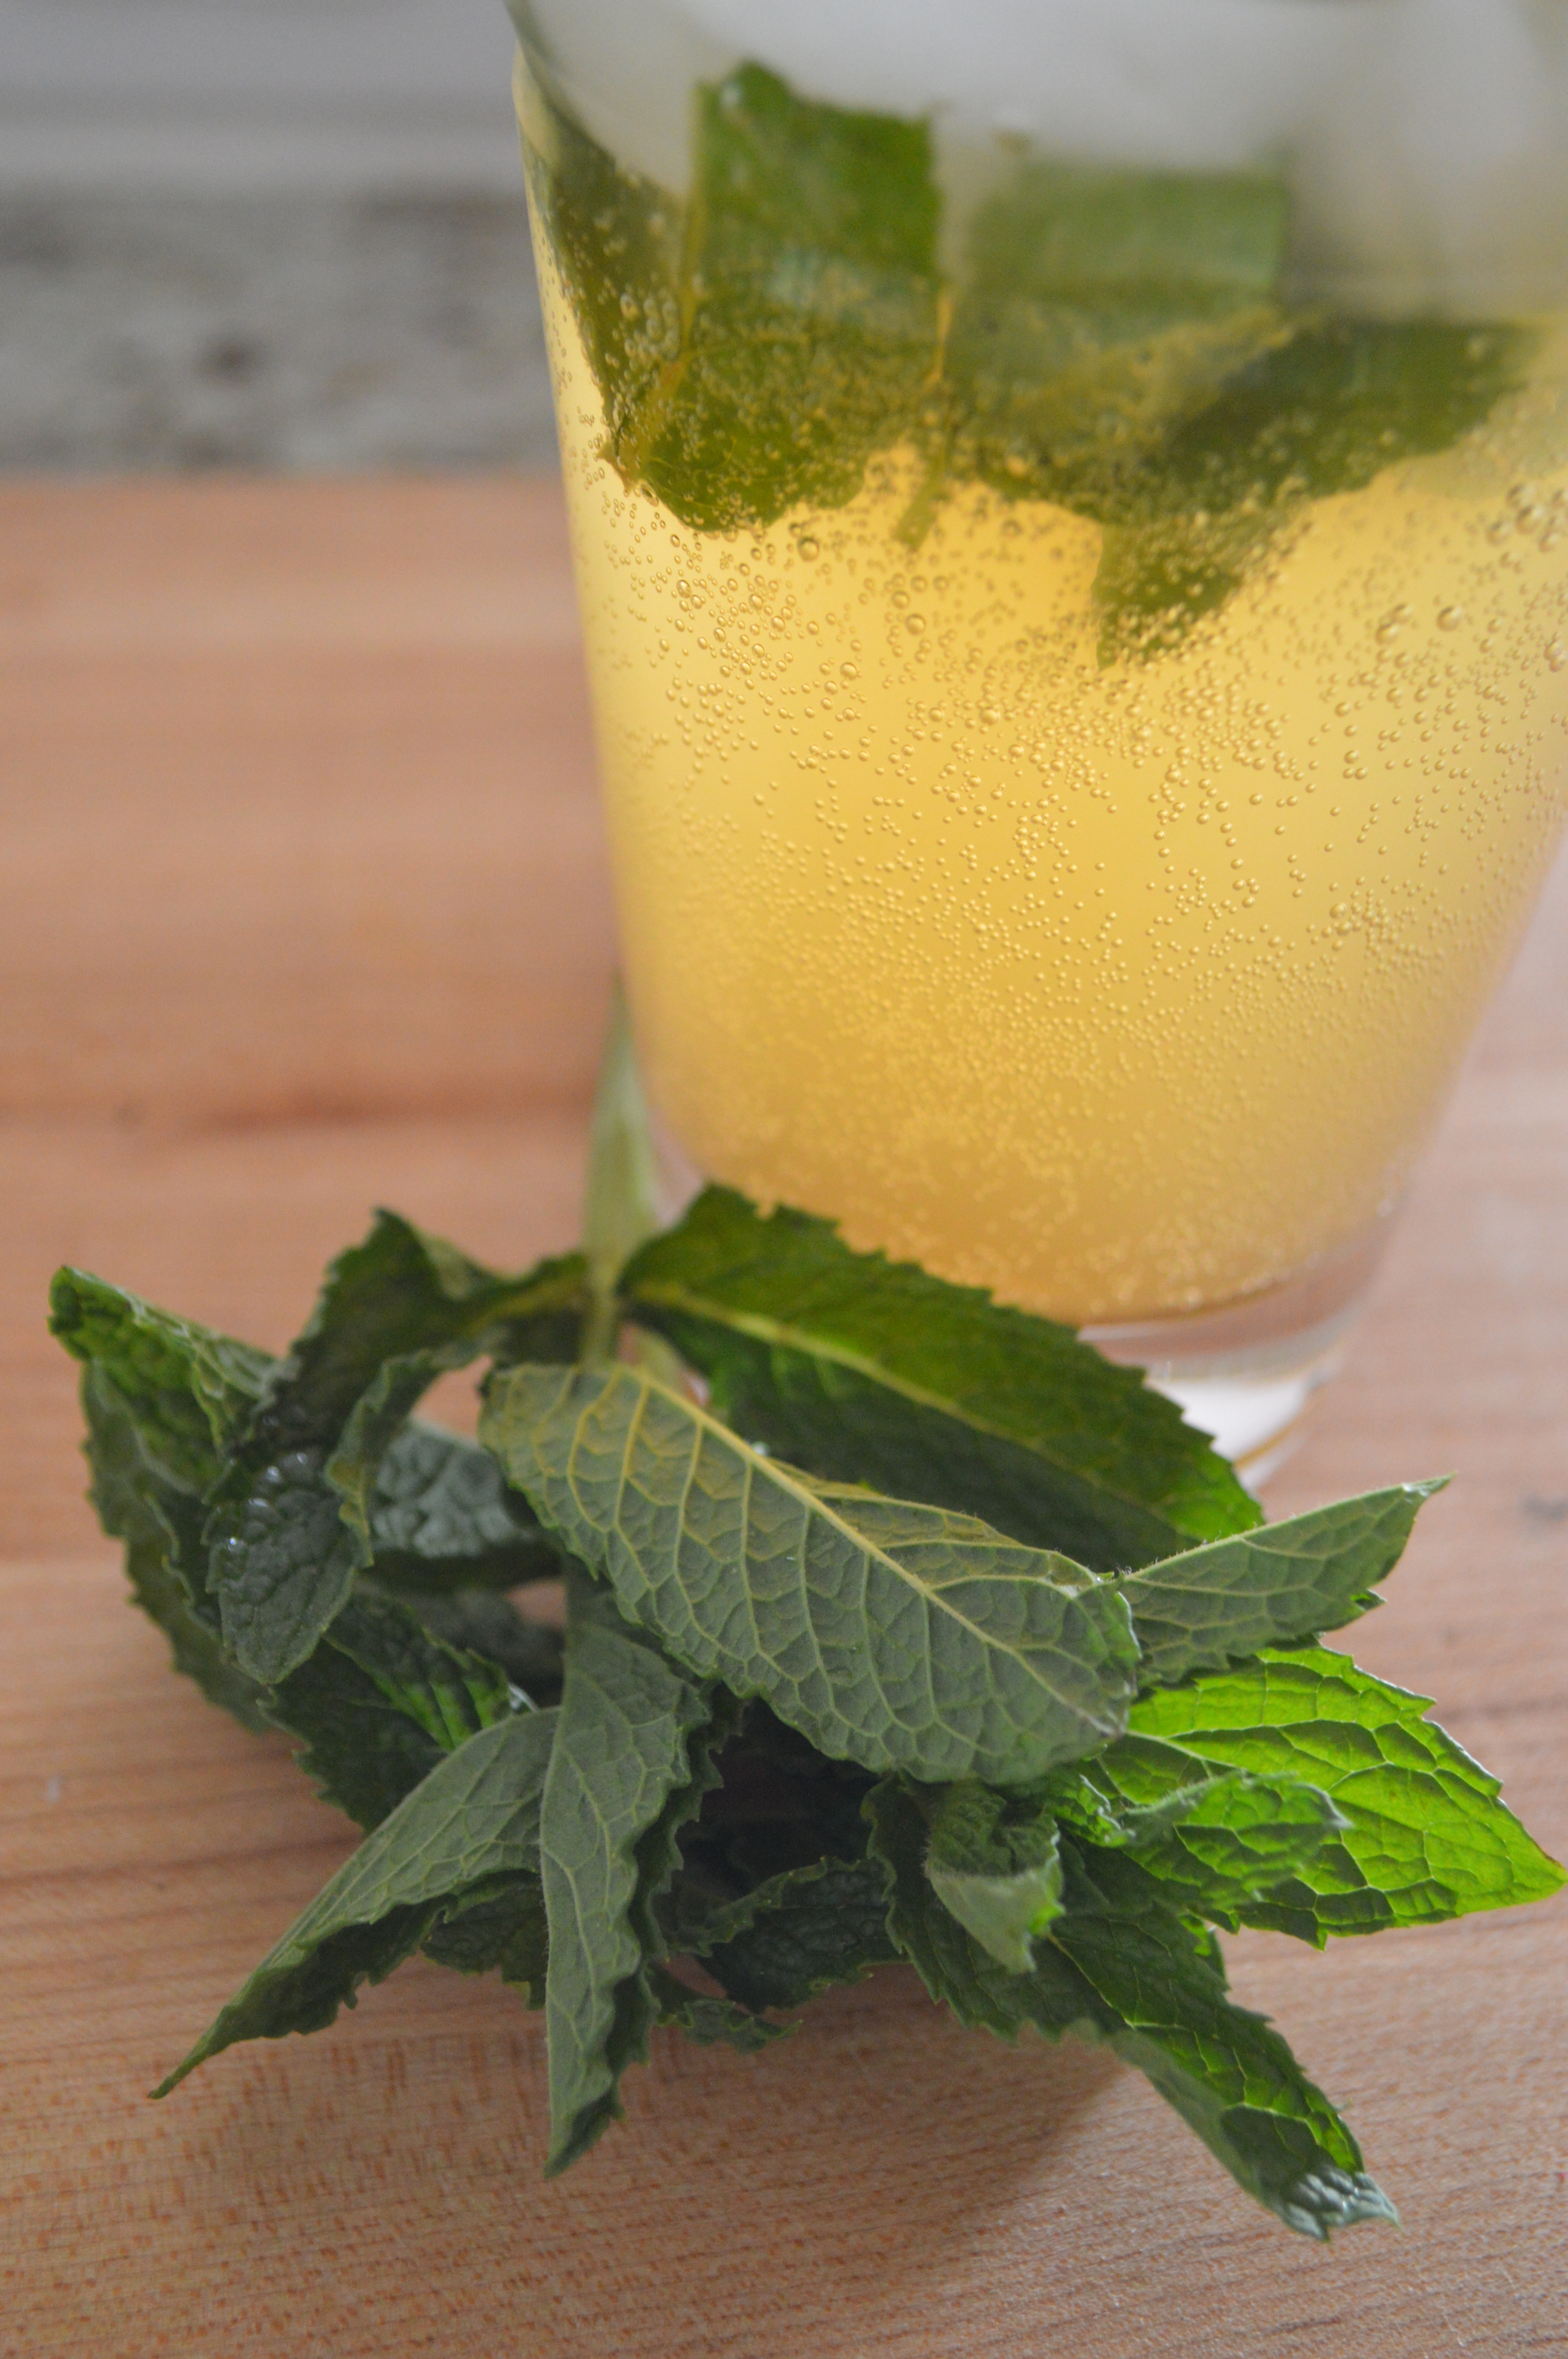
… And to be paired with champagne. 

Cheers to another year!

DSC_0995

Chimichurri Sauce
2014-08-16 09:12:36
Write a review
Save Recipe
Print
Ingredients
  1. 1/2 bunch parsley, finely chopped
  2. 2 tablespoons fresh oregano, finely chopped
  3. 4 garlic cloves, crushed and minced
  4. 1/2 cup green onions, finely minced
  5. 1 small hot pepper, seeds removed and finely diced (I used a Serrano pepper because that is what was ready in the garden)
  6. 1 teaspoon of red pepper flakes
  7. 2 tablespoons of red wine vinegar
  8. Juice of half a lemon
  9. 1/2 cup of good olive oil
  10. Salt and pepper to taste
Instructions
  1. Combine all ingredients in a bowl and mix well with a whisk.
  2. Store in the fridge and use within 48 hours.
Bloom. https://www.theblogbloom.com/

Filed Under: Recipes, Uncategorized Tagged With: chimichurri, Herbs, parsley, steak

Falling in Love With Sage

August 13, 2014 by theblogbloom.com 8 Comments

For the last three years I have considered taking the Master Gardener program through Purdue Extension.

My mom took the course through Ohio State’s Extension when I was in middle school and took away so much that made the flowers in the landscaping around our home spectacular.

It seems like it would be a great course to take to learn more about gardening, veggies and flowers, how dirt is composed, etcetera, etcetera. Maybe even get more into flowers in my own landscaping… which, right now, is pretty pathetic.

Plus, I would be able to share my new found knowledge with all of you… and have a little more creditability than my experiences and library/youtube/Pinterest research.

But the course is a big commitment. Bigger than I can make with my job that can pull me anywhere in the Midwest at a moment’s notice. And, in the spirit of being honest, bigger than I can make with my limited amount of free time. (See also: No blog since last week…)

What I have tried to do is seek out workshops or events that the Master Gardener programs in various surrounding counties host. Or, even just go visit their community gardens.

Late last summer, I went Marion County’s (Indy, basically for the non-Hoosiers here) Master Gardener garden at the state fairgrounds.

It was a fun morning checking out all the unique produce the gardeners had planted. Being late summer, the garden was full of vibrant and intense colors from the tomatoes, eggplant, swiss chard, peppers, and more.

1234399_10102821353227448_459614727_n

There were also gorgeous flowers throughout the garden that left me inspired to try to update my own landscaping at home… but, flash forward nearly a year later, it still hasn’t happened.

1233570_10102821353486928_308149274_n

But, what really blew away were the garden’s herbs. They were unbelievable. The herbs were huge, full and so incredibly fragrant.

1003202_10102821353661578_2100897467_n

Last summer, I struggled with herbs a bit, really only finding success in basil, oregano, mint and parsley.

This year, my herbs have done so well. Even Adam has noticed. (He tends to be more interested in the big produce than the herbs.)

In addition to basil, oregano, parsley and mint, I have thyme, rosemary, dill, cilantro and sage in pots on the patio. I keep them in pots so that they are easy to get to when I am cooking in the kitchen. I love to brighten up a dish with fresh herbs and have used them for years so I am really familiar with their flavors.

DSC_0846

Except for sage.

Last summer’s trip to the Master Gardener Garden might be the first time I have ever seen fresh sage.

And I quickly fell in love.

DSC_0955

It is incredibly aromatic with a scent similar to a lemon with a touch of spiciness.

In researching sage a little more I have learned that it’s aroma is thought to keep away negative vibes and spirits. It may be because it has aromatic healing powers to lift moods, ease anxiety, and calm stress when smelled.

… No wonder I fell in love with it so quickly.

This summer, I have experimented with sage more and more in the kitchen. It can be used fresh or dried and is often found in holiday dishes, like stuffing or soups, because of its pleasant, savory lemon flavor.

We found that baked with little gold potatoes using bacon grease versus oil, the flavors are strong and the sage leaves crisp up like a little savory chip.


Sage Roasted Potatoes
2014-08-13 17:02:22
Write a review
Save Recipe
Print
Ingredients
  1. 3 pound bag of golden baby potatoes
  2. 1 cup of sage leaves, chopped
  3. 4 cloves of garlic, minced
  4. 1/2 cup of bacon grease
  5. Salt and Pepper
Instructions
  1. Preheat oven to 400 degrees.
  2. Clean potatoes and place in a pot of salted cold water and bring to a boil. Cook for ten minutes or until tender.
  3. Drain and place potatoes in a baking dish with sage and garlic. Pour bacon grease over the potatoes and sprinkle with salt and pepper.
  4. Bake for about 40 minutes.
Notes
  1. The bacon grease will make the potatoes crispy and give them a great flavor. I just cooked a few slices of bacon in a skillet and poured the grease over the potatoes from the skillet. The bacon slices became Adam's breakfast the next morning!
Bloom. https://www.theblogbloom.com/
DSC_0993

DSC_0990

Filed Under: Recipes, Uncategorized

Michigan Blueberry Tart

August 6, 2014 by theblogbloom.com 6 Comments

A couple weekends ago, I went to the western coast of Michigan to visit my parents. They moved to a house on the dunes that overlooks magnificent Lake Michigan last summer.

The weekend was full of great meals, cocktails, relaxing in the sunshine and spectacular sunsets.

With my mom watching the sun go down.

With my mom watching the sun go down.

We even managed to fit a trip to Holland’s Farmer into this really strenuous schedule.

My great friend, Lauren, joined me for the trip to the market. Lauren lives in Grand Rapids with her husband and their cute rescue pup, Toby.

It was so nice to catch up with Lauren and check out all the great produce available ay Holland’s Farmer’s Market. Holland is a really neat little town. There are unique shops and great restaurants but the Farmer’s Market is unreal.

There are always so many vendors, so many product options, and tons of people. And, this particular Saturday was no exception.

I was so excited to find great looking white and red onions and some amazing goat cheese. These things are rarely at my town’s Farmer’s Market. There were also beautiful peaches, cherries and tons of blueberries.

DSC_0927

Michigan is the #1 producer of blueberries in the nation, producing over 100 million pounds of blueberries each year.

The state, particularly the south western side of the state, is a great place for blueberries to flourish thanks to the naturally sandy soil.

Blueberries come on strong from late June to October and residents of Pure Michigan can’t get enough. My mom said she has been purchasing blueberries in five pound containers each week at the Farmer’s Market.

So, I did the same.

A few days ago I froze my five pound box of Michigan blueberries to have for smoothies and treats throughout the next few months, but saved a couple handfuls for this tart that also features the strawberry jam I canned in June with our backyard strawberries.

DSC_0866

Topped with the super fresh berry combo, the tart is similar to a cheesecake, but lighter and with a slight tang thanks to the zested orange.

(PS- I coughed up twenty bucks for a new zester recently. It seemed expensive, but Oh em gee. It’s phenomenal.)

I fully understand if you now are thinking that I am insane because of my love for my new zester.

But, the only thing that is insane is how good this dessert is.

Berry Tart
2014-08-06 19:36:28
Write a review
Save Recipe
Print
Crust
  1. 1 1/4 Cups Flour
  2. 1/2 tsp. ground nutmeg
  3. Pinch of Salt
  4. 1 Stick Softened Butter
  5. 1/4 Cup Sugar
  6. 1 Large Egg, separated
  7. Tart Filling
  8. 6 TBS Softened Butter
  9. 1/2 Cup Sugar
  10. 1 TBS Flour
  11. 2 Eggs
  12. 3/4 Cup Sour Cream
  13. 1 1/2 tsp. Vanilla Extract
  14. Zest of half an Orange
Topping
  1. 2 Cups Blueberries, washed and dried
  2. 1/2 cup of Strawberry Jam
Instructions
  1. Preheat Oven to 375.
Crust
  1. Sift together flour, nutmeg, and salt into a small bowl.
  2. Beat butter and sugar with stand mixer until smooth. Add the egg yolk and beat until blended.
  3. Add flour mixture slowly on low speed beating just until dough forms.
  4. On a lightly floured surface, press dough into a flat disk.
  5. Press into a nine inch tart pan. ( A pie pan would work as well.)
  6. Place crust in the refrigerator for thirty minutes until firm.
  7. Bake crust for 15 minutes until slightly golden brown and set aside.
Filling
  1. Beat the butter and sugar at medium speed until light and fluffy.
  2. Beat in the flour.
  3. Add the eggs, one at a time. Beat well after each egg.
  4. Beat in the sour cream, vanilla and orange zest.
  5. Pour into the baked crust.
  6. Bake tart for twenty minutes. The filling will puff up slightly.
  7. Cool Completely.
Topping
  1. Place Blueberries on top and brush jam over the berries.
Bloom. https://www.theblogbloom.com/

DSC_0871

Filed Under: Recipes Tagged With: blueberries, Farmers Market, Holland Farmers Market, Michigan

Blueberry Mojitos

July 25, 2014 by theblogbloom.com 7 Comments

There are times that I feel like my life is a 50:50 series of me wanting to scream either, “I am an adult!” or, “I don’t want to be an adult.”

I have been blessed with a great career. A career when I get to utilize my natural entrepreneurial spirit, make presentations to groups of influencers, and surround myself with likeminded, creative people.

However, I have also been blessed with the face of an eighteen year old.

Not even kidding.

My big, blue eyes, button nose and the -still- lingering baby fat in my cheeks makes me look nearly ten years younger than I am.

I can be out to dinner with all my friends and I am the only one who gets carded. I have been asked to show my ID for R-Rated movies. Even Elementary School age children ask me what grade I am in.

So imagine me going into a meeting to present a quarter million dollar partnership to a group of middle age men who are accountants and attorneys…

Between the looks and innuendos of concern, skepticism, and apprehension questioning my credibility there are days I want to totally switch up my introduction and go with a little something like this:

“Look. I get it. I look like a child. But, I am responsible. I pay my own taxes. I can afford to go on vacations or buy really nice high heels. I put money into mutual funds. And, I can hold intelligent conversations on viticulture. Hint? That has to do with wine. Which I totally can legally drink. Now, can we move along and take me seriously? I am an adult.”

But, I can’t…. Because I am an adult.

As often as I want to defend my adult status, I also find myself wanting a break away from it.

And, I don’t think I am alone in this thought.

Let’s be real… Being an adult is hard.

You have to spend hours trying to talk to the right person on the insurance customer service line… just to give them half your paycheck.

Your car will surprise you with the colorful and blinking “Maintenance Required” light bringing your day to a – literal- screeching halt.

A stranger, named Chris, will use your phone number on accident when trying to get information about refinancing his mortgage causing your phone to ring non-stop with companies trying to sell their options to you… When they really want Chris. And don’t understand that you aren’t Chris.

Your computer will crash, killing your hard drive, photos, all your writing and any momentum you had going at work and hobby blogging.

Sans computer, you miraculously find time to work out every day only to step on the scale and see that you have gained five pounds…?

You will have to sweep your kitchen floors Every. Single. Day. Honestly… where does all this dirt come from?!

Oh! And, this will all happen in four days.

You’re welcome! Love, Adulthood.

Some week’s it’s enough to make you want to throw up your hands, ditch the responsibility, say, “Screw it. I don’t want to be an adult anymore,” and go to your parents nostalgic for the carefree days of childhood.

Or, at least it makes you really want a really good cocktail.

I guess that’s the consolation prize of adulthood… you can drink cocktails like this one.

DSC_0940

I plan to make this on my escape to my parent’s home in Michigan this weekend. Adam has to work and many of my friends are busy, so why stay at home with my dirty floors and no computer?

The cocktail will be perfect because blueberry harvest has come on strong in Michigan the last few weeks. My mom says their farmer’s markets sell blueberries in five pound containers vs. pints.

Michigan Blueberries

Michigan Blueberries

Any other time of year, blueberries are nowhere near as good as they are now. This cocktail recipe capitalizes on the fresh, sweet juices after muddling a handful of berries with fresh mint, which is also full of vibrant flavor this time of year.

If you don't have a muddler (Like me!), the bottom of a wooden spoon works great.

If you don’t have a muddler (Like me!), the bottom of a wooden spoon works great.

Shaken and served over ice, the pink cocktail might make me feel like being a kid… but also remind me that being an adult is pretty good.


Fresh Blueberry Mojito
2014-07-25 08:53:34
Write a review
Save Recipe
Print
Ingredients
  1. A handful of fresh blueberries (8-10)
  2. 2 TBS. Fresh Lime Juice
  3. 1 tsp. Sugar
  4. Small handful of fresh mint leaves (8-10)
  5. 1/4 cup white rum
  6. 1 cup of Ice
  7. 2 TBS. Club soda
  8. Lime slice, blueberries, and mint for garnish
Instructions
  1. In a cocktail shaker, add blueberries, mint, lime juice and sugar.
  2. Muddle with a muddler or end of a wooden spoon. (Muddling will crush the berries and help to release the oils in mint)
  3. Add the rum, ice, and club soda.
  4. Shake well and pour over a glass of ice.
  5. Garnish with extra blueberries, lime wedge and mint.
Bloom. https://www.theblogbloom.com/

DSC_0938

Filed Under: Recipes Tagged With: blueberries, blueberry, blueberry mojito, cocktail, Mint

Fried Zucchini Blossoms

July 18, 2014 by theblogbloom.com 5 Comments

Zucchini is a great plant for a newbie -and oldie- gardener.

They are easy to grow.  It doesn’t need too much attention.  Just decent soil.  And there’s nothing outrageously tricky in terms of watering.  They also produce veggies for a long time; Just be sure to pick them before they get huge!  They are the most flavorful when they are maybe 3-4 inches wide and 5-6 inches long.  (This can be a rookie gardener mistake… it’s fun to see this HUGE veggie come out of the garden, but it’s not going to taste as good as it could.)

However… There is one problem with zucchini.

Yes, the produce for a long time, but they also produce A LOT for a long time.

A few nights ago, after staring at about fifteen zucchini’s on my kitchen counter, I began looking around for new zucchini recipes to help make sure we don’t get too bored. (Not even kidding. Fifteen Zucc’s.)

In my searches I kept coming across recipes for zucchini blossoms.  

Zucchini blossoms are the flowers that appear as the plant is producing a fruit.   They are a very beautiful, vibrant orange when in full bloom, but they wilt as the fruit gets larger and ready for harvest.  

021

There are female and male blossoms.  Female blossoms are attached to the zucchini, male blossoms aid in pollination and will not bear a zucchini.

A female blossom.  You can see the developing zucchini.

A female blossom. You can see the developing zucchini.

Male zucchini blossom.

Male zucchini blossom.

Although it wouldn’t help with my growing zucchini collection, I thought with all the big blossoms on my zucchini plants to give Fried Zucchini Blossoms a try.

045

They looked similar to tempura, but tasted almost like a mozzarella stick thanks to the warm, melty cheese I stuffed in the blossom.  My backyard basil added great, subtle pepper flavor and sweetness and the lemon had the right amount of tart to add depth to this fun appetizer.

047

These are great on a summer evening with a glass of cold moscato.


Fried Stuffed Zucchini Blossoms
2014-07-18 17:31:50
Write a review
Save Recipe
Print
The Cheese Filling
  1. 1 Cup Ricotta Cheese
  2. 1/2 cup Parmesan Cheese
  3. 1 Lemon, juiced and Zested
  4. 1/4 Cup finely chopped Basil
  5. S&P
The Batter
  1. 1 1/2 Cup Flour
  2. 1 Tbs. Baking Powder
  3. 1 1/2 cup soda water or beer
  4. 10 Zucchini Blossoms
  5. Vegetable Oil for Frying
Instructions
  1. Wash Zucchini blossoms thoroughly, but do not soak in water. Be sure to look inside the blossom and check for bugs and dirt.
  2. Mix together all stuffing ingredients in a medium bowl then add salt and pepper to taste.
  3. Stuff each zucchini blossom with the filling. Be sure to wrap the petals closed once stuffed to "seal" the blossom.
  4. In another bowl, mix the batter ingredients together, carefully whisking in the beer or soda water.
  5. In a heavy bottom pot or pan (we use a cast iron skillet) heat about two inches of oil until shimmering. Dip the blossoms in the batter mixture and turn until coated. Fry in batches for about two minutes or until the batter is golden brown.
  6. Remove from oil and place on a paper towel lined plate to cool.
  7. Enjoy!
Bloom. https://www.theblogbloom.com/

Filed Under: Recipes Tagged With: backyard Garden, fried zucchini blossom, recipe, Zucchini, zucchini blossoms

Picking Black Raspberries at The Bearded Frog and Sweet Corn and Black Raspberry Ice Cream

July 10, 2014 by theblogbloom.com 8 Comments

Adam works with a farmer in the neighboring county named Lee. Adam’s business works with him and his corn and soybean operation.

And, in the last couple years, Lee decided to add another crop to the farm ground: Black Raspberries.

Last year, Lee planted somewhere between 300-400 black raspberry plants in six rows on his family farm. This year, the berries were ready for harvest so he opened up The Bearded Frog Berry Patch. He sells the black raspberries in pints or you can come and pick your own.

photo 2 (22)

Adam was so excited to hear about Lee’s side business venture and, over dinner a couple weeks ago, he told me that we had to check it out.

Berries were ready on June 24th at The Bearded Frog but, unfortunately, Adam’s schedule was crazy and he couldn’t get there. My schedule was a little more flexible so I was able to stop by the berry patch last week before work.

I arrived to the berry patch and was greeted by Lee and his young nephew. After grabbing a few pint containers and a wagon we headed out to the rows of black raspberries.

Lee pointed me in the direction of the best rows to pick from and then explained what to look for in order to pick the best berries. He said you wanted to find the darkest berries and when you did they would almost just pop off the plant.

photo 1 (24)

He told me that they had planted all the berry plants during the fall of 2012 but didn’t have berries until this year. The season for black raspberries is only a couple weeks long and is typically in late June.

The three of us began picking and getting to know one another.

Lee asked me about my job and we made the connection that an old schoolmate of his is now a chef that works with me at Purdue University.

I asked him about how the berry patch got its unique name “The Bearded Frog.”

He explained that it’s an ode to the past as his fourth generation farm is in a town that was once called “Beard” and a neighboring town was called “Frog.”

I loved the play on the past and told him I can already vision some fun frog logos for the berry patch. Lee laughed saying that logos are something they are currently working on.

Lee told me they started with just the eight rows of berries to see how it goes. They may expand as the years go on and they find more uses for the berries. Lee mentioned he was interested to learn what it would take to sell to a local winery and have them create a black raspberry wine or even create a Bearded Frog branded black raspberry jam.

I asked him, “Why black raspberries?”

Lee first explained that there are not many other black raspberry growers in Indiana. Then he added, “And they are the best.”

He told me that black raspberries make the best pies. The best jam. And they are great on their own.

My very pink hands after berry picking :)

My very pink hands after berry picking 🙂

“I have probably had ten pounds straight off the vine,” Lee said with a laugh.

I laughed too and looked to his nephew who had told me earlier he was going into fifth grade this fall and that he helps his Uncle Lee at the berry patch a couple days a week. I jokingly asked him, “So are you sick of black raspberries yet?”

Without hesitation he replied, “Nope!”

And then he added, “But I have almost made myself sick from eating so many!”

I could see how.

The berries were great. They tasted wonderful and were a great size and texture.

004

After my early morning picking, I came home with eight pints. I froze four pints to make a pie later this summer. I also brought a couple pints to the lake for the 4th of July just to have around for a quick snack and made the great ice cream below for the Holiday as well.

040

The Bearded Frog Berry Patch is closing it’s berry season in the next week. The final days the patch will be open are July 12, 2014 from 7:00 AM to noon and July 14, 2014 from 8:00 AM to 10:00 AM.

The Berry Patch is located at:
2566 East County Road 600 North
Frankfort, IN 46041

Be sure to Like The Bearded Frog Berry Patch on Facebook to learn more about the story behind their name, the farm, directions to the berry patch and to stay up to date with next years berries!

002

I made Sweet Corn Ice Cream with Black Raspberry Sauce using my fresh Black Raspberry’s. The recipe is from Jeni’s Splendid Ice Cream, my favorite ice cream store in Columbus, Ohio. (Okay, it’s my favorite in the world. Just based out of Columbus.)

It was the quintessential taste of summer in the midwest.

043


Sweet Corn and Black Raspberry Ice Cream
2014-07-10 09:40:26
Write a review
Save Recipe
Print
Sweet Corn Ice Cream
  1. 1 ear sweet corn, husked
  2. 2 cups whole milk (tempted to save calories and use anything but whole milk? Don't. The texture gets messed up.)
  3. 1 tablespoon cornstarch
  4. 1 1/2 ounces cream cheese, softened
  5. 1/4 teaspoon fine sea salt
  6. 1 1/4 cups heavy cream
  7. 2/3 cup sugar
  8. 2 tablespoon light corn syrup
Black Raspberry Sauce
  1. 2 cups black raspberries
  2. 1 cup sugar
Black Raspberry Sauce
  1. - Combine black raspberries and sugar in a sauce pan and bring to a boil over medium heat, stirring occasionally.
  2. - Let cool slightly and force through a fine sieve to remove the seeds.
  3. - Refrigerate until cold before using.
Sweet Corn Ice Cream
  1. Prep-
  2. - Slice kernels from the corn cob, then "milk" the cob by running the back of a knife down the husk to extract the liquid. Reserve the kernels and liquid.
  3. - Mix 2 tablespoon of the milk with the cornstarch in a small bowl to make a smooth slurry.
  4. - Whisk the cream cheese and salt in a medium bowl until smooth.
  5. - Fill a large bowl with ice and water.
  6. Cook-
  7. - Combine remaining milk, cream, sugar, corn and juices, corn syrup in a sauce pan and bring to a rolling boil over medium high heat. Boil for 4 minutes.
  8. - Remove from the heat and force the mixture through a sieve into a bowl, leaving the corn "cases" behind.
  9. - Return the mixture to the saucepan and gradually whisk in the cornstarch slurry.
  10. - Bring back to a boil and cook, stirring until slightly thickened about one minute. Remove from the heat.
  11. Chill-
  12. - Gradually whisk the hot milk mixture into the cream cheese until smooth.
  13. - Pour complete mixture into a gallon Ziploc freezer bag and submerge the sealed bag in the ice and water bath. Let cool completely, about thirty minutes.
  14. Freeze-
  15. Pour ice cream base into frozen ice cream maker container and spin until thick and creamy. About twenty minutes.
  16. Pack ice cream into a storage container, alternating with layers of ice cream and black raspberry sauce. Top with a spoonful of sauce.
  17. Seal container and freeze in the freezer until firm. At least four hours.
By Jeni Britton Bauer
Adapted from Jeni's Splendid Ice Creams at Home
Bloom. https://www.theblogbloom.com/

Filed Under: Agroturism, Recipes Tagged With: Black raspberries, Ice Cream, Indiana, Jeni's, Jeni's Splendid Ice Creams at Home, local food

Roasted Radishes

July 7, 2014 by theblogbloom.com 6 Comments

If you are thinking about getting your kids involved with gardening 1.  Good for you!  

Adam and I have talked about how we want our kids to have their own garden bed each summer where they can choose what they plant, learn a little responsibility in tending to the bed and reap the benefits of their harvest.  I think it’s awesome for kids to learn how food grows.  

And, 2. You should seriously consider planting radishes.

Radishes grow very quickly in comparison to other plants, which will help encourage and hold the attention of a young person.  This year it took about four weeks from planting a seed to enjoying a little crunch on my salad.

Radishes just about two weeks after planting.

Radishes just about two weeks after planting.

Radishes come in all shapes and sizes.  Word to the wise: as they get bigger, they get spicier. So keep an eye on them.  They also come in various beautiful shades of pinks and reds.

006

They are most prevalent from April to July.

What I like about radishes is that there are so many things you can do with them.  Like I said, they are great in a salad.  I love to just pop them with some veggie dip or hummus.  We have done shaved radishes on a pizza.  You could also add them to a sandwich.  Pickle them so that you could eat them all year long.

The other night I decided to roast our plentiful radishes.

027

Roasting radishes that have maybe gotten too big is great because it cooks the spiciness out of them and makes them much easier to eat.

This recipe is my go to when roasting almost any vegetable.  It is easy, light and made with ingredients that are always in my pantry.  (Or, any typical pantry for that matter.)

It is proof that you don’t need to complicate things to make them good.

026

Roasted Radishes
2014-07-07 19:54:05
Write a review
Save Recipe
Print
Ingredients
  1. 1 bunch Radished, quartered
  2. 1 Shallot, thinly sliced
  3. 2 Tablespoons Olive Oil
  4. Juice of one Lemon
  5. Salt and Pepper
Instructions
  1. Preheat Oven to 375
  2. Toss all ingredients in a medium bowl, spread onto a baking sheet
  3. Cook until tender about 20-25 minutes.
  4. Eat right away.
Bloom. https://www.theblogbloom.com/

Filed Under: Recipes, Uncategorized Tagged With: backyard Garden, gardening with kids, radishes, recipe, roasted radishes, roasted vegetable

Cooking Like the Beekman Boys.

July 1, 2014 by theblogbloom.com 8 Comments

After the first of the year, I was talking with a co-worker about cheese.

Embarrassingly, too common of a conversation for me.

She told me about this great wheel of cheese that her family had over the holidays. She said it was a combo of goat milk and cow milk. She also said the cheese looked totally crazy because it had a black rind made from ashes.

Incredibly interested, I asked, “So, what’s it called?”

“Beekman 1802 Blaak,” she said.

“Beekman, what?” I asked.

“Beekman 1802. It’s made by the Beekman Boys,” she said.

Reading the confused look on my face, she went on, “Oh my gosh, Claire. You don’t know the Beekman Boys? They are right up your alley with your big garden and food blog. You would love them!”

She told me that the Beekman Boys were partners from New York City who purchased a huge old home in upstate New York. They fell in love with living the country so they began raising goats and planted a large garden.

Now they have an online mercantile where you can purchase all sorts of kitchenware, garden tools, soaps made with goats milk and foods like the Blaak cheese.

I was intrigued. It did sound like I would love them.

She told me that they also had a book, The Bucolic Plague: How Two Manhattanites Became Gentlemen Farmers: An Unconventional Memoir (P.S.),that tells the story of how they found their way from the city to the country. It also goes into detail about the first year of trying to get their goat milk soap business off the ground.

Adam and I were headed to Jamaica a few weeks later and I was in need of a good beach read. So, I hopped onto to Amazon and purchased The Bucolic Plague. It was a perfect, laugh out loud, easy read for the beach.

And, like my co-worker thought I would, I did fall in love with The Beekman Boys, Brent and Josh.

Since reading their memoir, I added their page to my likes on Facebook. I love staying up to date with new products that are constantly added to the online mercantile and any specials that they might be running. They also post beautiful, personal pictures of the house, their garden, and the goats.

It was on their Facebook page that I learned Williams-Sonoma was promoting their newest cookbook, The Beekman 1802 Heirloom Vegetable Cookbook: 100 Delicious Heritage Recipes from the Farm and Garden, with a cooking class in mid June. Williams-Sonoma often has cooking classes where they showcase a new cookbook or teach basic kitchen skills, such as knife skills.

I have always wanted to take one of the classes at Williams-Sonoma so I thought what would be better then this class featuring my new gardening idols.

Plus, their cookbook looked amazing and it came with the class.

Turns out I was the only person in Indianapolis who signed up for the class so I got a call from, Dottie, the instructor the day before the class. She said she would do a more hands on class versus a demo class, like it was originally supposed to be.

Obviously, I didn’t mind. In fact, I was even more excited.

I showed up the next evening ready to cook and wound up having a great time. Dottie was a wonderful lady and was full of so much knowledge about food and cooking. I loved hearing her stories of traveling in Europe and we made the connection that we were both Purdue sorority girls.

That night we made Kale Bruschetta, a Beet and Ricotta Salad, Eggplant “Meat” Balls, and a cucumber ice cream in a carrot cookie cup. All were recipes from The Beekman Boy’s new cookbook.

photo

The cookbook has fabulous photos of the Beekman home and garden throughout the seasons that are in line with the seasonal layout of the book. Majority of the recipes are vegetarian as they are designed to utilize produce that is available throughout the year in a garden like the one at their upstate home.

We didn’t plant eggplant and our cucumbers, carrots and beets are not ready yet. But, our kale looks great.

1

I like have kale in the garden because it is incredibly healthy and tasty.  It is a great addition to salads and smoothies. I also like to make kale chips.

Growing kale is very simple.  I started a few heads of kale in the basement and transplanted the seedlings to the ground this spring. I also started a few seeds right in the ground to have more kale ready to eat at a different time than the seeds I started indoors. We plan to have more kale this fall as it is a hardy vegetable that can tolerate cooler temperatures. In fact, their leaves are even sweeter when exposed to colder temps.

009

With our backyard garden kale looking awesome, I decided to share a bit of my fun night at Williams-Sonoma with Adam and recreated the Kale Bruchetta at home.

013

I loved everything we made during the cooking class, but this bruchetta was definitely my favorite. I knew that Adam would love the salty, creamy kale topping too.

I cannot wait to try other recipes from the Heirloom Vegetable Cookbook. I have a feeling it will be a great resource for me for many, many years! Be sure to check it out!

018


Kale Bruschetta
2014-07-01 17:26:22
Yields 8
Write a review
Save Recipe
Print
Ingredients
  1. 2 Tbs. Olive Oil
  2. 1 garlic clove
  3. 2 anchovy fillets, finely chopped
  4. 6 ounces kale, stems and ribs removed
  5. pinch of salt
  6. 1/2 cup of water
  7. 2 Tbs. mayo
  8. 2 Tbs. grated Parmesan cheese
  9. 2 teaspoons fresh lemon juice
Instructions
  1. Heat Olive Oil in a medium skillet over medium heat.
  2. Add garlic and anchovies. Cook stirring frequently until anchovies have melted, about two minutes
  3. Add kale, salt, and water. Cook until kale is tender and water has evaporated, stirring frequently.
  4. Remove kale from skillet and place on cutting board. When cool, finely chop.
  5. In a medium bowl combine the mayo, Parmesan, and lemon juice. Add the kale and stir to combine.
  6. Top eight pieces of toasted baguette or Bread crisps.
Notes
  1. Making bruschetta isn't hard. All you need is some oil and a baguette.
  2. However, there are lots of short cuts out there. Whole foods makes little bruschetta crisps and packages them. You can find them in their baked goods section. I used some bread crisps made by Stacy's.
  3. No one around here judges for making your life easier!
Adapted from The Beekman 1802 Heirloom Vegetable Cookbook
Bloom. https://www.theblogbloom.com/

Filed Under: Books, Recipes, Uncategorized Tagged With: backyard Garden, beekman 1802, beekman boys, bruschetta, cooking classes, kale

Cinco de Mayo Rhubarb Mojitos

May 5, 2014 by theblogbloom.com 1 Comment

I am like… oh, 95% positive that I made the first purchase of the season at Carmel’s Farmer’s Market on Saturday morning.

I had been in Indianapolis Friday night for dinner with friends who were running the next morning in the 500 Festival’s 5k and Mini Marathon.

Hey, girls, heyyy!

Hey, girls, heyyy!

I, however, was not.

I can power through an intense spin class like a champ but am pretty sure that I have not run more than two miles since last summer.

I blame the winter.

So, the girls all rose early to get to the race and I began the drive home. On the way, I stopped in downtown Carmel to check out their Farmer’s Market.

It was opening day of the market for 2014, but I had never been to the market period. I had always heard great things so I was eager to see what they had to offer.

I got there about forty minutes before the market opened thanks to the early race start so I grabbed a Starbucks and brainstormed a few blog ideas in my car while I waited. Ten minutes to open I decided to hop out of my car and see what was going on.

I took a lap around the market and was beyond impressed.

There was so much available, despite the cold, late spring. I even saw tomatoes. Obviously, green house tomatoes. But still… tomatoes!

By the time the mayor began her opening day speech and rang a bell to signal the commence of the market, I was standing underneath a vendor’s tent that was selling vibrant rhubarb and big, green spears of asparagus handing over some cash.

015

Note: There’s no prize or celebration for the first purchase of the season. Dang!

They were the two things I was looking for and I couldn’t wait to get them home.

Rhubarb is a perennial vegetable and is typically cooked in sugar to be added to desserts. Rhubarb is typically harvested in mid to late spring. The color of rhubarb is the best. It can be from deep reds to pinks with a little green.

028

I had never had rhubarb until I started dating Adam. Rhubarb crisp is one of his families most loved desserts.

017

I thought about making the crisp but then remembered that Cinco de Mayo was just around the corner and decided to use the rhubarb to add subtle flavor to one my favorite Mexican vacation cocktails, the mojito.

Mojitos are incredibly refreshing and are not as sweet as a margarita. And, with all the mint left over from the Derby’s Juleps it seemed perfect for Cinco de Mayo!

039

Rhubarb Mojito

Rhubarb Syrup:
3 large stalks rhubarb, thinly sliced
1 cup light brown sugar
½ cup granulated sugar
1 ½ cups water

Place all ingredients in a medium pot, stir to combine. Bring to a boil and then simmer for about five minutes or until rhubarb is tender.
Strain rhubarb collecting the liquid mixture in a bowl. Clean pot and pour liquid mixture back into pot. Boil over medium heat until liquid becomes a syrup. About fifteen minutes.
Let cool completely before using.

Rhubarb Mojito

6-7 mint leaves, torn
3 tablespoons rhubarb syrup
1 ounce white rum
Club Soda
Fresh lime juice

Add the mint, syrup and rum to tall glass. Stir to combine. Add ice and top with club soda and juice from a lime wedge. Garnish with mint and lime wedge.

034

Filed Under: Plant, Recipes, Uncategorized Tagged With: cinco de mayo, cocktail, Farmers Market, rhubarb, rhubarb mojito

Midwestern Rasied, Southern fed.

May 4, 2014 by theblogbloom.com 1 Comment

After a semi-traumatic (see also: dramatic) experience with innards from a chicken I bought at the Farmer’s Market last summer, I was relieved when we were told that we could have everything removed from our fifty birds at the place we took them late last fall to get butchered.

Adam grew up with a great friend, Andy, who still lives just down the street. Andy is over often and when he heard we were going to have the butcher just pitch the innards, he spoke up and told us that we had to save the livers.

… Livers?

He explained that his family, who hails from eastern Tennessee, loves fried chicken livers. We had to keep them and the next time they were in town they would cook them for us.

So, we had the butcher bag up all the livers and we froze them until early last week when Andy’s grandparents and aunt came to town.

At lunch, the day of our fried chicken liver dinner, Adam’s mom asked me if I had ever had liver in tone that made me wonder what I was getting into. Truth of the matter was no. But, I convinced myself that if it’s fried, it’s probably not going to be too bad.

I am also not a picky eater and will try almost anything, but it still didn’t stop me from Googling “Fried Chicken Livers” in the afternoon just to see what to expect.

Within the first five posts there were recipes from Saveur and Food and Wine. Turns out fried chicken livers are a southern classic and even the snazziest southern inspired restaurants were serving them. The sites even listed beers and wines that pair well with the fried livers.

010

That evening, Adam and I headed over to Andy’s where we found his grandmother and dad cooking up a storm. The stove top was full of cast iron where livers were frying as well as potatoes and cornbread patties.

003

Andy and his grandmother both commended us on how great the livers from our birds looked and that they were a great size. They had soaked them in salt water and then milk, much like I do with duck, to help dull the game-y flavor.

001

The liver’s were dredged through flour with a bit of spices and then placed in a skillet of oil and melted butter.

004

Andy’s grandmother told me to try one that she had pulled out of the skillet a few minutes earlier that were sitting on a plate lined with a paper towel.

002

I understood why they had soaked the livers in milk; they had a very similar taste and texture to venison or duck. Andy said the gaminess is likely because they contain so much iron.

Chicken liver is a great source of iron and zinc, but contains quite a bit of cholesterol so they are not something that you would want to eat all the time. (Don’t worry, Doc. I balanced this meal out with a glass of red wine.)

The spread that evening was great. In addition to the livers, there was homemade cole slaw, deviled eggs, fried potatoes, corn bread, and a killer peanut butter pie.

008

Adam and I so appreciated the experience because it was something we would have never done ourselves. But, we will now. What I really loved was getting a taste of an authentic southern meal and seeing another family’s traditions come to life.

Yesterday, I saw liver’s at the Farmer’s Market. Give them a try! There are tons of recipes out there and when I try them at home I think I will use this recipe from Food and Wine. The author says the soy sauce will balance the gamey taste if that’s not something your into.

Filed Under: Plant, Recipes Tagged With: Backyard Chicken, cooking, fried, fried chicken livers, southern, tradition

  • 1
  • 2
  • 3
  • 4
  • Next Page »

Meet Claire

Hi, thanks for visiting! I am Claire and I have been sharing my life and thoughts on Bloom since 2013. Welcome to 2023's project, The Farmers Market and The Library. For more about me...

Follow Bloom.

RSS
Follow by Email
Facebook
Twitter
Pinterest
Instagram

Be a Bloom Insider

Enter your email address to subscribe to Bloom and receive notifications of new posts and a bi-weekly love letter from Claire by email.

Archives

Copyright © 2025 · Foodie Theme by Shay Bocks · Built on the Genesis Framework · Powered by WordPress