Bloom.

Navigation
  • About

Happy Fall, Ya’ll!

October 6, 2013 by theblogbloom.com 2 Comments

Unlike much of the rest of the world, I have not fully come to terms with the fact that it is Fall.

Now, before you choke on your Pumpkin Spice Latte, let me say that I do love Fall.

I love all of the seasons. And, yes, Fall is wonderful. Football, chili, over-sized sweaters, colorful leaves… Love it.

But, let me also remind you that, in Indiana, it was a muggy, eighty degrees all last week.

Not exactly the kind of weather that makes you want to carve pumpkins or pick apples (… or have a PSL, for that matter), but it is time to welcome Autumn with open arms and give it a try.

Recently, my parents were visiting and I was trying to figure out how to entertain the Ex-Chicago Yuppies in the country. I thought about the little apple orchard I drive passed nearly every day that is just around the corner from our home, but have never been to. So, I suggested a trip to the apple orchard.

They took me to pick apples as a kid so I thought what better way to kick off fall and return the favor.

Some fun shots from a trip to an orchard just outside of Chicago in 1991.  My little sister couldn't have been much more than a month or two old.

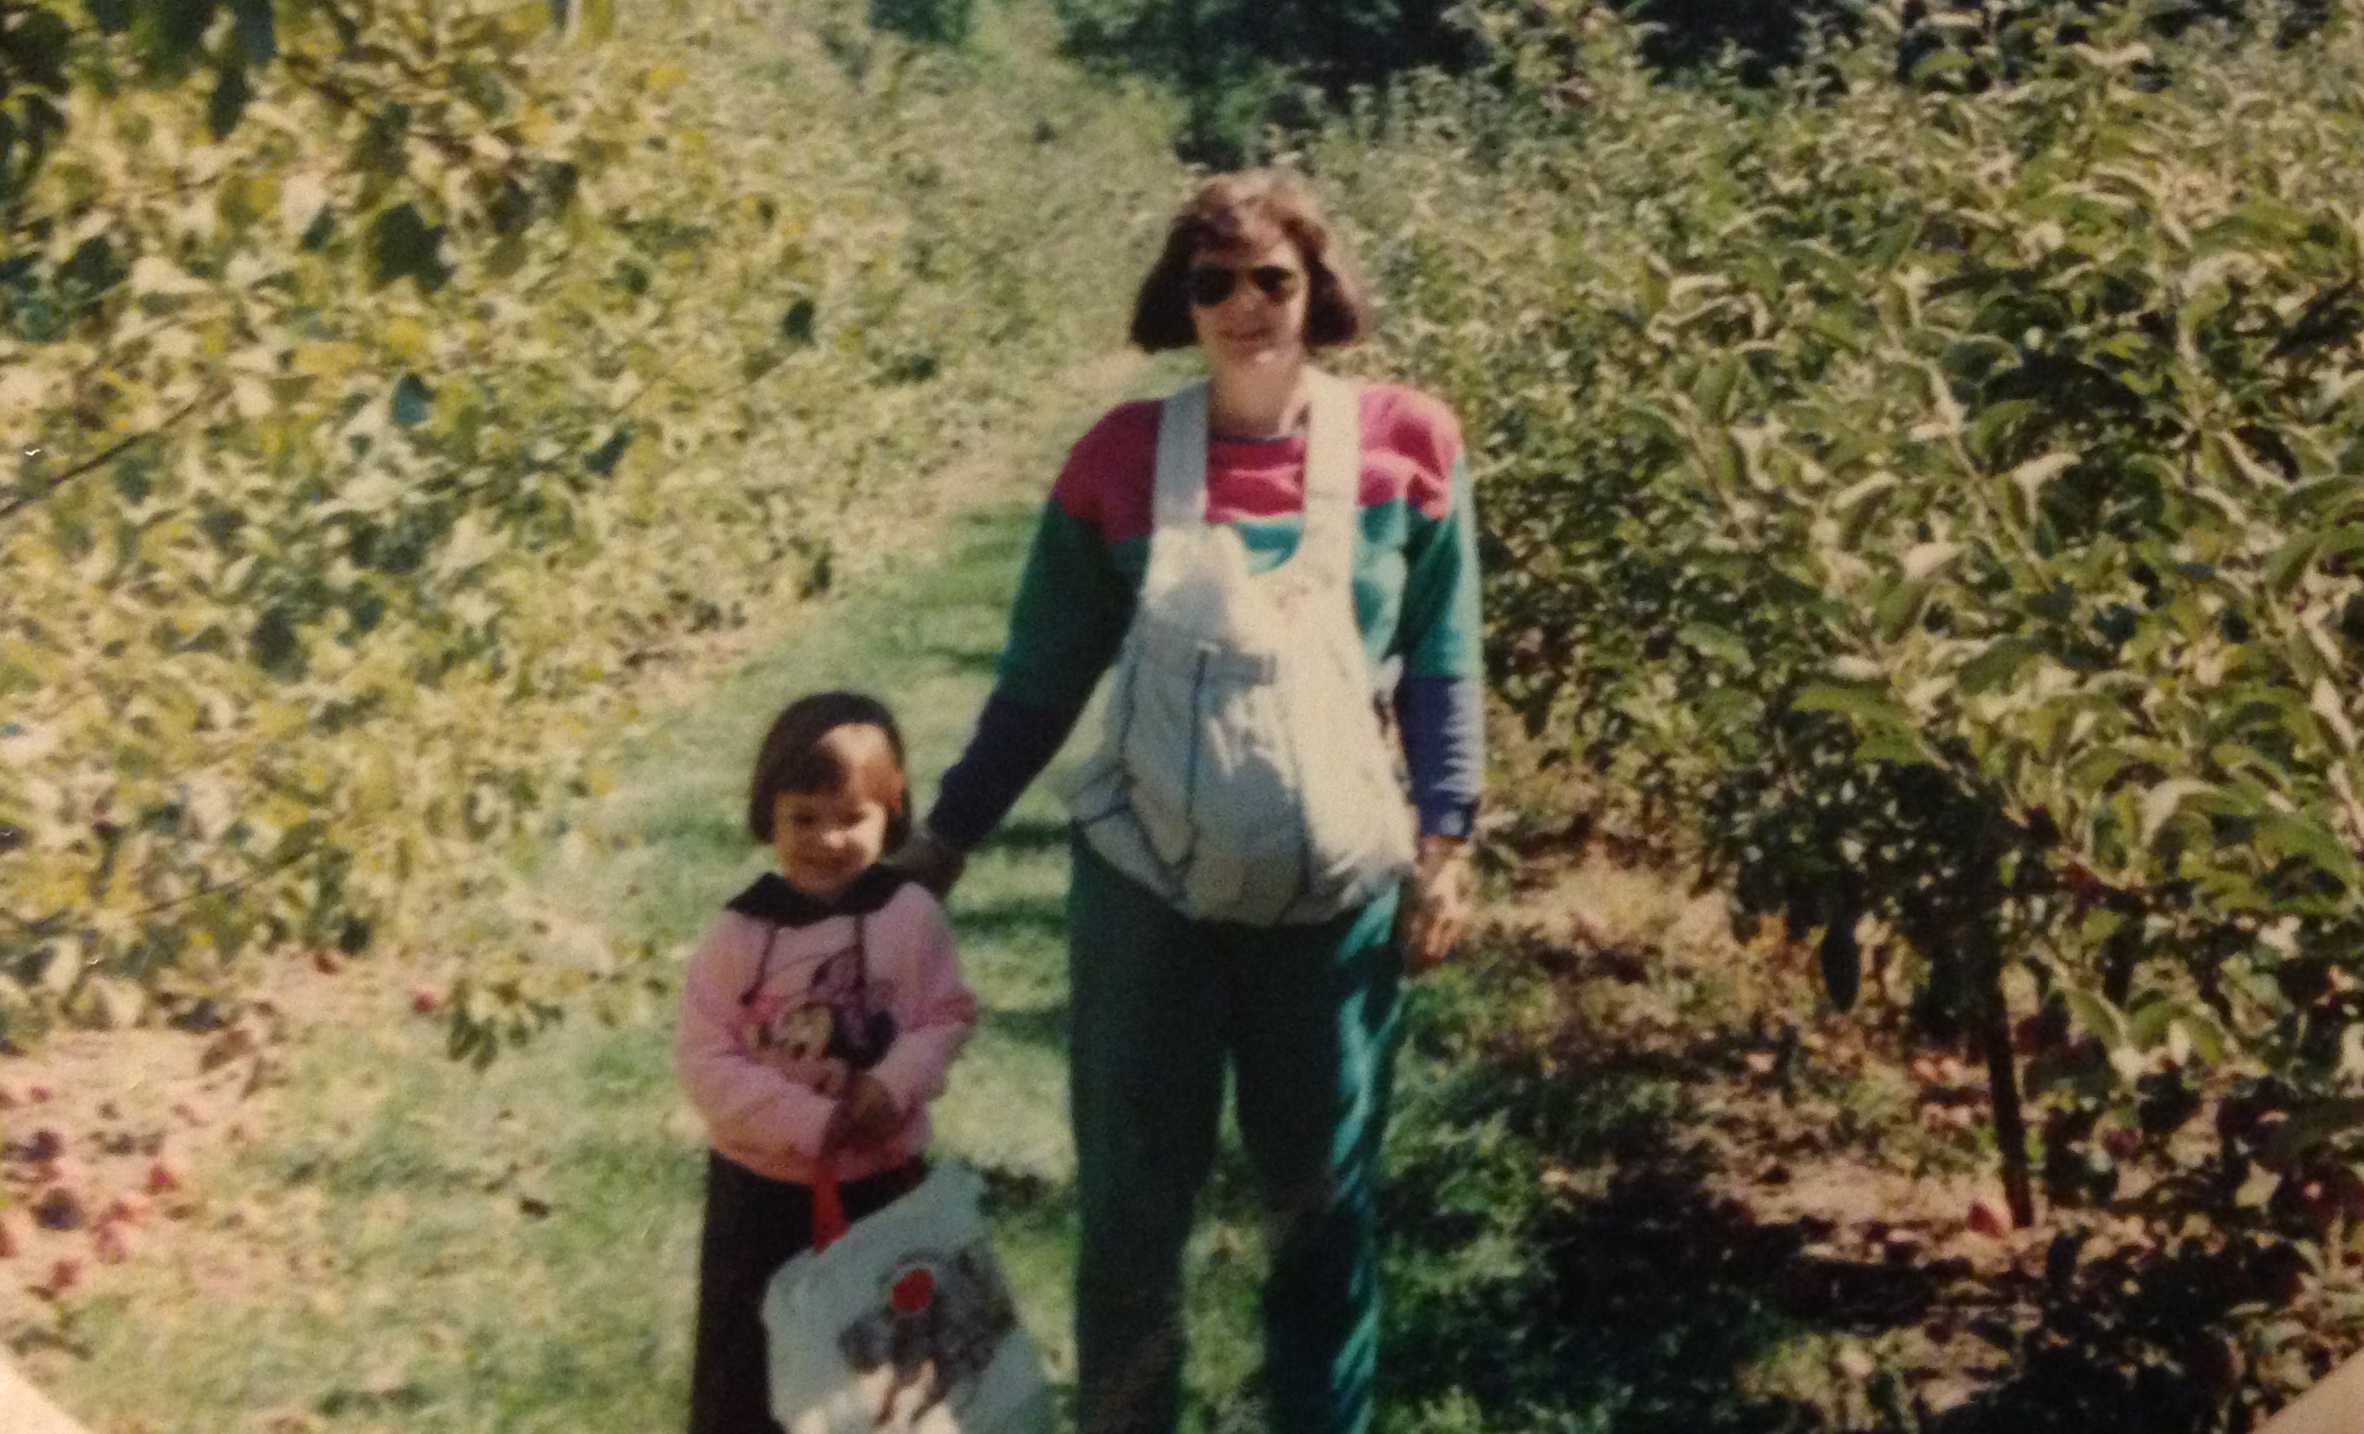
Some fun shots from a trip to an orchard just outside of Chicago in 1991. My little sister couldn’t have been much more than a month or two old.

photo (81)

photo (82)

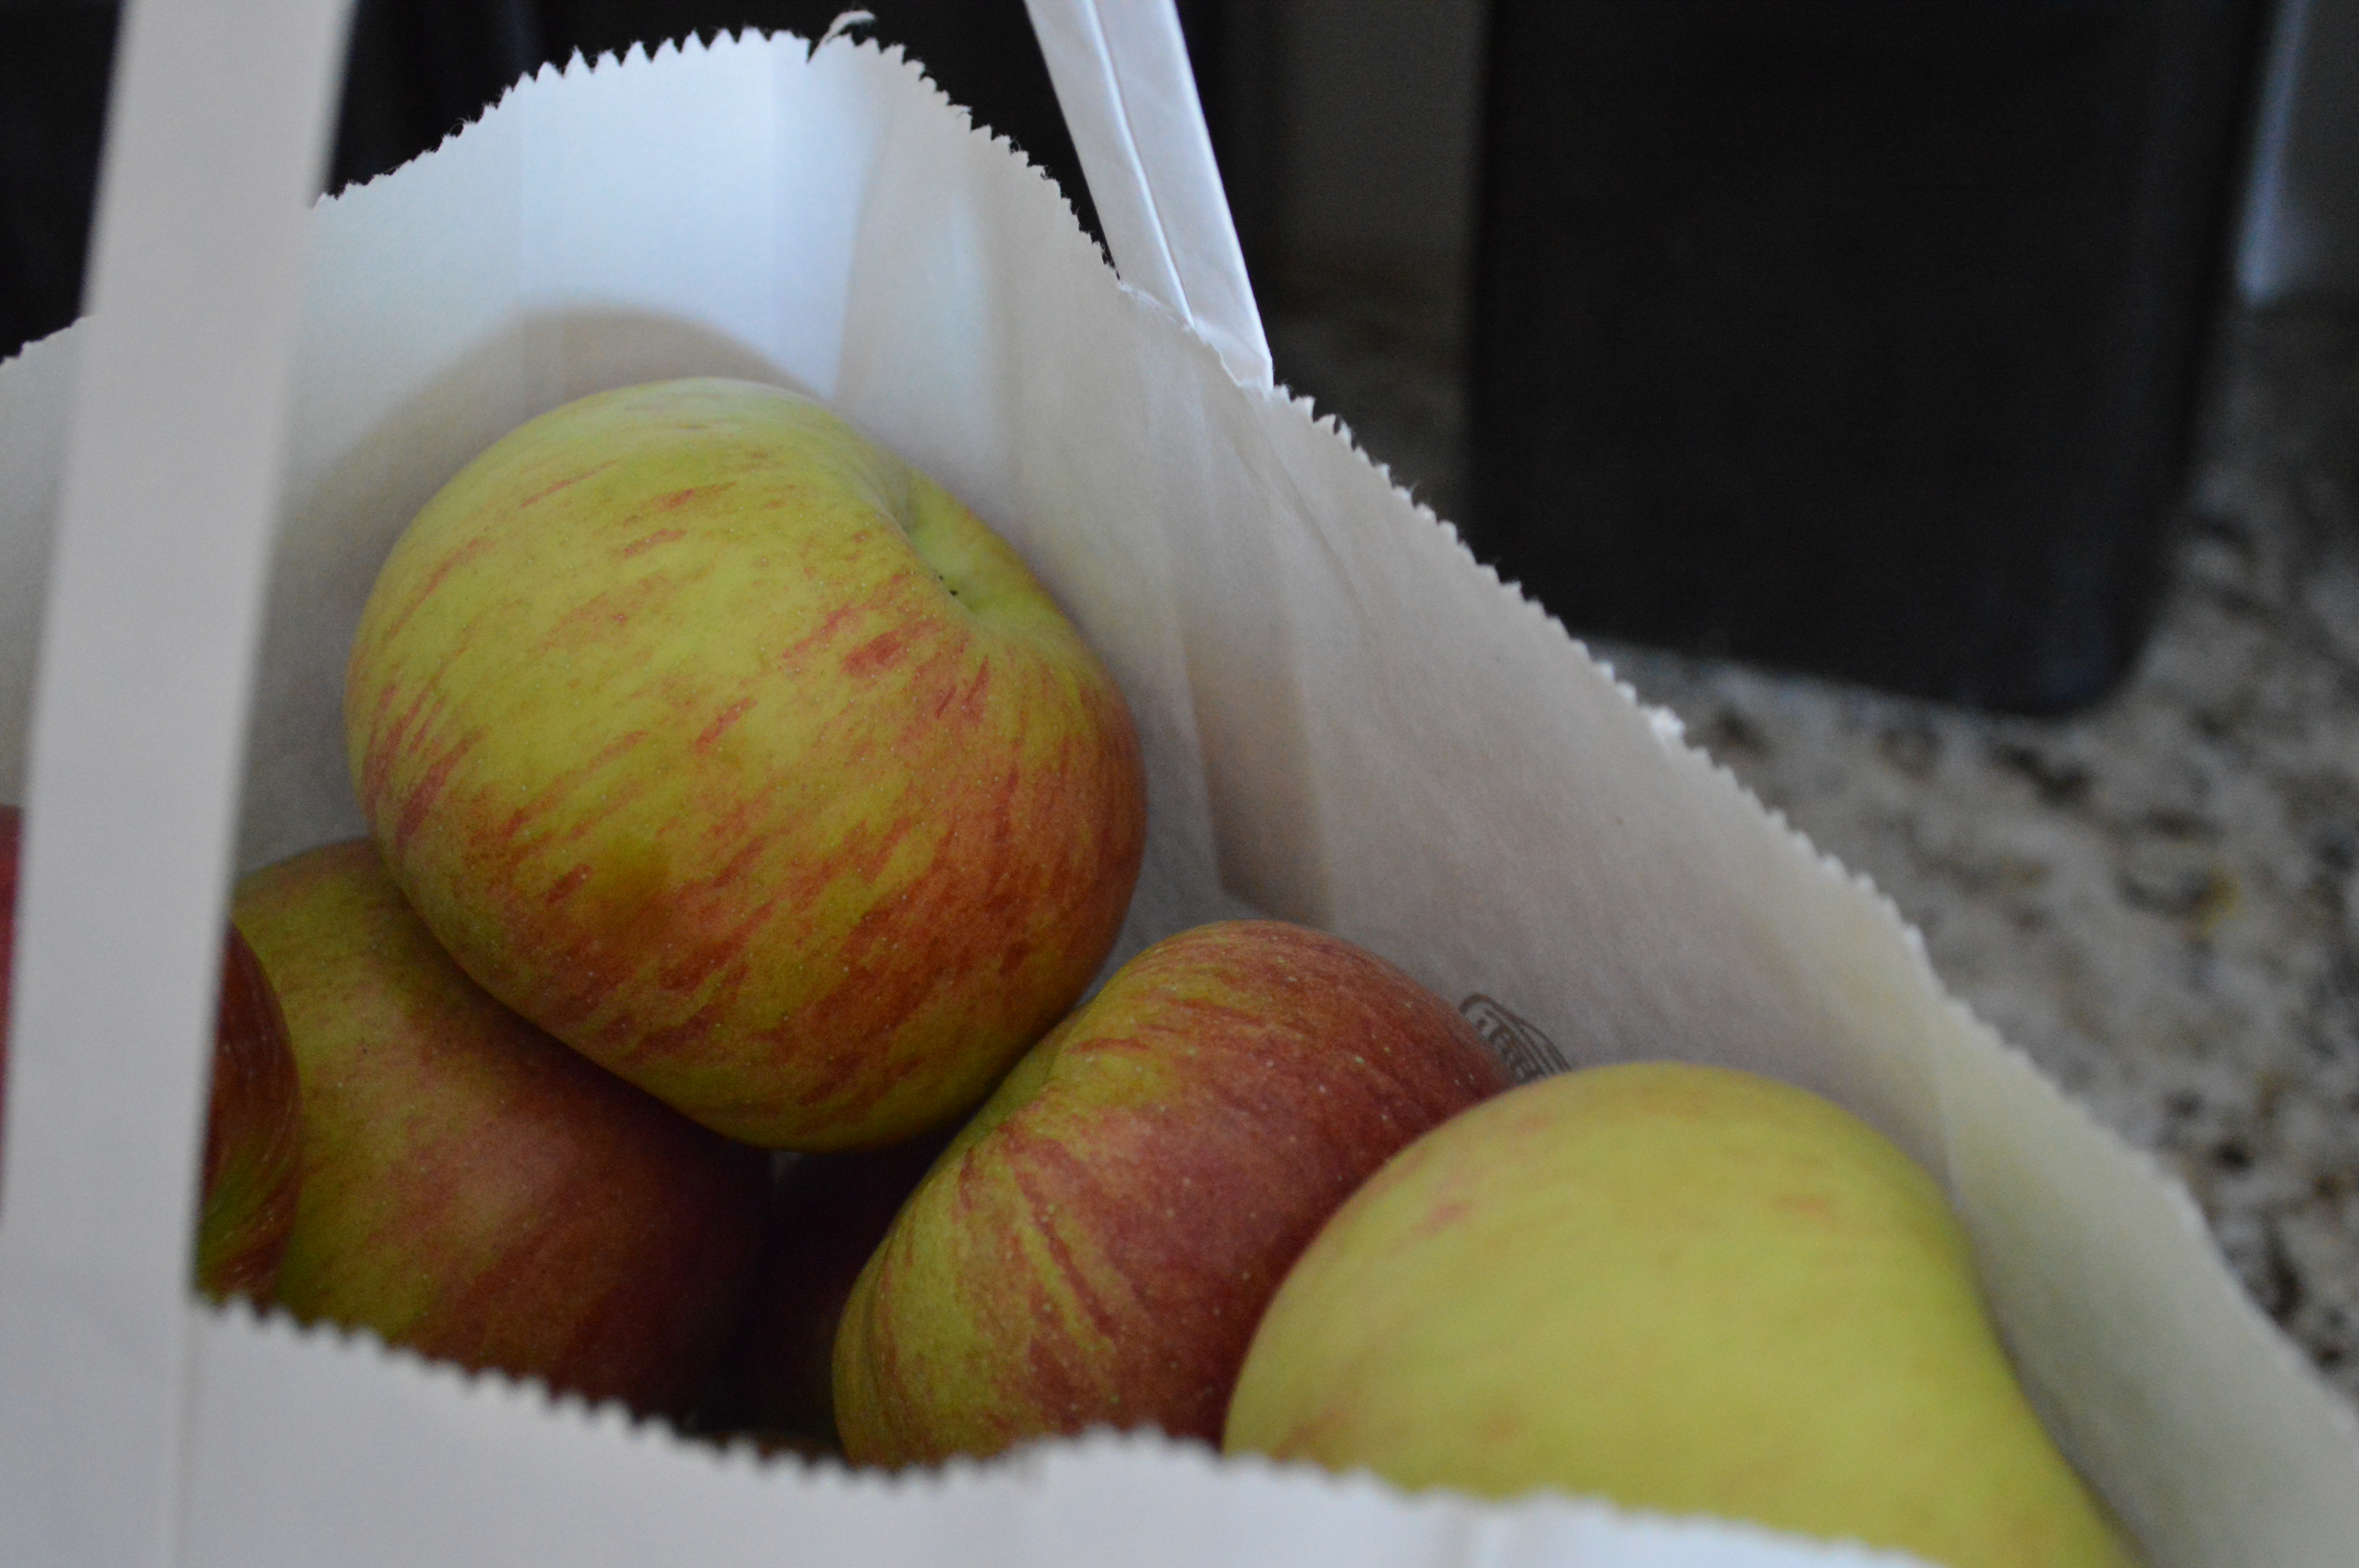
We took the whopping two minute drive to Farlow’s Orchard, drove up a gravel driveway past rows and rows of apple trees to a small barn with open doors.

Inside it looked like a basic gift shop. There were lots of different varieties of apples around the room that you could buy as a bushel, peck, or individually. There was also a cooler full of ciders and many apple desserts like apple dumplings or caramel covered apples.

We were greeted by an older man in bib overalls. He explained they don’t have a “You-Pick” operation to preserve the orchard. He mentioned that Farlow’s is the oldest apple orchard in the state of Indiana. The orchard was created by his wife’s family three generations ago.

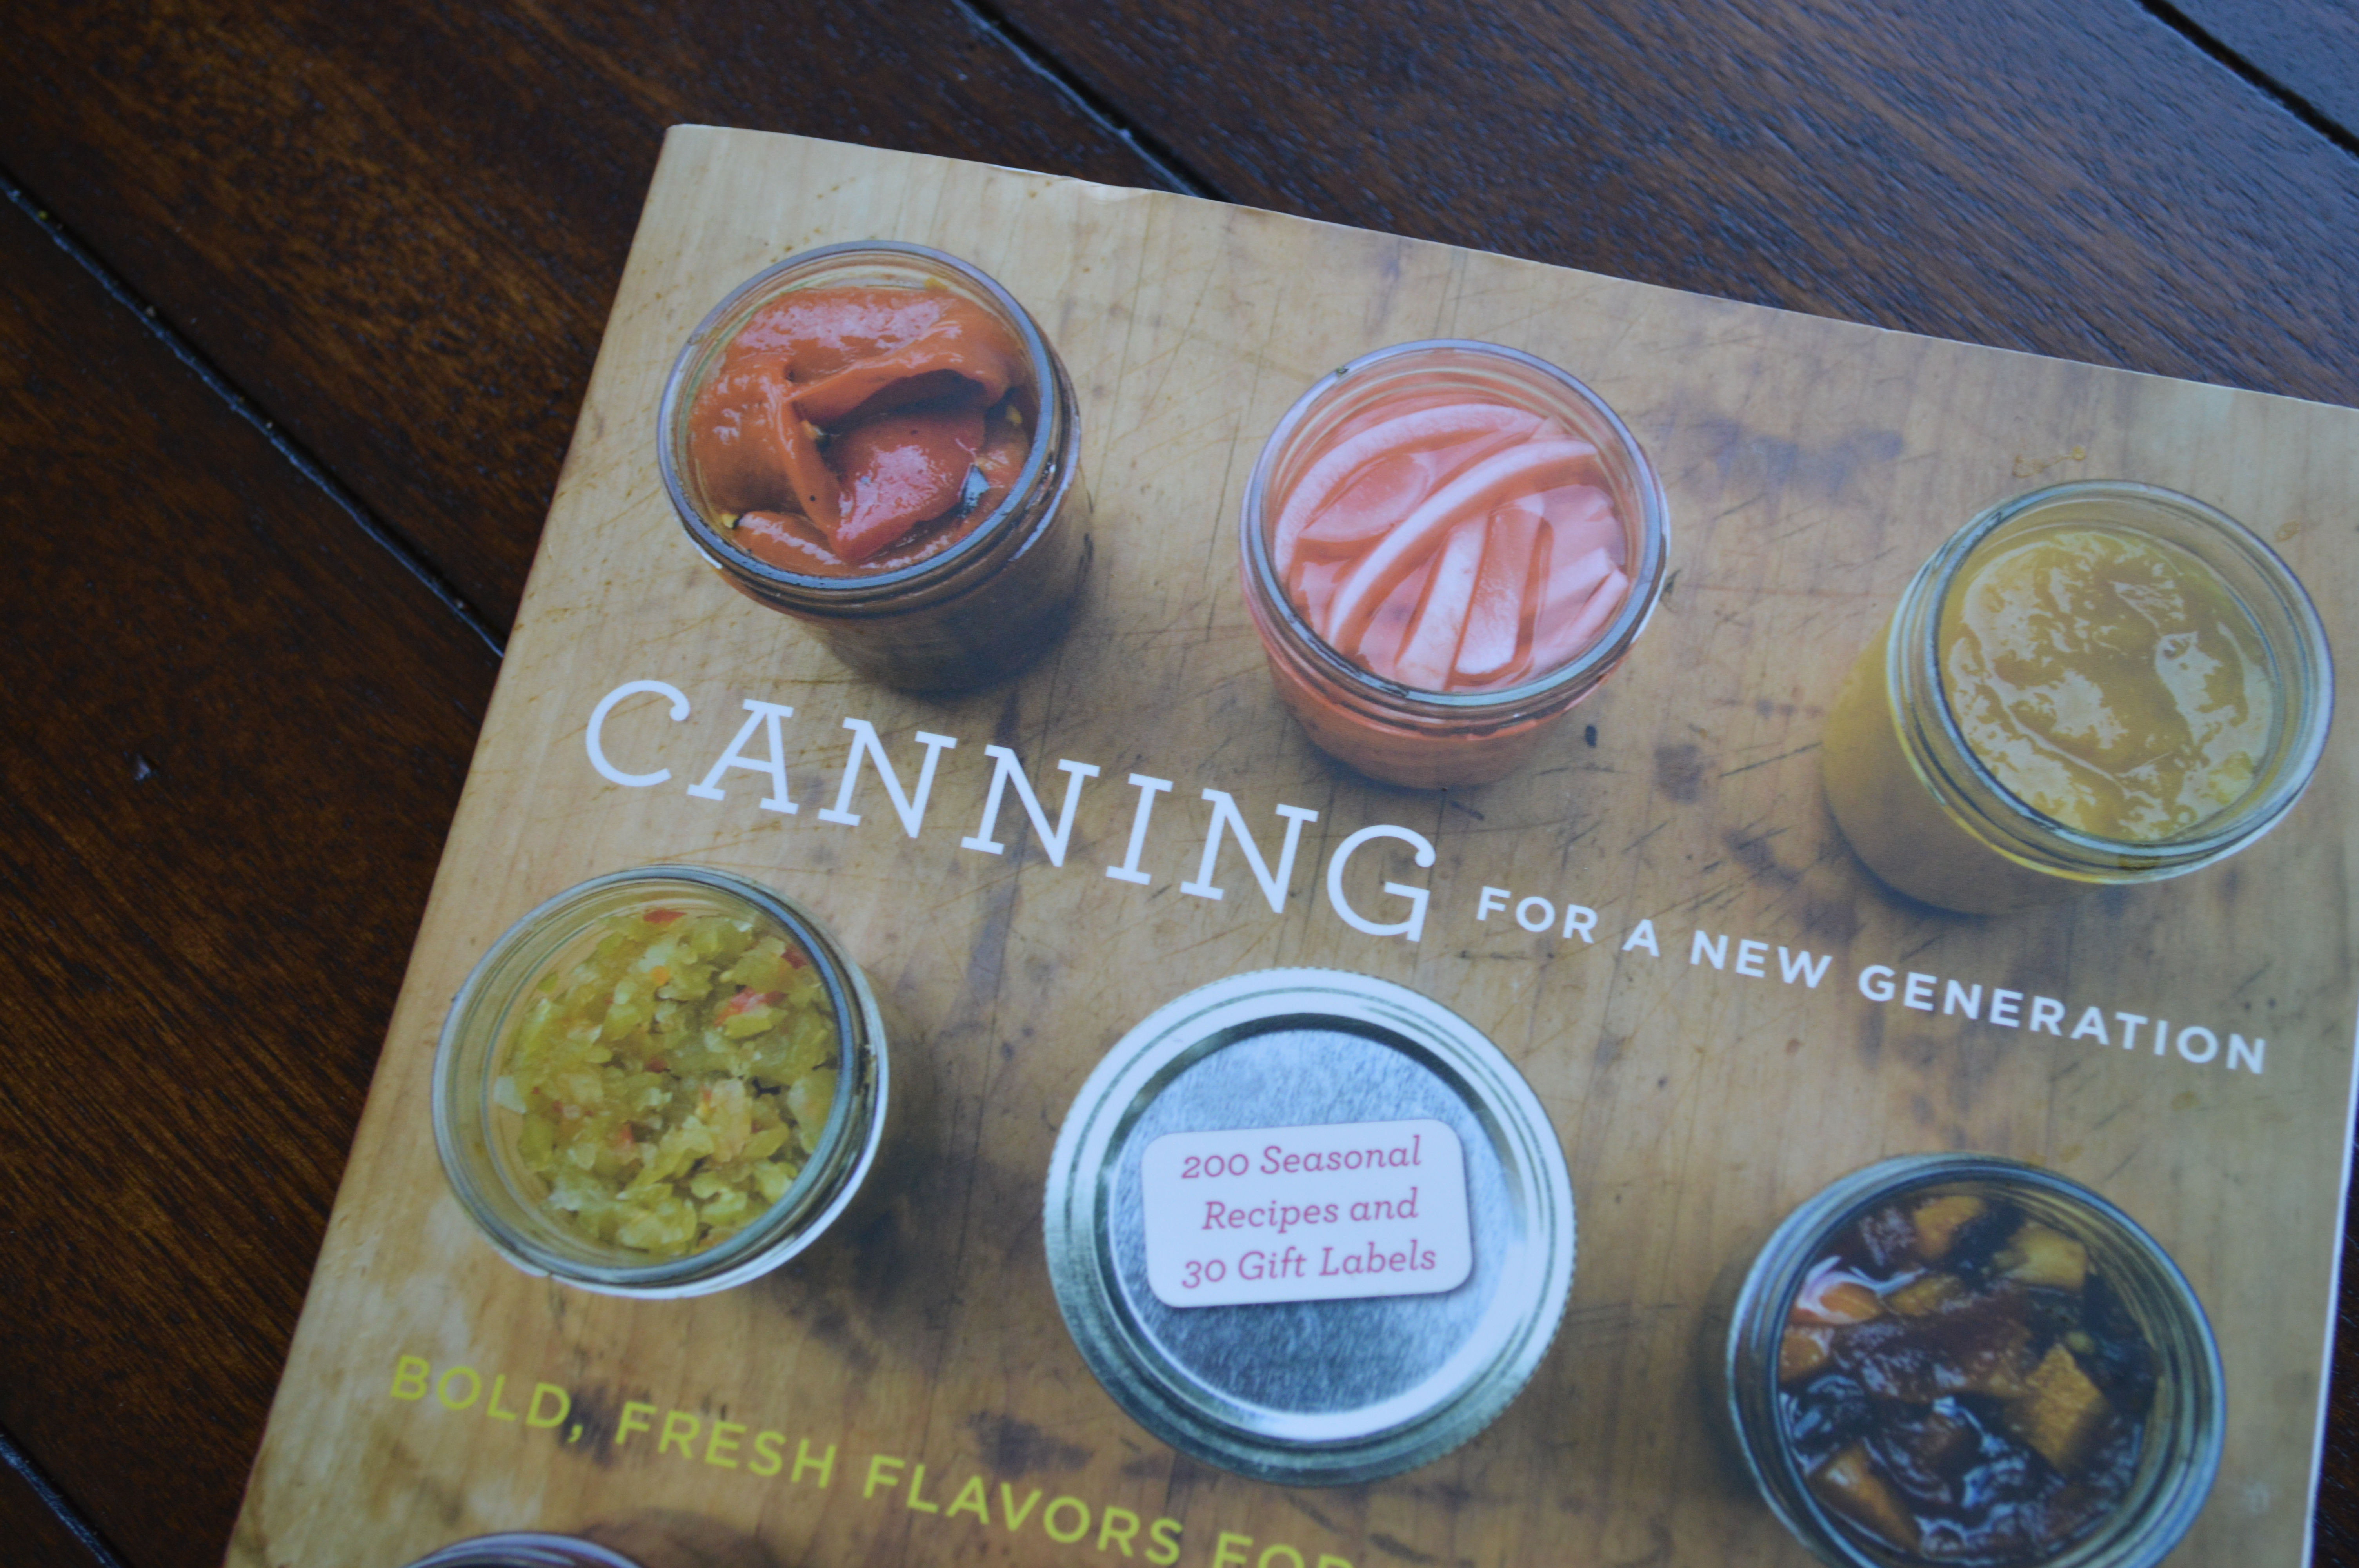
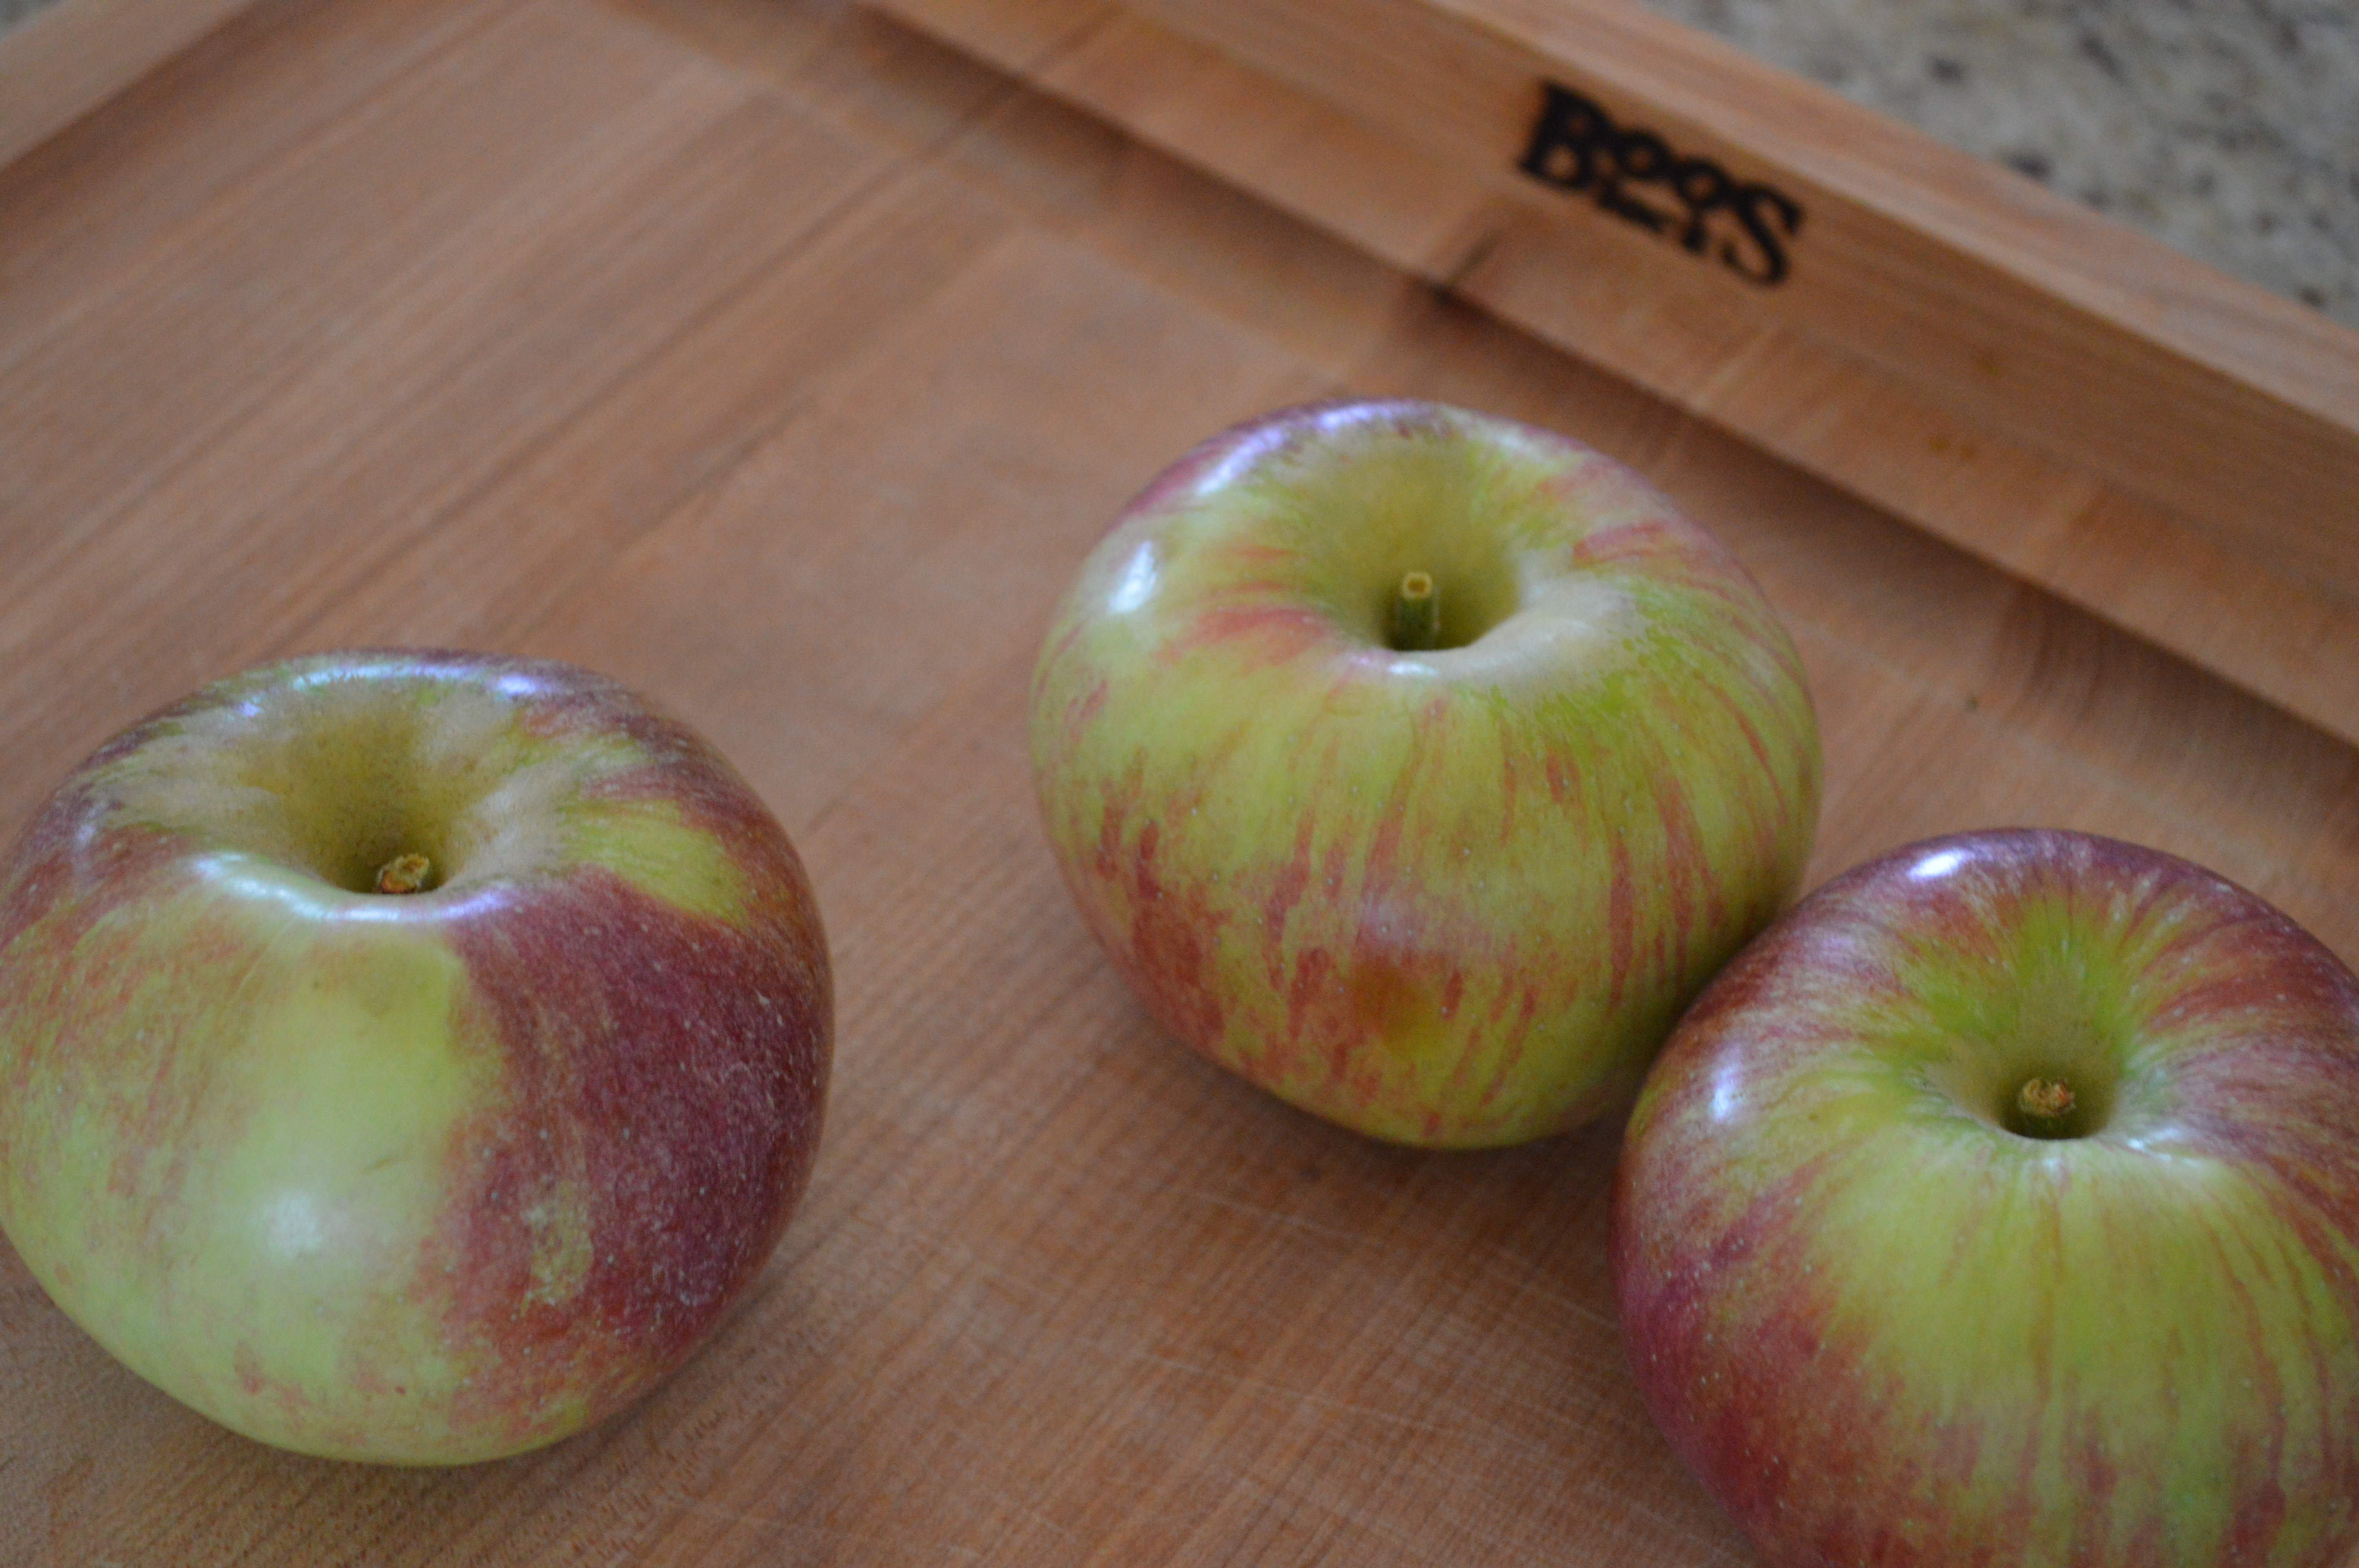
I knew I wanted to make something with the apples and had recently scanned through the Canning for a New Generation book. There was a recipe for applesauce that had caught my attention in the “Fall” chapter.

099

I asked which apple was good for making apple sauce. He said lots of them were, but his wife’s favorite for apple sauce is the Cortland variety.

Good enough for me. A woman who grew up on an apple orchard and continued to live there well into adulthood? She probably knows what’s best.

080

My dad treated me to my apples and got himself an Apple Slush, basically an apple Slurpie.

“Mmm, that’s good,” he said offering me a sip. It was.

He thought for a moment. “A suggestion?” the marketing extraordinaire questioned the orchard owner, “A little caramel in here would really just make it incredible.”

“They sell pretty well enough on their own,” the orchard owner bluntly replied.

Welcome to the country, Dad. If it ain’t broke, don’t fix it.

Another thing that clearly had not broken was the cash register. It looked like it was at least a hundred years old. It was a huge machine covered in ornate designs and complete with a big hand crank. The owner said he tried to use a computer once, but this worked better.

Again, if it ain’t broke, don’t fix it.

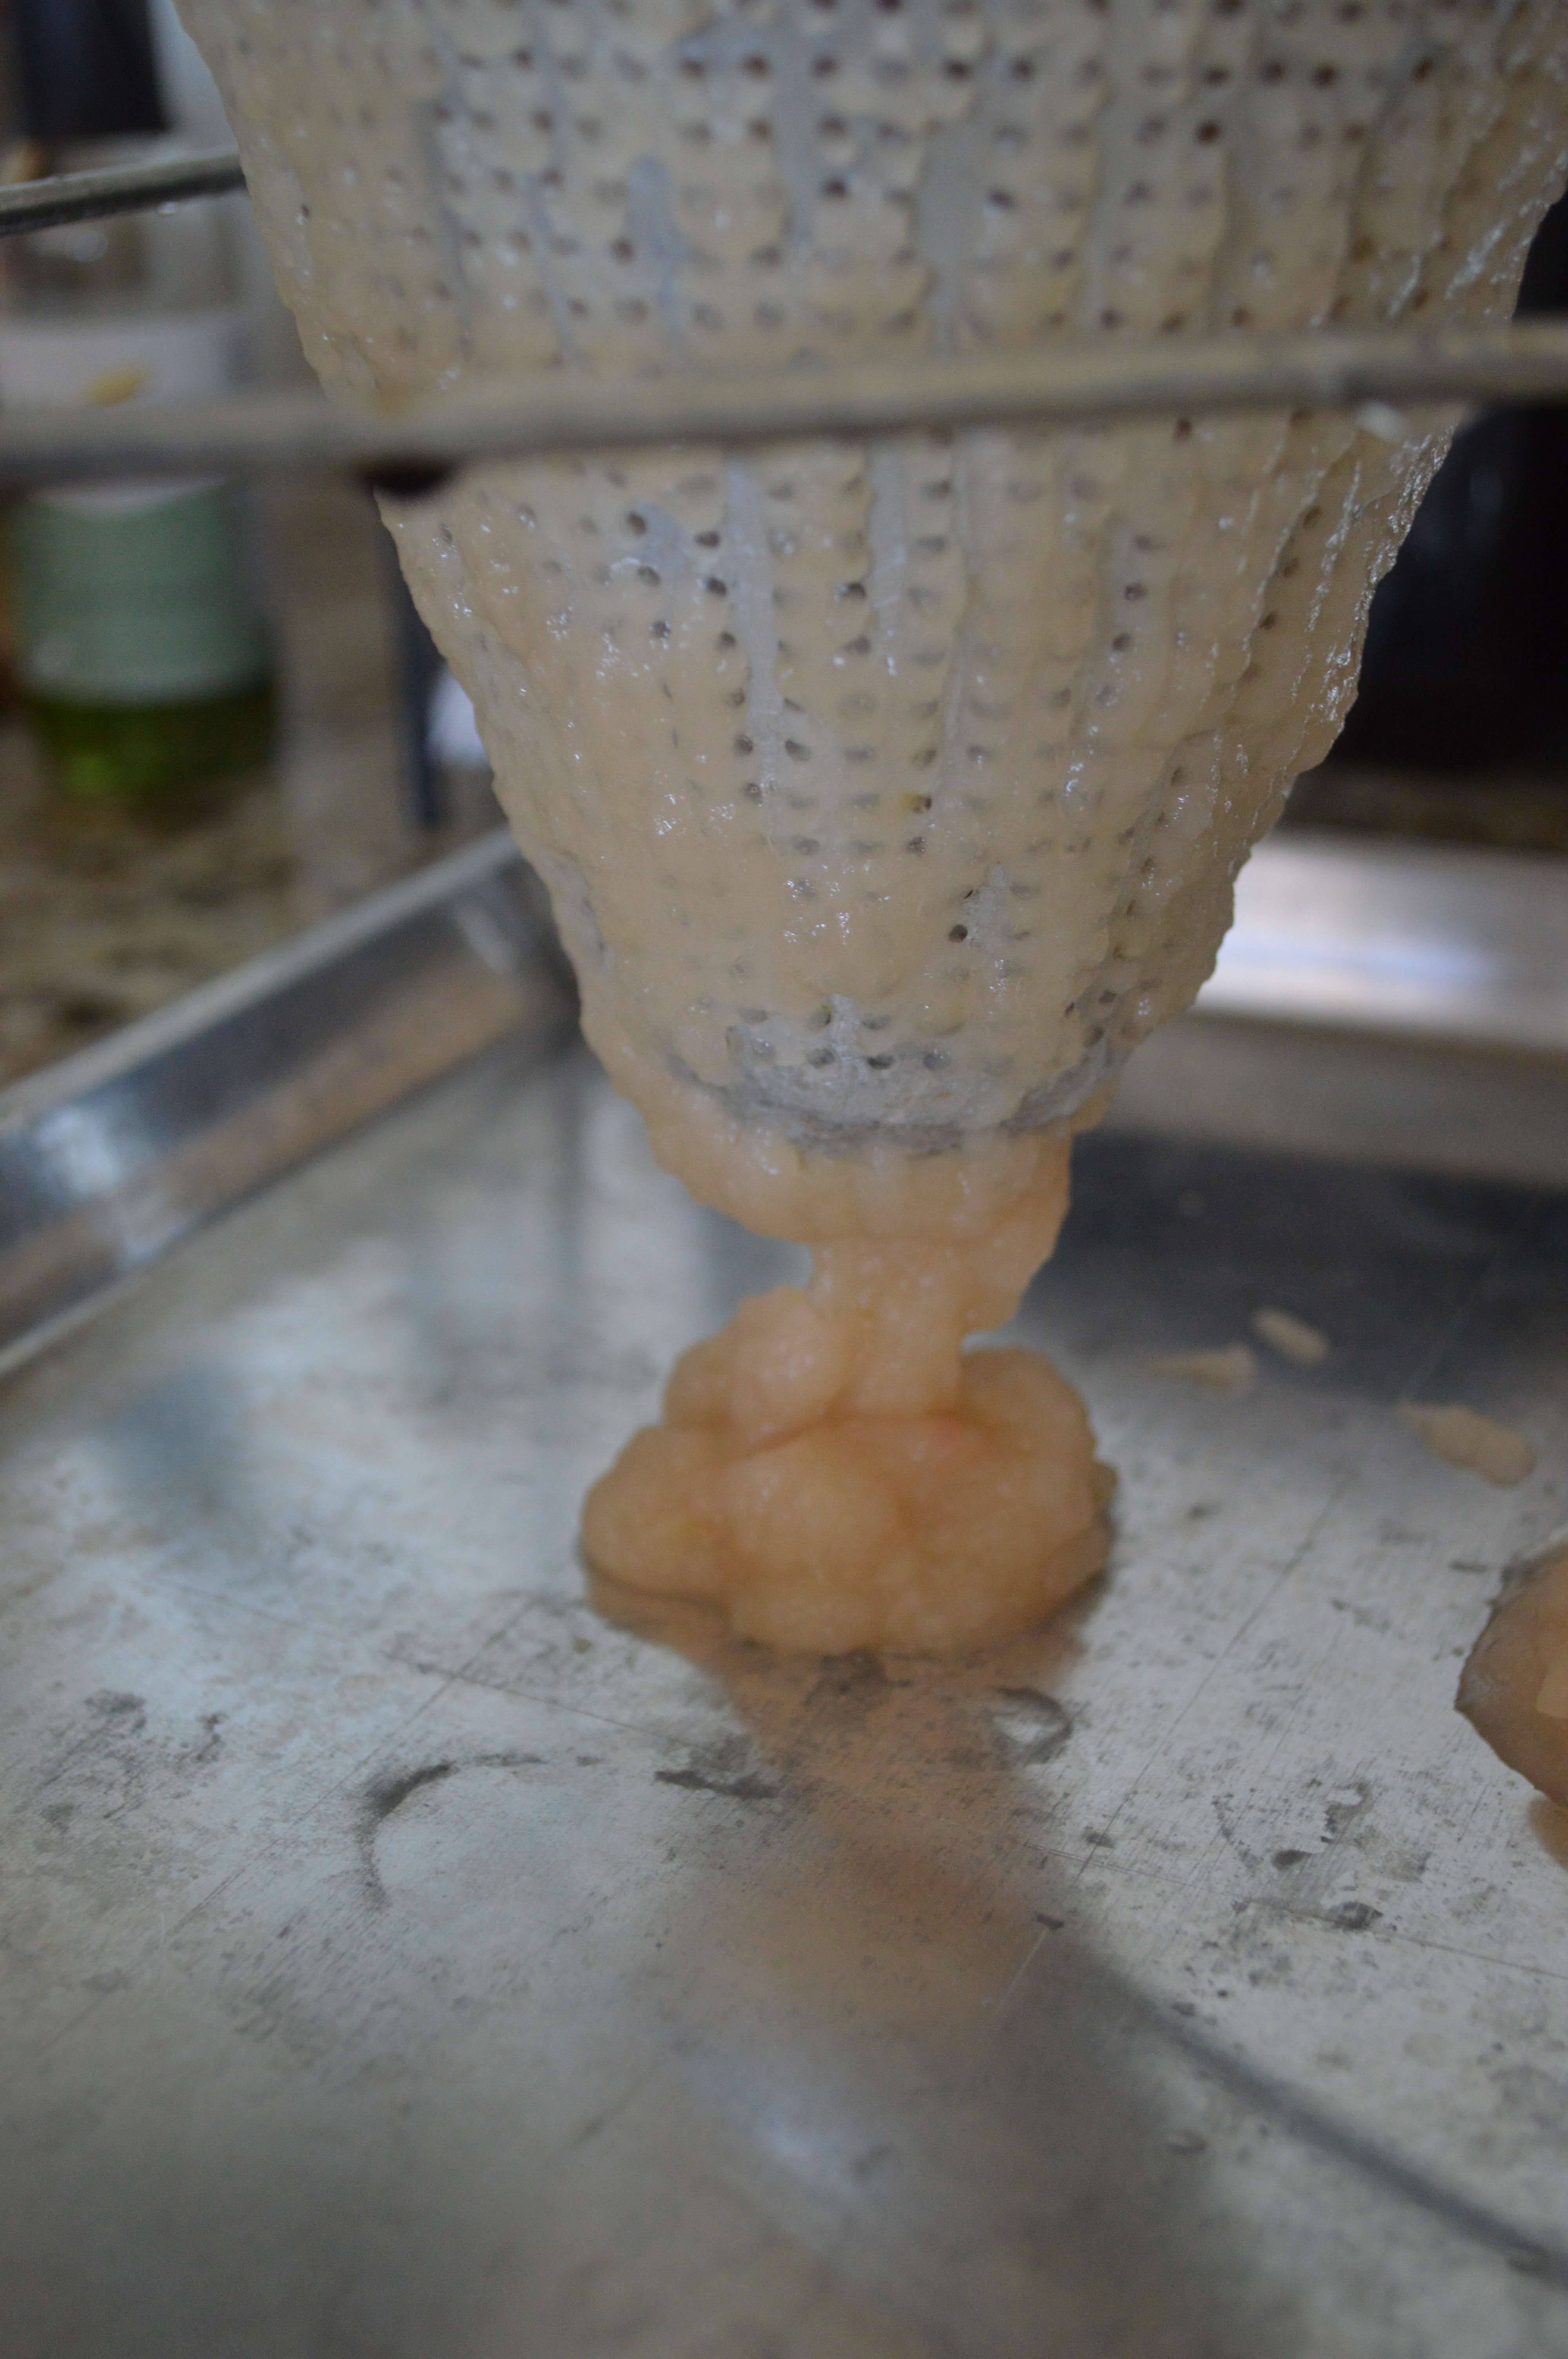
I took this mind set home with me and prepared to make applesauce. After cutting, boiling and mashing the apples I pushed them through an old, aluminum sieve with a wooden mortar that belonged to Adam’s grandmother.

113

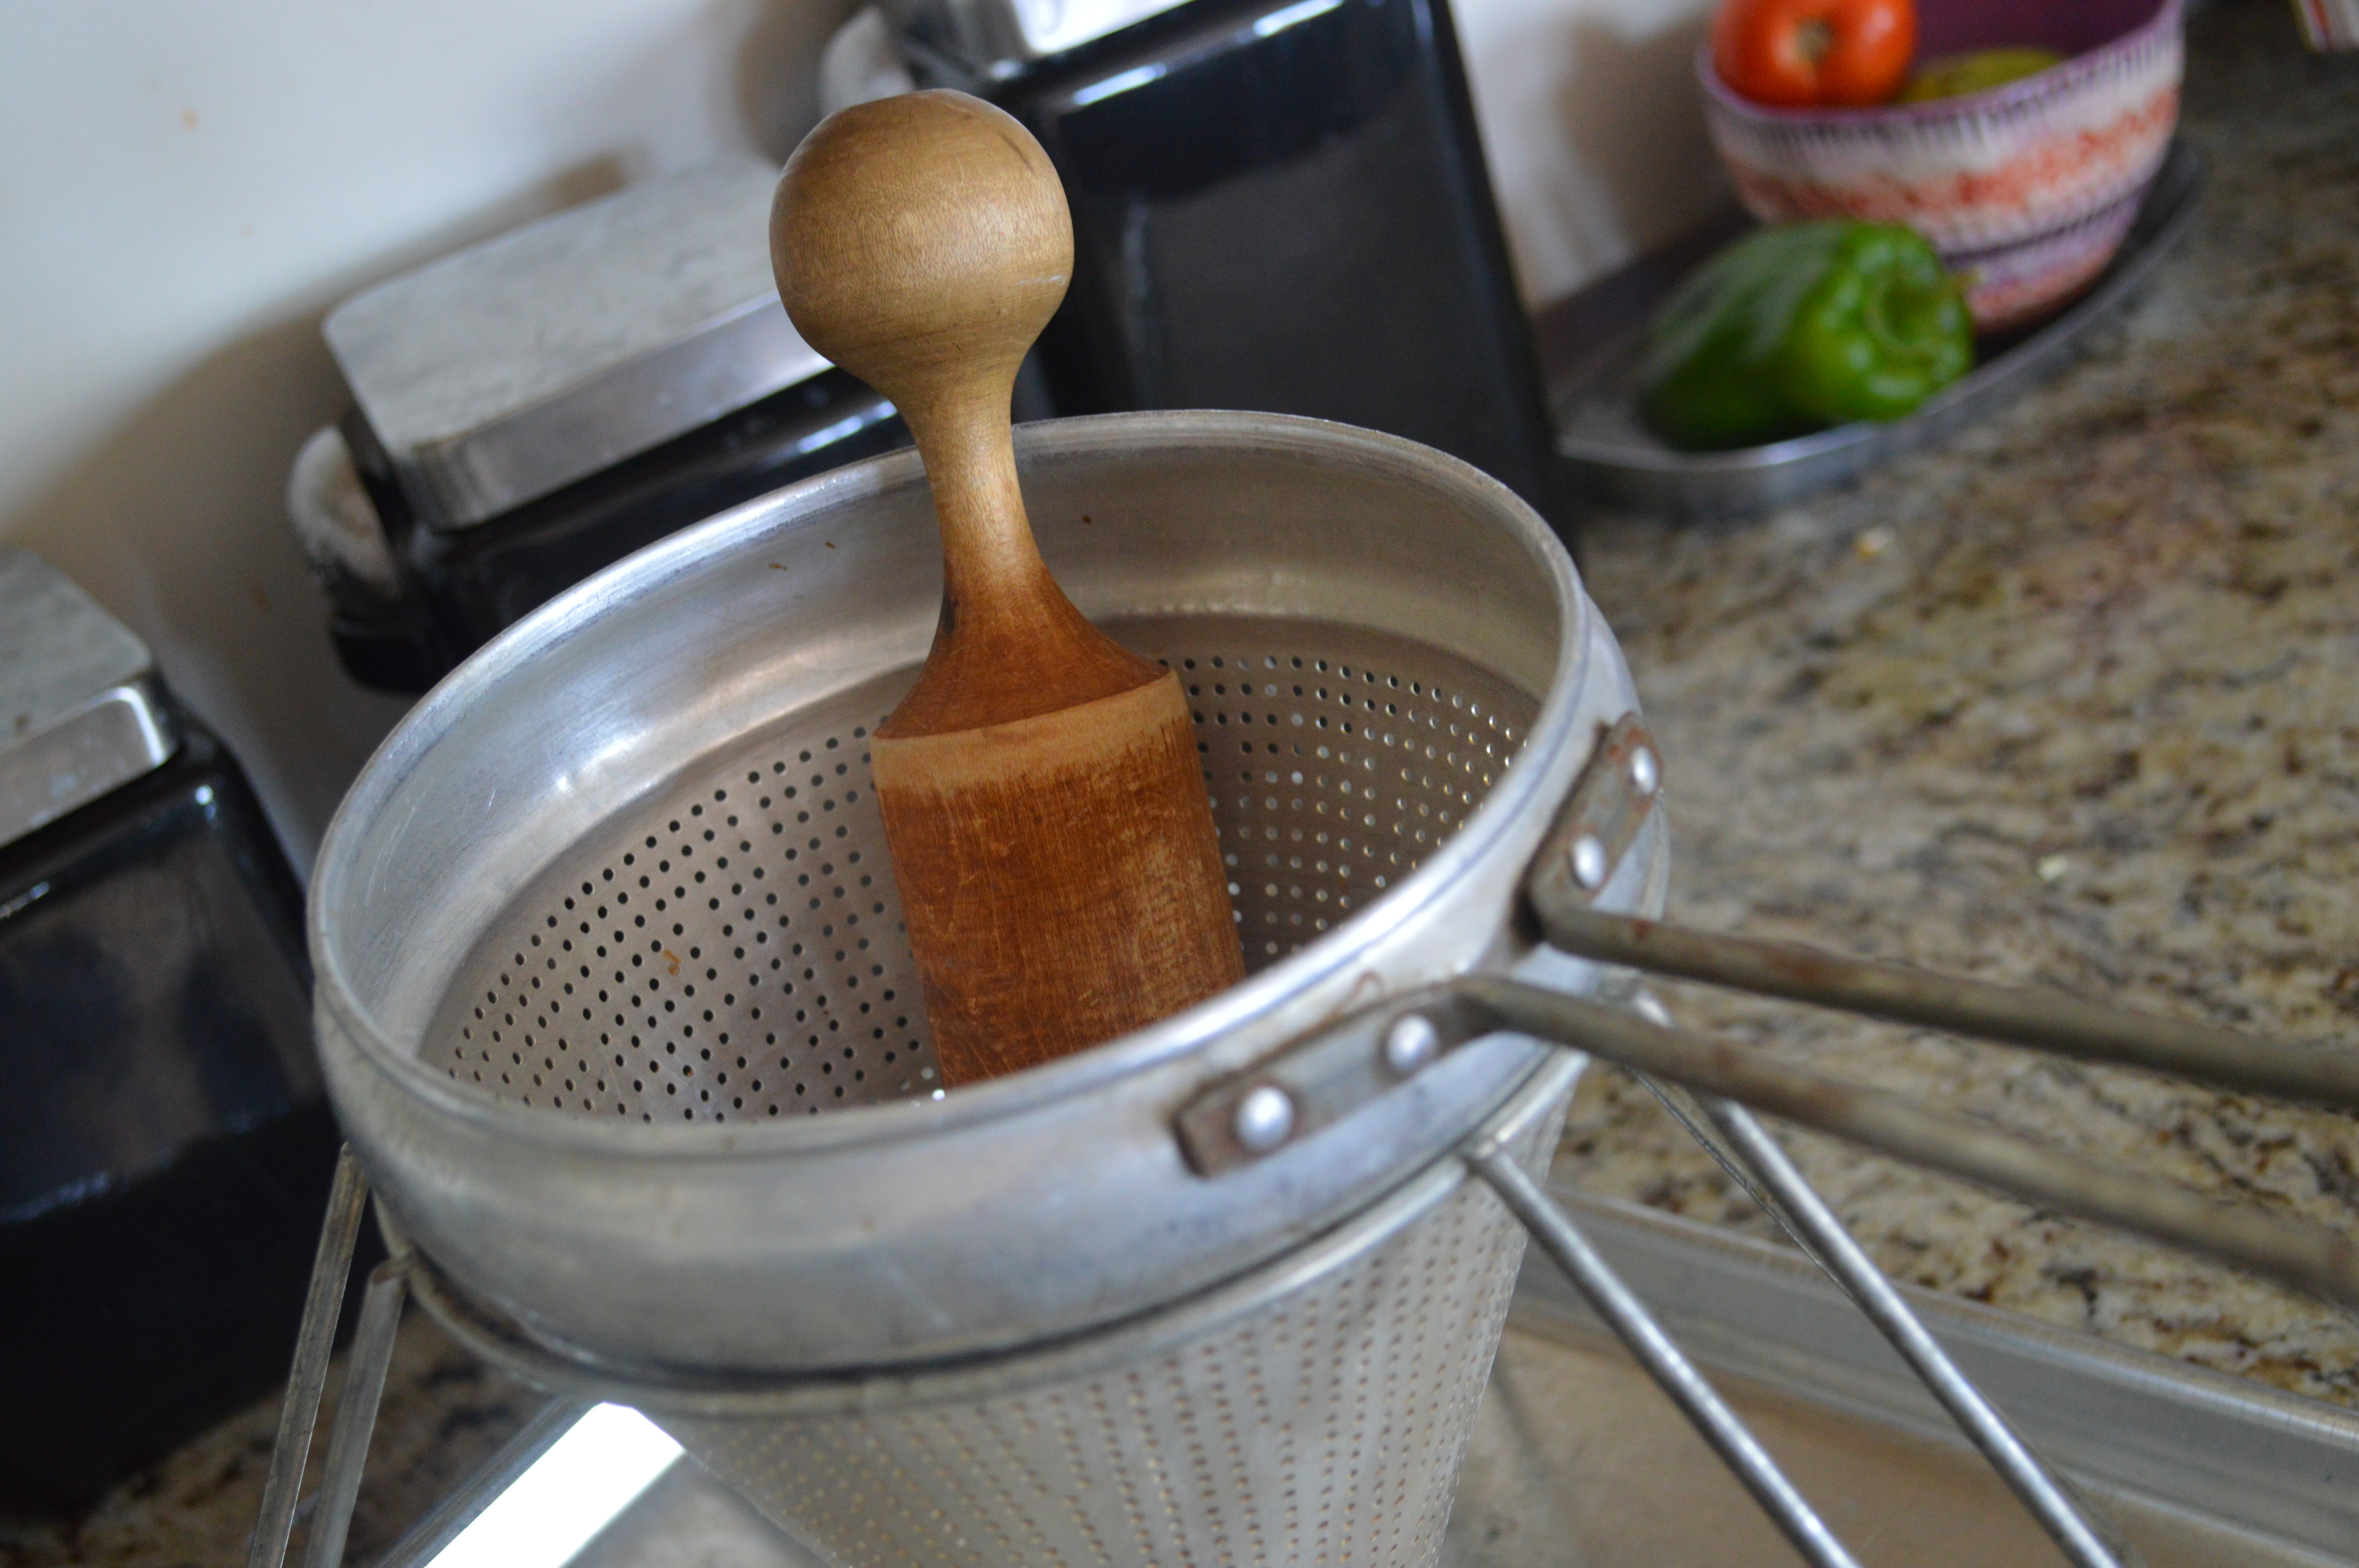
Adam found it in his childhood home after his parents moved out and had to hang onto it. It had still not been used since it was in our possession so I decided to give it a try.

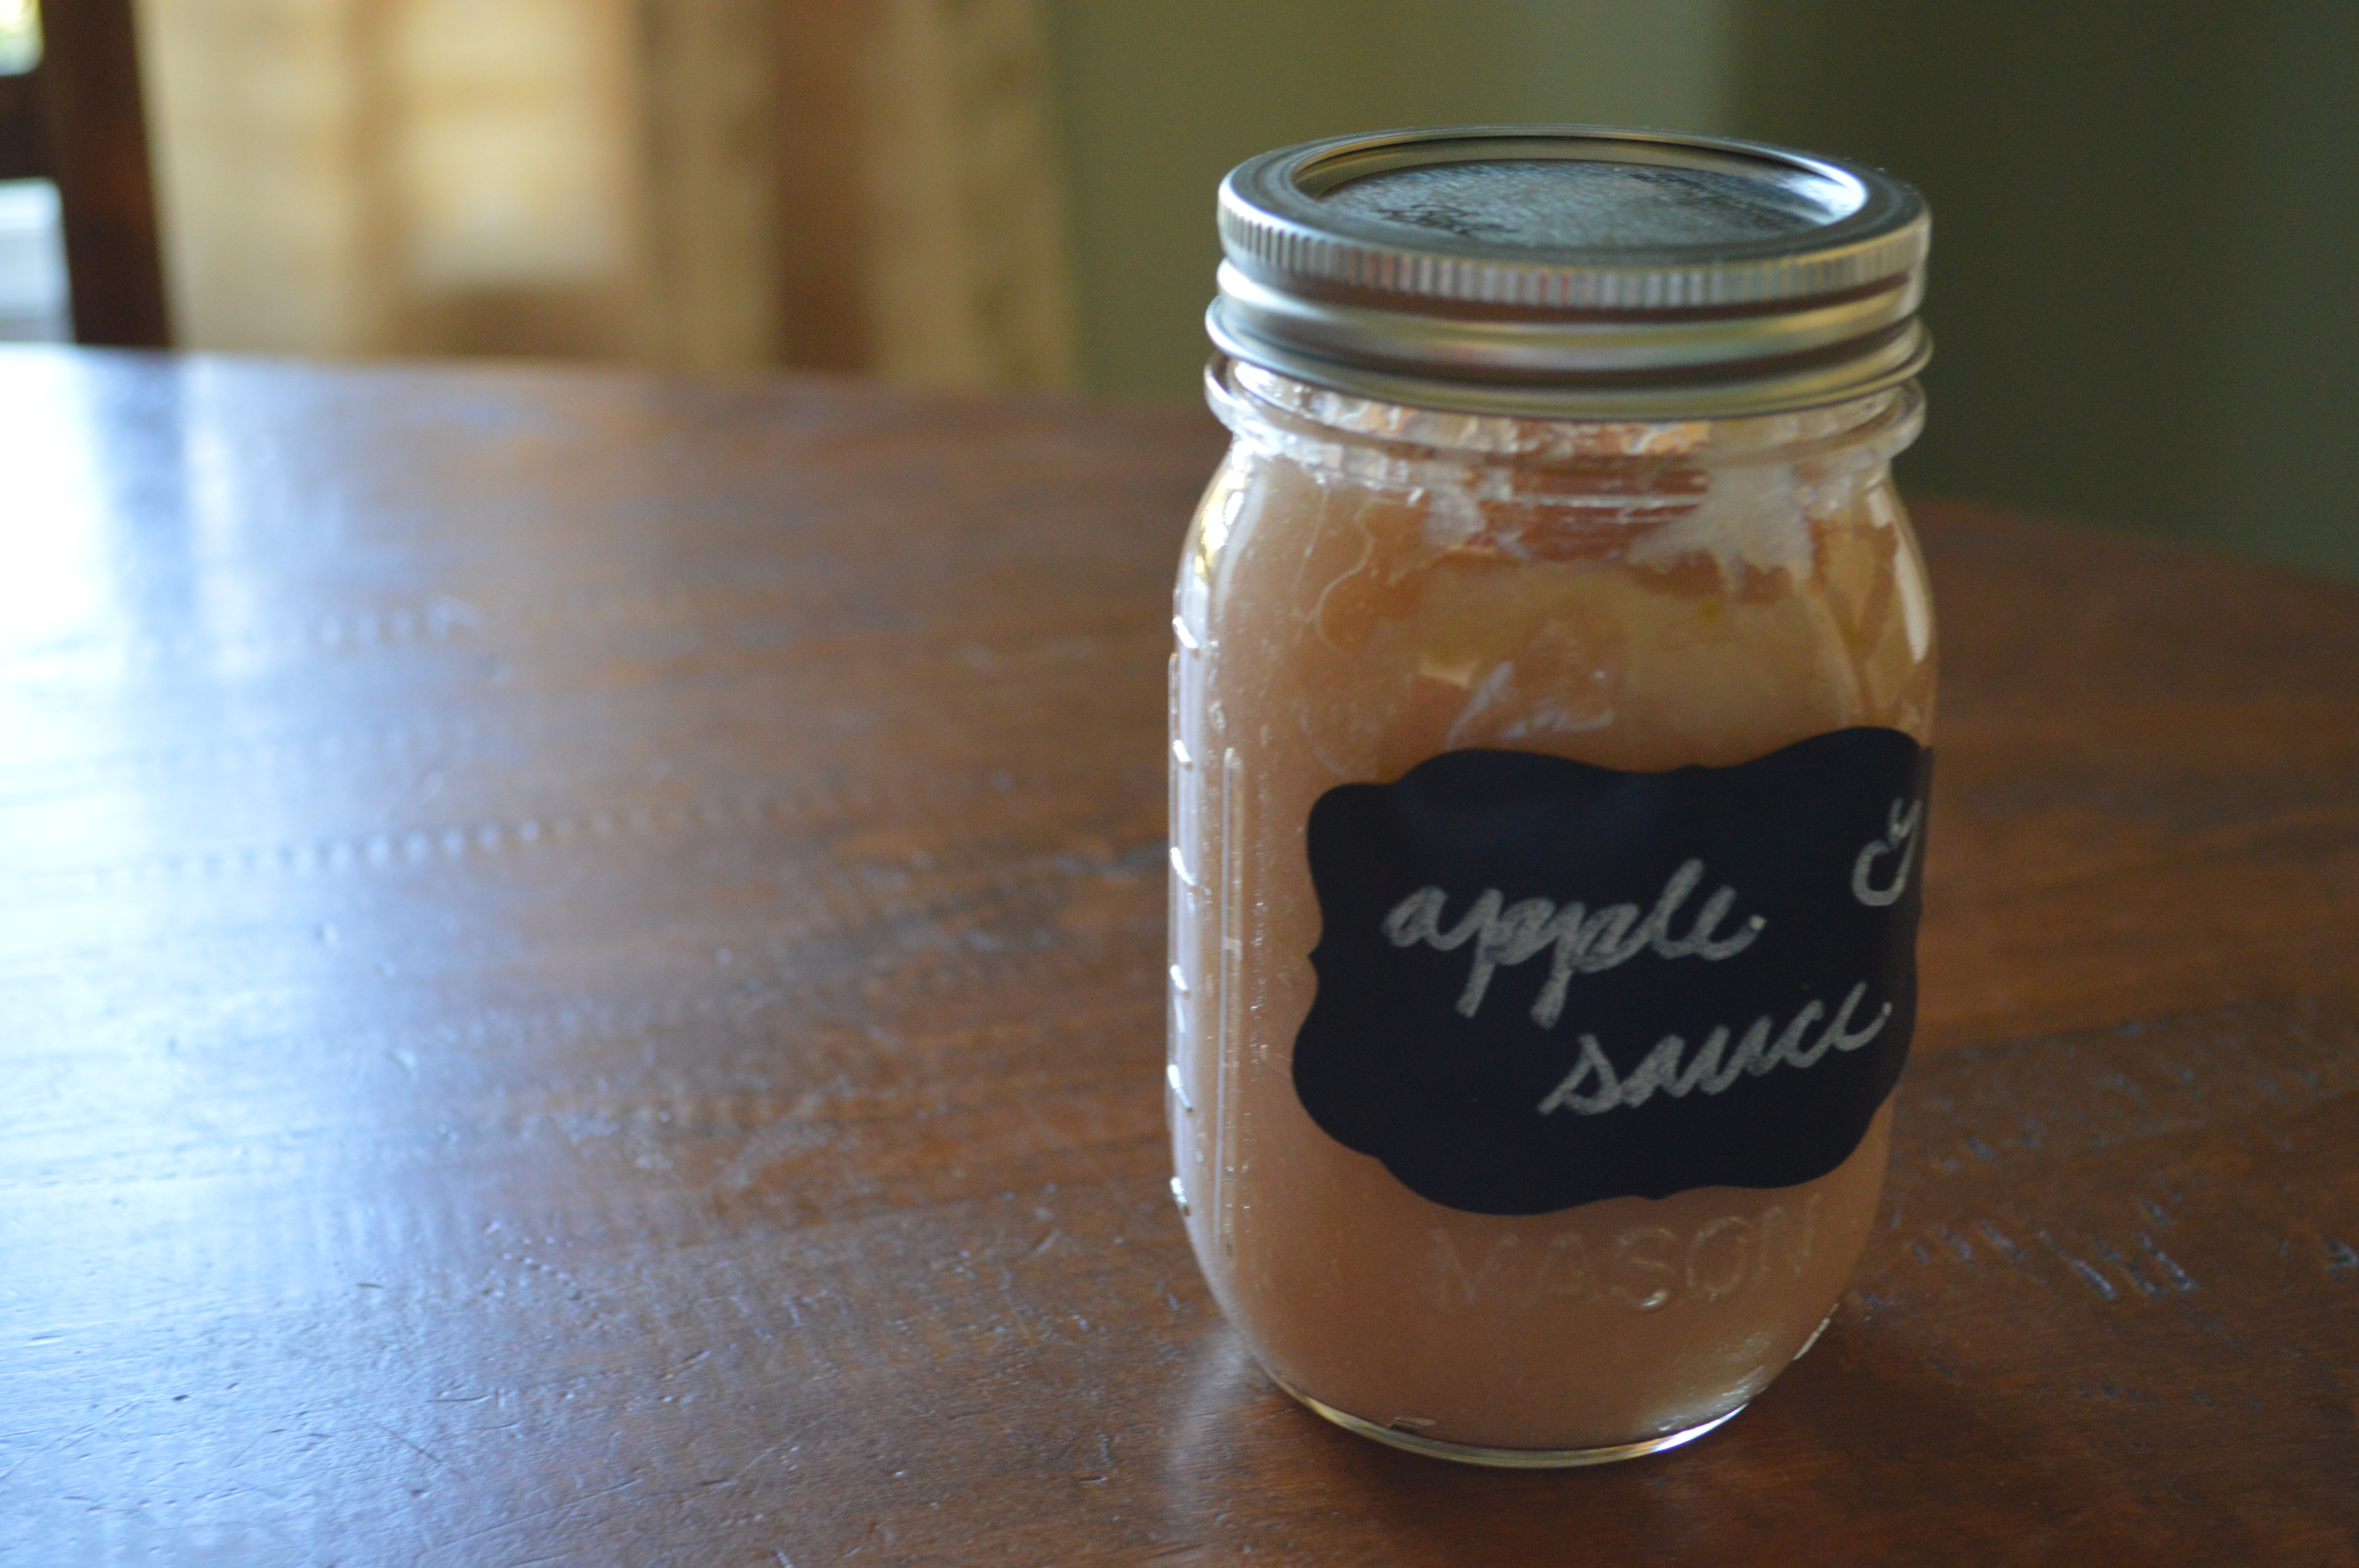
Oh my gosh. I discovered muscles in my forearms that I didn’t even know existed. It was crazy, hard work. But, with my peck of apples (… Minus a few for snacking.) I made two jars of apple sauce.

118

Here is what I did:

Get about about six pounds of apples (Not as many as you would think once you weigh them.)

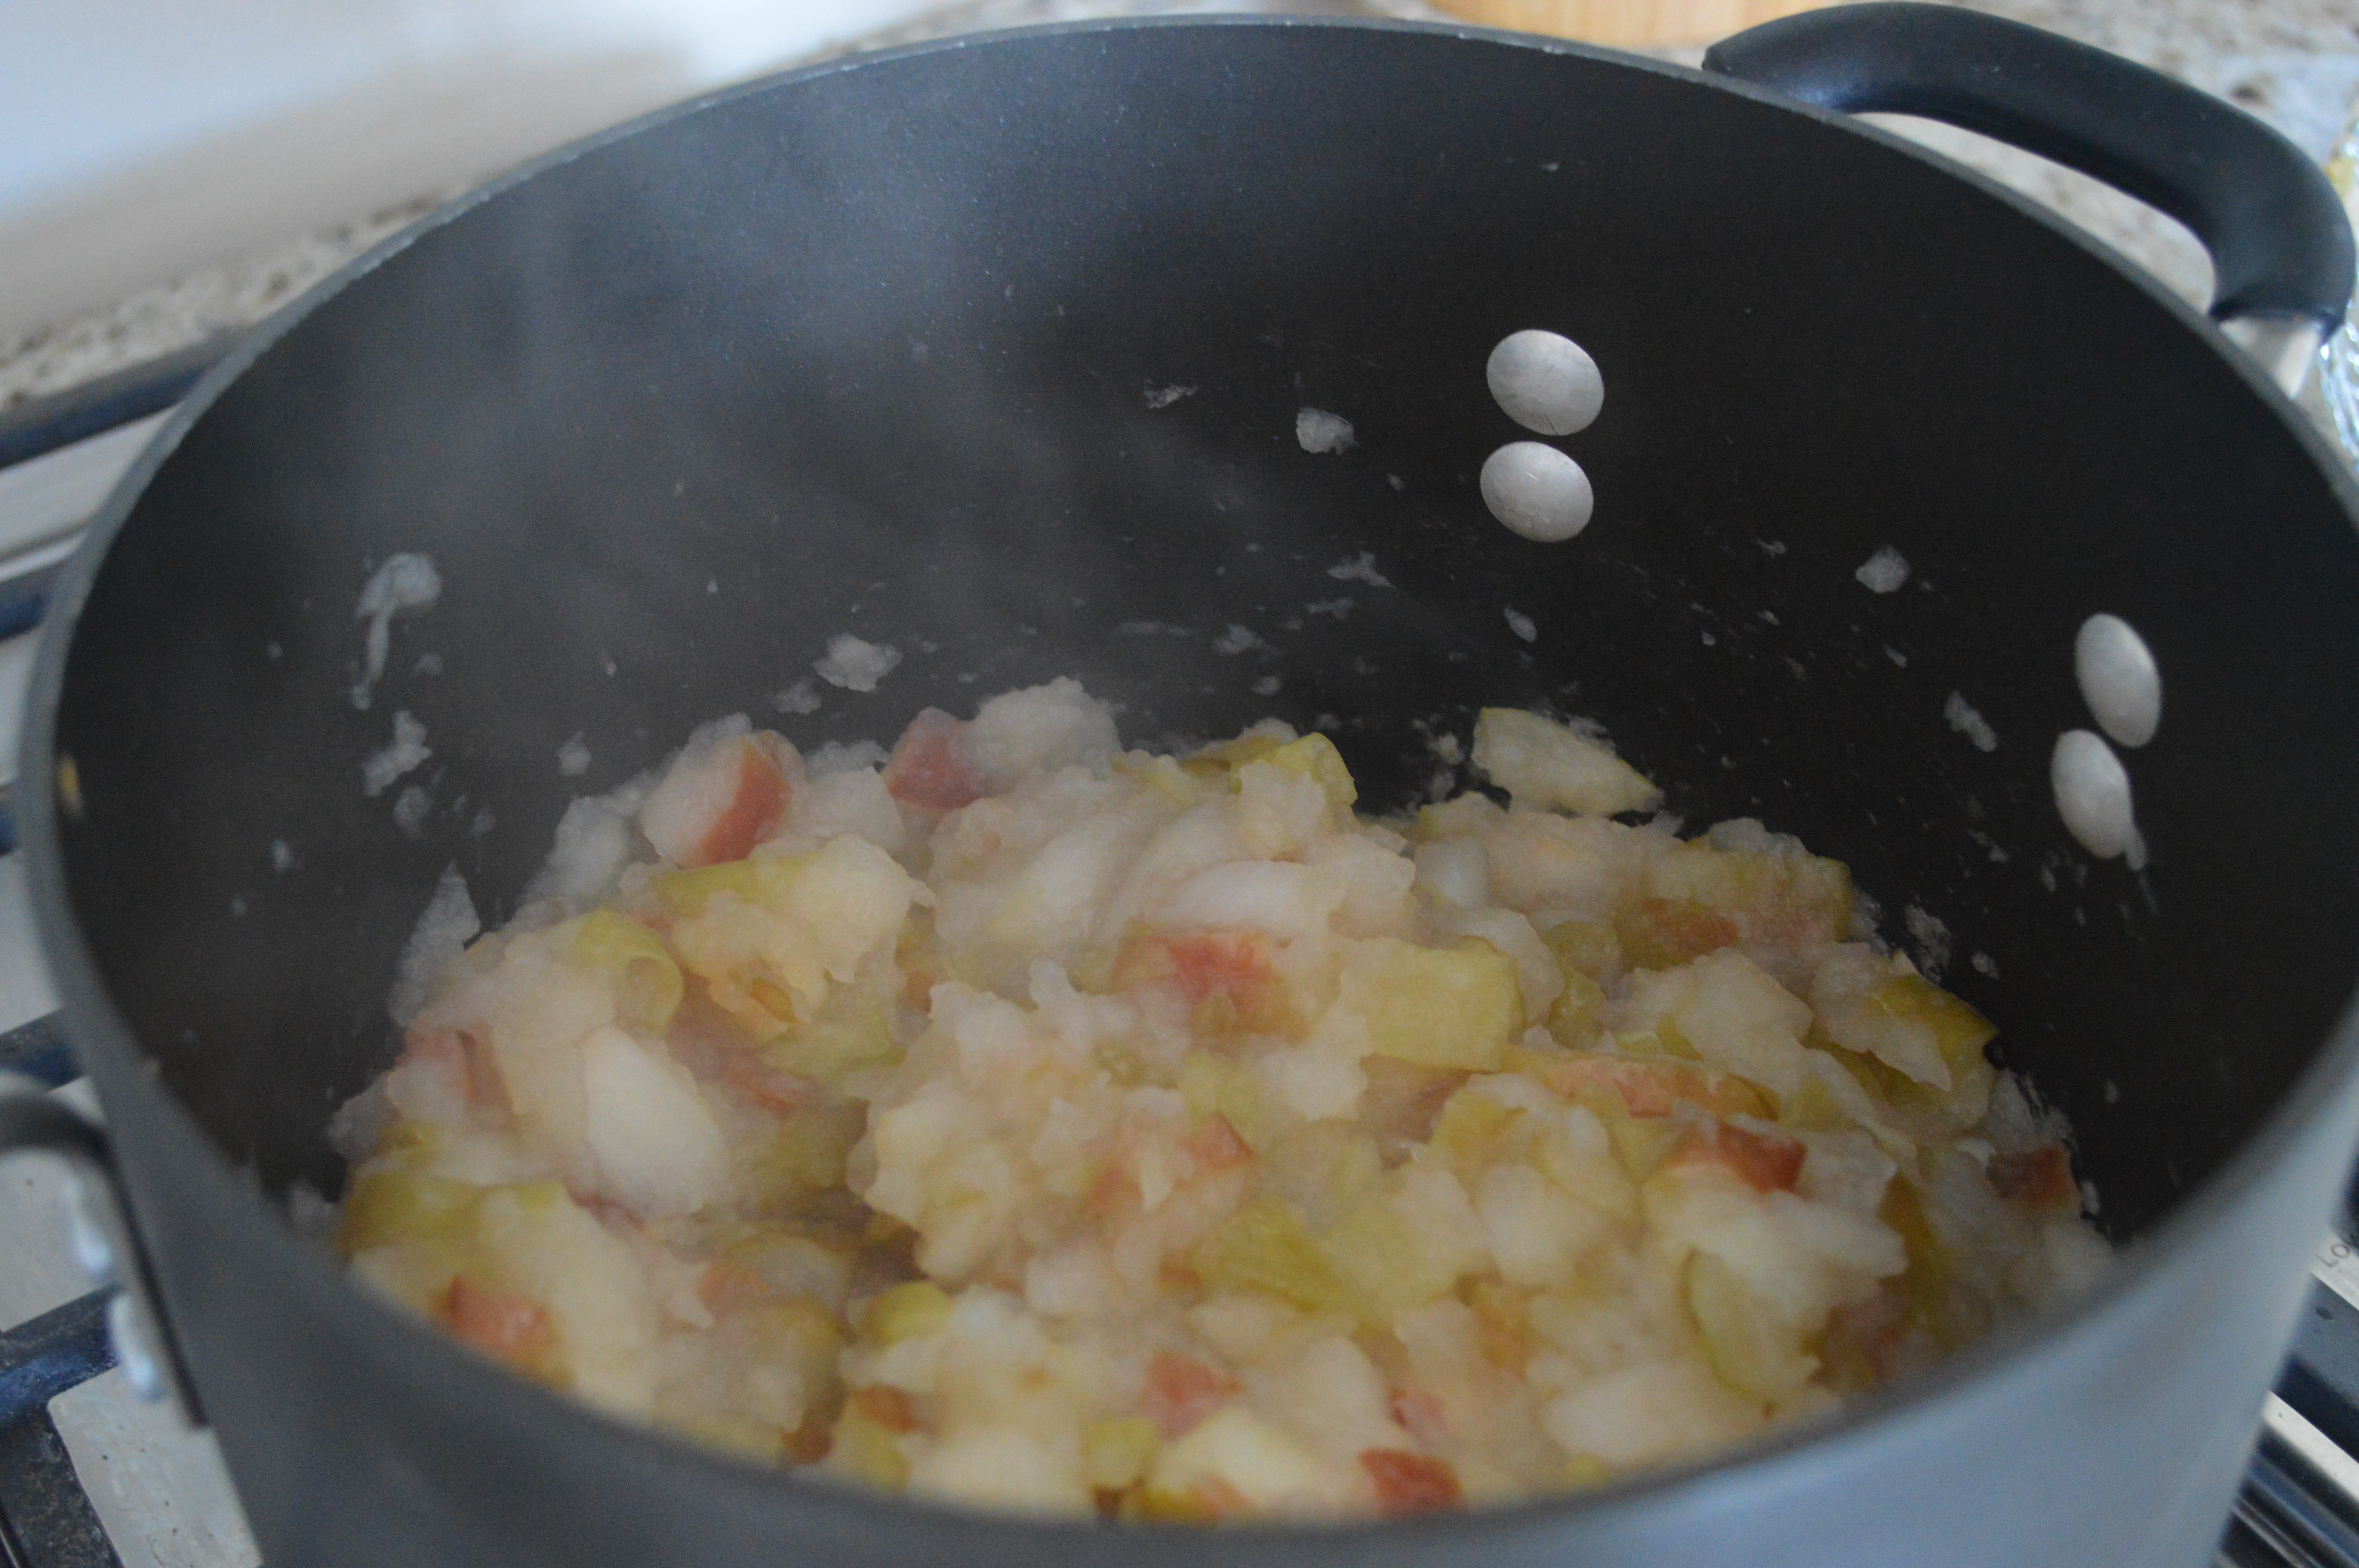
Core apples, cut into 1-inch chunks

107

Add to a pot with about 1 ½ cups water

109

Heat on high, bring to a boil and stir occasionally. As the apples cook down, the peels will separate from the apple. Cook for about forty minutes.

110

111

Pass through a food mill (or sieve). I had the puree fall onto a deep cookie sheet. You can use a bowl as well.

114

Bring puree to a boil for five minutes.

Can, if you would like. I did not, just because I didn’t make that much. If you were to water bath can apple sauce, process the jar in the boiling water for fifteen minutes.

The apples and applesauce were a perfect first taste of fall.

083

Now, time for chili… And maybe even a Pumpkin Spice Latte.

Filed Under: Agroturism, Plant, Recipes, Uncategorized Tagged With: Apple Sauce, Apples, Cortland Apples, Fall, Farlow's Orchard, Plant

Egg-citing News!

October 2, 2013 by theblogbloom.com 2 Comments

Yesterday was a Big Day!

I retrieved the first egg from the chicken coop!

007

We had been told that it would take five to six months for our birds to begin laying eggs. We brought the few days old chicks home on Mother’s Day, so I knew it was just a matter of time. Adam had also recently switched the birds from Chick Starter Feed to Layer Feed supplemented with oyster shell.

I came home from work and opened up the coop to let the chickens run free in the yard. Side note: We used to let them roam all day, but one day two didn’t come home. (… Can’t help but wonder if a predator was involved somehow.) They still have a fenced in area off their coop they can run in during the day.

Many of the chickens ran out to explore, but one hen hung back. I peered beyond the doorway of the coop to the three roosts Adam had built and sure enough there was a small brown egg. I was excited and kind of in disbelief.

As I stepped into the coop to investigate, it was almost like the hen knew what I was about to do. They normally scoot out of the way of our feet, but she stood her ground.

I felt bad. Was this her showing maternal instinct? I reasoned with my commiserating, female emotion: She didn’t have this maternal instinct thing all worked out. Otherwise, she would have been sitting on this egg. Plus, it wouldn’t matter how long she sat on that egg. She wouldn’t be getting a baby. There was no chicken hanky panky going on.

Shoeing her away with my hands, I made it to the roost and picked up the small, fragile egg. It was a lot smaller than I was expecting, but I read this would be the case in the beginning.

Tiny Egg... Going to need ten of these to make anything...

Tiny Egg… Going to need ten of these to make anything…

I couldn’t help but beam with a little pride as I carried the first of many eggs back up to the house. Once in the kitchen I placed it in a little ceramic egg holder I purchased at Anthropologie right after we got the chicks last spring in anticipation for this moment.

010

I laughed.

It was like I had been nesting.

In fact, the whole process of raising a chick to lay eggs seemed a little bit like pregnancy.

The excitement when you first get the chicks.

Seeing them grow bigger and bigger every day.

Getting fun accessories like the egg holder or asking everyone you know to save you their egg cartons because their “coming.”

Then it comes and it’s a lot smaller than you thought it was going to be.

But, it’s wonderful. And fun!

And then you start thinking of all that it could become…

An omlet?

A frittata?

Quiche?

… The possibilities are endless.

Below are some fun shots of the grown ladies. We have seven.

037

047

049

Filed Under: Plant, Uncategorized Tagged With: anthropologie, Chickens, chicks, Egg, free range chicken, Plant, Roost

Yes, You Can Can!

September 19, 2013 by theblogbloom.com 1 Comment

Can we talk about how it is almost October?

Where has September gone!?

My September, so far, can be summed up pretty quickly: Work and canning.

I recently told a few women at work that I needed to get some canning done over the weekend. They stared at me with blank faces.

“Claire, don’t take this the wrong way,” one of the ladies started, “You just don’t…hmm? How should I say this? You don’t seem like the kind of girl who would be into canning.”

Another chimmed in, “Yeah. I would never think you raised chickens or had a garden.”

The first lady continued, “You’re just really domestic. It’s just you don’t look like a girl who would do that. You are young and… pretty.”

Embarrassment burned in my cheeks and with a little laugh, I quickly changed the subject.

I got back to my office and began to question everything.

… Do I come off as a young and dainty ditz who only cares about my appearance?

What does someone with chickens look like?

… Okay, stereo-typically speaking, probably not like me in my business casual attire. Sure.

What does someone who cans look like?

That’s when it hit me.

Those women were imagining their grandmothers.

Those middle age women may have never canned because they didn’t have to. Their grandmothers, before food processing reached its prevalence, had to.

While canning today is not mandatory, it sure is rewarding. Not to mention, fun!

I recently purchased Linana Krissoff’s, Canning for a New Generation. The tips, recipes and photos all looked great. Plus, it just seemed appropriate… 😉

102

It’s a great resource for newbie canners.

There are also tons of other great resources all over the internet, but be cautious in your searches. Anyone can write a blog (… this can be a positive thing too. I am living proof!) and canning incorrectly can potentially be dangerous as botulism can live and grow in improperly processed cans. Eek!

That being said, don’t be too scared to can at home. Just do your homework and study up.

I had never canned anything before this summer and would suggest checking out Ball Jar’s website or the USDA’s recommendations found here: http://nchfp.uga.edu/publications/publications_usda.html

Here are a few other good things I picked up from my rookie canning adventures:

Make sure you have all the tools you need. I have a canning kit that has a jar lifter, a funnel, a magnetic lid lifter, and a jar wrench. These kits are sold at any kitchen or home improvement stores. This time of year is a great time to get a canning kit on sale. I got ours a year ago at an end of season sale at a major discount.

003

The funnel is great for keeping products in the jar and off the rims.

The funnel is great for keeping products in the jar and off the rims.

The magnet helps place the lids onto the jars without using your fingers.

The magnet helps place the lids onto the jars without using your fingers.

Tongs are key when canning.  It helps in placing jars into the water bath and removing them at the end of processing.

Tongs are key when canning. It helps in placing jars into the water bath and removing them at the end of processing.

I also use water bath, which is a huge pot. It can take some time to bring to a boil, so plan accordingly.

002

Be sure you are working with clean jars. I always inspect the jars before sterilizing them in the water bath for chips that could prevent the lids from sealing.

015

Jars and rings can be reused, lids cannot. Ball sell’s lids individually so you don’t have to invest in new jars every year.

There are a lot of seasoning packets that make creating different flavors of pickles, salsas, and sauces easy. They also include cooking times for the product you are creating so it takes out a lot of the guess work. I used these often, but did manage to create a handful of batches from scratch.

Once canning is complete, let jars sit. I leave ours alone on a cooling rack for twelve hours just to ensure they seal correctly.

076

Finally, be certain to do a victory dance for every “Pop!” you hear indicating the jar has sealed…!

Bonus Tip from Adam: Be prepared for a lot of dishes.

… I laughed when he told me to add this. It’s funny and true. We did it 100% without a dishwasher because our house is new and we don’t have power in our island yet. If we can do it, you can do it. (Although, I am sure a dishwasher helps.)

Even with the many rounds of dishes, canning is so gratifying.

I look at our dining room table, covered in Ball jars and smile.

068

The sauces and salsa’s made from our garden ingredients will be welcome in the winter when a fresh, flavorful tomato is hard to come by. I also can’t help but wonder if this will help keep our grocery bills down.

014

Don’t be scared or intimated.

Break down the stereotype.

You can can!

... And can in Charlotte York style!

… And can in Charlotte York style!

Filed Under: Canning and Preserving, Plant Tagged With: Ball Jars, Canning, Cookbook, Plant, Preserving, Salsa, Sauce, Tomato

Sunday Funday.

September 8, 2013 by theblogbloom.com 5 Comments

Happy First Football Sunday!

… Or Merry Christmas, if you are speaking with my husband.

Adam looks forward to this day all year long.

With harvest picking up, Sunday’s are his only day to relax and not worry (…too much) about work.

Adam and I have established a little bit of a tradition for early Sunday afternoon football games that date back to my first apartment in Indianapolis. It’s fabulous. We take our time waking up, make brunch, throw something in the crock pot for an early dinner after the game, all while drinking Bloody Mary’s.

011

Adam has spent the last few years trying to perfect the Bloody Mary.

And he really has done some research. He has befriended bartenders and expert tailgaters at football games and NASCAR races. (AKA all the professionals in this field.)

Ingredients have included everything from Pepper and Bacon vodka, pickle juice, horseradish, Worcestershire sauce, pickled okra, bacon and many others.

016

PS- it’s been a really hard job being the taste tester for all these cocktails…

Adam’s grandmother recently shared her recipe for tomato juice with me after seeing how tomatoes were taking over my counter tops. While reading through the ingredients, I thought how it would make a great Bloody Mary base.

When I shared this with Adam, his passion for the perfect Bloody Mary came to life and he instantly got to work canning his own Bloody Mary mix.

009

Here is what he did:

021

Ingredients:

Approximately 20 Tomatoes (Adam used a few different kinds, including Roma and Beefsteak)
Two cloves garlic, minced
Two yellow onions, minced
Three ribs celery, chopped
1 Bell pepper, chopped
1 Poblano pepper, chopped (Any spicy pepper, like a jalapeno, would work)
1/3 cup prepared horseradish (Not horseradish sauce)
1 ½ teaspoons of crushed red pepper flakes
1 tablespoon Tobasco (Any red pepper sauce could work)
¼ cup sugar
1/3 cup lemon juice
½ tablespoon salt
½ tablespoon celery salt

Heat tomatoes in boiling water for about three minutes. Place immediately into ice water bath. Core, skin and cut tomatoes into wedges.

Add all ingredients, including blanched tomatoes, to a large stock pot. Cook over medium heat. Simmer for 40 minutes, stirring occasionally.

Vegetables should cook down and turn to juice.

Strain (we used a mesh strainer), pushing out as much juice as possible. After straining, return juice to the pot and bring strained tomato juice to a boil.

Put juice into 1-quart jars. (Make sure jars are clean and sanitized before processing begins. Ensure all lids are clean and unused.)
Process in boiling water bath with a half inch of water over the top of the sealed jar for forty minutes.

Remove from water bath and place on cooling rack for at least four hours. Make sure each jar seals. If jar does not seal, consume the mix in the next three days.

Today we tried to Bloody Mary mix for the first time. We mixed in about a shot glass of vodka and a splash of spicy pickle juice.

009

Perfectionist Adam said he liked them, but he still needed to work on it as he dug through the fridge for more Tobasco.

... annoying photographer.  I know...

… annoying photographer. I know…

I, however, thought they were great. I loved the fresh flavor. It didn’t taste watered down or too salty. The pickle juice was perfect. There was enough spice to keep it interesting. Perfect.

024

And the Colts won! So, who knows?! Maybe this Bloody also has a splash of luck.

027

Filed Under: Canning and Preserving, Plant, Recipes Tagged With: Bloody Mary, Canning, cocktail, football, Plant, recipe, Tomato

A Corny Post.

September 4, 2013 by theblogbloom.com 2 Comments

I first visited the home Adam grew up in about five years ago. We were about to go on a canoe trip and he needed to pick up some of his camping supplies. While there, he also decided to change the oil in his truck.

(… I have said it before and I will say it again: The guy is handy.)

It was pre smart phones so I got bored rather quickly. While he was elbow deep in his truck, I decided to walk around. His childhood home was surrounded by fields that are farmed each year rotating between soybeans and corn. That year it was corn. We were there in late August and the corn was as tall as Adam.

033

As I walked towards the edge of the driveway and up to the start of the corn field, I remember being so surprised. Each stalk only had one ear, maybe two, of corn.

032

Really? That’s it?

As a Midwestern girl, born and raised, I have driven on highways surrounded by corn fields all my life. I could have sworn there were at least six ears to a stalk.

I walked back into the garage and squatted down to Adam’s level.

“Hey Bud. Random question… Are there really only one or two ears of corn on a corn stalk?” I asked.

Adam slid out from under his truck with a confused look on his face.

“Well, I thought there would be, like, six or seven ears. The corn out there only has one.” I tried to explain, what apparently was, a weird question.

“Yep. Just one. Sometimes two. Depends.”

Hmm, I thought looking back at the field.

Field corn surrounding our new home.  (And the chickens.  Arn't they cute?!)

Field corn surrounding our new home. (And the chickens. Arn’t they cute?!)

Now I was the confused one. “It seems kind of inefficient. It’s just, a stalk takes up a lot of space. And you only get one ear?”

“Yep,” Adam said, sliding back under the truck.

Still looking out at the corn, still perplexed, I asked another question: “So, when can we eat it?”

Adam laughed.

“Babe. We won’t eat that. That’s not sweet corn. It’s field corn. Sweet corn is a different kind of plant. It’s mainly grown in the south.”

Umm. What?

All these years of driving around Illinois, Indiana and Ohio I thought I was looking at what would wind up at a picnic and here I am, at twenty-one years old, learning all this?

Later, I shared my newfound knowledge with my east coast raised father. In his mid fifties, he had the same reaction to the news that corn stalks only have one or two ears: “Really? Never knew that. That seems inefficient.”

That’s what I am saying..!

However, he was in on the sweet corn versus field corn thing…

And while Indiana is home to acres of field corn that will eventually become oils or ethanol, many farmers and home gardeners in Indiana do grow sweet corn.

However, this year, Adam and I were not one of them.

Sweet corn is a little challenging to grow. Its success relies on the amount of rain during the growing season and the amount of attention the grower is able to give it. Two things we couldn’t guarantee at the beginning of the summer.

But, it was okay. We also knew we wouldn’t be without corn. Everyone around us grows sweet corn. It pops up on every other corner within ten miles of our home at temporary farm stands throughout the late summer.

Fortunaly, rain was not an issue this summer. Everyone who grew sweet corn had success. Many of Adam’s clients grew sweet corn and he would receive ears of it by the bushel every day. Free of charge.

We couldn’t eat it fast enough so we decided to freeze it. Freezing any vegetable, especially corn, is a great way to lock in fresh, natural flavor.

Here is how we did it:

Note: You want to either eat or process corn as soon as possible. The longer ears of corn sit untouched the more nutrients and flavor are lost.

Step One: Shuck all the corn. Pull all greens and silks from the ears.

IMG_1675

Step Two: Get set up. Bring a pot to a boil and get a bowl of ice and water ready. We actually used a clean cooler filled with ice water because we were working with so much corn.

photo (68)

Step Three: Boil corn for about five minutes.

photo (69)

Step Four: Remove corn from boiling water and immediately place into ice water. This will stop the cooking process and ensure all the sweet corn flavor that you know and love will remain with the corn.

photo (70)

Step Five: Remove corn from ice water after about five minutes. Remove kernels from corn cob.

There are a lot of neat gadgets out there to make the removal of corn kernels easy, but a knife works just fine. What we did here was turn a small bowl upside down and place in the center a large skillet. Running the knife along the cob as it’s held on top of the small bowl, the kernels will fall into the skillet making collecting the kernels (and clean up) easy.

photo (71)

Step Six: Place corn onto baking sheets and freeze. Once frozen, use a spatula to remove corn from baking sheet and fill into freezer bags, squeezing out as much air as possible. Keep in the freezer for up to a year.

photo (72)

The flavor of sweet corn frozen at home is so much sweeter and authentic than corn from major frozen vegetable companies. This is because those companies remove so much of the corn’s natural sugars in their processing as it can make their continually used equipment very sticky. Not to mention, they would have to get the corn frozen much more quickly than they do. Otherwise, they are going to go into whiskey making business fast.

But there are some businesses trying to break the traditional manufactured sweet corn mold.

Last week, I had the opportunity to meet two incredibly inspiring Indiana entrepreneurs who are trying to bring the “Home-Preserved” fresh flavor of sweet corn to the commercial market. I even got to tour their brand new processing facility.

Working the big hair net on the tour... Looking good, right?!

Working the big hair net on the tour… Looking good, right?!

Through their new business, Husk, they are purchasing sweet corn straight from farmers just around the corner from their processing plant. With a little creativity (Example of this? French friers full of boiling water versus oil to cook the many corn cobs received every day.) and a ton of motivation they are changing the frozen corn market in Indiana.

1157614_631641993520893_1738933582_n

Since their inception at the start of this year’s sweet corn season, they have cut and frozen 60,000 pounds of sweet corn. Check them out: http://huskfoods.com/

And, Hoosiers, If you can’t find their product at your favorite grocery store, request it!

Filed Under: Canning and Preserving, Plant, Uncategorized Tagged With: Corn, Freezing, Husk, Indiana, Plant, Preserving

Mozzarella and Marinara: An Irish Girl’s Attempt at Italian

August 27, 2013 by theblogbloom.com Leave a Comment

There is a little part of me that has always -secretly- wished I was Italian.

But, I am Irish.

Very Irish.

My name is Claire, after County Clare in Ireland. My sister is Kerry, after County Kerry (the home of Dublin). And my brother is Danny… Danny Boy. My maiden name? Sullivan.

My dad was raised the sixth of eight Irish Catholic children and went to Notre Dame for undergrad. “Cheer, Cheer for ole Notre Dame” was in my childhood repertoire, just behind “The ABC’s” and “Twinkle Twinkle, Little Star.” I even went to high school in Dublin, Ohio where our mascot was “The Shamrocks.”

Very Irish.

As a housewarming gift my dad gave me this little garden fairy.

My "Green Gal"

My “Green Gal”

He said, “It’s an Irish Fairy for your garden!”

Let’s be serious for a quick second… The “Luck of the Irish” is not exactly what anyone wants in their garden.

The Irish are famously bad at gardening. Umm, hello?! That’s why we are all here.

Not to mention, we are not that good on the culinary front. Outside of Shepard’s Pie and Guinness, it’s pretty bleak.

Don’t even try to argue with me on this one. Especially with Irish Soda Bread.

In third grade we had “Culture Day” where we had to bring in food from our background. I remember my mom looking over the assignment and reluctantly saying, “Well, I guess we could make Irish Soda Bread…?”

She knew something I didn’t know.

But, I was excited. Soda and bread? Mixed together? My ancestors had it right!

Boy, was I in for a surprise.

On top of the weird flavor in something that looked like a dessert, there were raisins in there. Yuck.

Not something to build a deep connection back to the homeland on…

I have been to Italy twice and, despite my Irish roots, I couldn’t help but fall in love with their lifestyle and food culture. The fresh, light food. The importance and enjoyment of a meal. The wine. The gelato. At times it has felt like I was meant to be there.

And with my dark skin and dark hair I could maybe pull it off?

At Trevi Fountain cerca 2008

At Trevi Fountain cerca 2008; caught by papparazzo Dad.

So, last week I decided to give Italian my best effort. With tomatoes flowing from the garden I was confident this would be great.

photo (67)

I started my Italian adventure with canning marinara sauce made completely from scratch.

I used this recipe I found on Pinterest: http://www.theyummylife.com/marinara_sauce

I chose it because it featured lots of fresh herbs like parsley and basil. I was excited to use these in addition to the tomatoes from the backyard.

photo (66)

The recipe also called for a cup of red wine, which obviously called for a cup for me too. I figured this was what a true Italian would do.

photo (65)

This marinara is flavorful and sweet. I am excited to have it in the pantry for quick weeknight dinners in the winter.

The Italian adventure I was most eager to try was making mozzarella. I know, it sounds crazy, and a little ambitious, but I really wanted to make a caprese salad with my tomatoes, my basil and my mozzarella.

In Animal, Vegetable, Miracle, Barbara Kingsolver writes about a family vacation when they visit “The Cheese Queen.” She was located in New England, and while there, they all learned to make mozzarella. Ever since reading the book last winter, I had been looking forward to making my own mozzarella.

The Cheese Queen is a woman named, Ricki Carroll. Ricki has established a true name for herself in the world of making cheese. She puts on workshops in her Massachusetts home for new and experienced cheese makers. She also sells cheese making supplies and kits online.

I purchased the citric acid and rennet on her website that I needed to make mozzarella. After the supplies arrived at my post office, I couldn’t wait to get started.

I went straight to the grocery store to grab a gallon of milk and head to my kitchen.

Making mozzarella is a little scientific. You have to dilute the citric acid and rennet in water before adding it to the milk. The temperature has to be controlled, and the milk cannot get too hot, too fast. Thank goodness Adam was willing to help. It requires a lot of hands at the stove.

photo (62)

I was following this recipe from the Pioneer Woman: http://thepioneerwoman.com/cooking/2012/07/making-fresh-mozzarella/

By the time I got to the point where we “cut the cheese” (…which Ree and her friends thought was hilarious. My friends –embarrassingly- would too), I knew we were doing something wrong. The cheese wasn’t becoming solid. It was runny and resembled ricotta when I tried to drain it from the whey.

Blast!

I had failed.

photo (64)

I had a lump of cheese that didn’t want to hold together and by no means was mozzarella. It did taste like cheese.

The blog world said at this point we had cheese spread. So I added some seasonings, busted out some crackers and another glass of wine and sat down at the computer with Adam to see what we had done wrong.

Ten minutes later Adam and I looked up from our designated screens.

“You want to try again?” I asked.

“Yes,” Adam responded without hesitation.

Adam went back to the store to get more milk and I prepared the stove top.

We got the milk mixture going following directions from The Cheese Queen’s website: http://www.cheesemaking.com/howtomakemozzarellacheese.html

We made it to the “cutting the cheese” step, same result.

What the heck?!

We read that over pasturized milk can be the problem. Whole milk is a necessity, which we had been using all along.

This “cheese spread” became part our dinner as I whipped up a quick pizza using a splash of the marinara that didn’t fit into the canning jars, cherry tomatoes, and basil from the backyard.

photo (63)

Overcome with determination, I arrived at a natural food store the next morning ten minutes before they opened. I bought the most expensive gallon of milk I had ever bought in my life. It was from a local Indiana dairy and had minimal processing.

“This is it,” I excitedly thought as I got to work back at home.

Same result.

Grainy cheese curds that wouldn’t come together.

Now I really did resemble an Italian lady. “Fired up” was the best way to describe me. I had not had so much trouble trying to make anything since a lab in college where I had to make chocolate mousse with chocolate (… that I had to chop off the largest, most dense block of chocolate ever) and eggs on an industrial kitchen double boiler. I continually wound up with chocolate scrambled eggs. YUCK.

I remembered the gallons of raw milk at the natural food store. Raw milk isn’t processed at all. It is straight from the cow. It had to work, so I went back to the store to give it a try. I continued to talk myself into the $8.00 purchase by saying this is probably what cheese mongers in Italy use too.

Raw milk is actually illegal in Indiana for human consumption. As scary as it was reading that on the label, I got to work. I figured I was altering the milk. The heat would kill anything lingering in there… right?!

Within twenty minutes I had the same blob I had seen three other times.

Scusami!

This was the last straw.

This cheese blob was thrown in the corn. Mainly out of frustration… and, if we are being honest, a little bit out of concern of the illegal raw milk.

So, all in all, my attempt at being an authentic Italian was a failure.

But, what is so great about being an Irish American is that I can still enjoy the Italian food I love without having to pretend to be anyone.

… And, that the grocery store sells mozzarella year round for less than a gallon of raw milk.

august 27 001

You could say that I can have my caprese and eat it too.

... and so I did.

… and so I did.

Or you can say this Irish Meal Time Prayer:

“Bless us with good food,
The gift of gab,
And hearty laughter.
May the Love and Joy we share
be with us ever after.”

And if that’s the Irish Food Culture, I am proud to be a part of it, and I know it’s where I am meant to be.

Filed Under: Canning and Preserving, Plant, Recipes Tagged With: Barbara Kingsolver, Basil, caprese, Italy, Marinara, Milk, mozzarella, Plant, The Cheese Queen, The Pioneer Woman, Tomato, wine

Natural, Roasted Chicken. It’s What’s for Dinner.

August 21, 2013 by theblogbloom.com 7 Comments

It’s hard to believe that it really is late August.

School has started and is in full swing.

The sun is down before nine.

The corn is tall.

And the garden is full of produce.

Like these peppers.

002

And tomatoes.

003

Tomatoes.

009

Tomatoes!

009

With so much naturally raised produce in the kitchen I decided to cook the naturally raised chicken from my Farmer’s Market trip in July for dinner on Monday night.

I had never cooked a whole chicken and used the website 100 Days of Real Food as a stepping stone. I visit this site often as it is a great resource for cutting out over processed food from your diet. The author takes a realistic and relatable approach as she has (precious) kids and she doesn’t want to “worry” about food, but rather be confident in her family’s food choices.

On the website there is a post about roasting a whole chicken: http://www.100daysofrealfood.com/2013/05/14/recipe-how-to-roast-whole-chicken-safely-defrost-meat/

Perfect.

A chicken seasoned with lemons, garlic and rosemary.

Even more perfect. Some of my favorite flavors and I already had local rosemary and garlic in the house.

The post begins with how to properly defrost a chicken. She mentions that even though she has lived to tell about defrosting meat on the counter, the USDA recommends that meat should be defrosted slowly in the refrigerator.

… Something that made this ServSafe certified, hospitality professional proud.

Once defrosted, I mixed the herbs, seasonings, and oils together in a small bowl.

The next order of business was to remove the “giblets or bag of ‘parts’ that may be stored inside the chicken.”

The chicken man at the market had mentioned the “giblet bag” was in there. I remember thinking when I made the purchase, “Oh wow. That’s nice. He bagged those up and put them back in. I bet there are people who want to keep those.”

I looked in my defrosted chicken’s butt. I didn’t see any evidence of a ziplock baggie or saran wrap like I was expecting.

Weird.

I opened the rear end more. A sleek brown, jelly-ish mass was in plain sight.

I had just read the chapter in “The Omnivore’s Dilemma” where Michael Pollan processes free range chickens on Joel Salatin’s Virginia farm. Pollan wrote about removing the chicken’s insides after the bird bleeds out.

I knew what I was looking at… it was the bird’s liver.

There was no actual “bag.”

I had been lied to…? Maybe he just forgot to bag up this one…?

Or, it’s an expression. Slang, if you will.

… For chicken organs.

I also remembered from my read that removing these organs needs to be done carefully. Pollan warned that a ruptured gall bladder can be a big mess.

“What the heck am I supposed to do?” I thought, desperately wishing Adam was home. He could handle this.

I looked at the clock. Adam wouldn’t be home for about an hour. And the bird would take that long in the oven. I couldn’t wait.

So, I did what every girl who didn’t know what 4-H was until she was eighteen would do: I Googled it.

The first page I saw said to “Gently reach in and simply remove the giblets.”

Seriously? That’s all you got, Google?!

After many other failed searches and confusing youtube videos, I decided to suck it up.

“Like a band aid,” I told myself, sticking my hand in the bird’s rear end. I wrapped my fingers around the bundle in the cavity of the chicken, wincing, eye’s shut and gave it a pull.

“Ohhhhmyyyygodddd,” I squealed out loud as my hand emerged.

Browns, pinks, yellows and blues made up the still slightly frozen mass. (Thank God. Had that been any squishier we would have had issues.)

Just be glad I didn’t take a picture.

Once I recovered (and threw the giblets away), I brushed the bird with the herbed oil marinade, stuffed the lemon peels in the chest cavity, and placed him in the oven for about an hour.

001

Right around the time Adam got home from work the chicken had reached 170 degrees. I let it rest on the stove top while I chopped up some tomatoes and cucumbers to serve as a side with a splash of red wine vinegar. Light and easy.

The aroma of the rosemary, garlic, and lemon married well with the chicken, filled the kitchen and demolished any traumatizing mental images of giblets.

010

By the time I plated everything I couldn’t wait to give it a try.

It seems crazy, but the natural, free range bird did taste different than the chicken breasts from the grocery store that I am used to. It was moist, flavorful, and felt as though I could really taste the chicken.

012

I am looking forward to having more natural birds from our own backyard this winter.

… And having someone else do the processing.

Filed Under: Plant, Recipes Tagged With: August, Chicken, Cucumber, Farmers Market, food blog, free range chicken, garlic, michael pollan, naturally raised, Pepper, Plant, recipe, Rosemary, Tomato

Indiana’s Wine Country

August 19, 2013 by theblogbloom.com 1 Comment

With the craziness of summer, especially this summer, weekends with just Adam have been nonexistent. We have either been running in two different directions or in fast forward with groups of people for some sort of celebration.

While this summer has been a great time, it is sometimes nice to just be a couple.

Last March I reserved a tour of Oliver Winery’s Creekbend Estate Vineyard. It was hard to book something so far in advance but, it was nice to know through all the jam-packed, full throttle weekends this summer, there was this day to look forward to.

Oliver Winery is a very successful Indiana Winery just north of Bloomington, which is home to Indiana University and, is at the forefront of the local food movements across the state. At Oliver, there are a handful of wines made from grapes shipped from California and others that are grown locally at their Creekbend Vineyard, a few miles away from the main tasting room.

Oliver's Bloomington Tasting Room.

Oliver’s Bloomington Tasting Room.

Adam and I have been to the tasting room at the winery many times and fall even more in love with it every time. One of our first road trips together was to Oliver after a long, stressful few weeks in the first year of our careers. Adam even proposed to me over a bottle of Oliver’s Merlot.

Thanks to this special place in our hearts for Oliver, I was excited to have the opportunity to tour the private vineyard.

On Sunday, Adam and I headed out on the two hour drive to Bloomington, looking forward to the afternoon. The drive from the tasting room to the vineyard was windy, hilly and amazingly scenic.

We were welcomed into the vineyard by vast grape vines as far as we could see in either direction. Adam pulled up to an old farm house where two men were sitting on the porch. The older man introduced himself as Bernie, the vineyard manager. The younger man, about our age, was a farm hand named Jay. Bernie told us that we were the first to arrive and that as we wait for everyone else we could explore the farmhouse or the table grape vines planted in the back.

After the long drive, we both needed to use the restroom so we headed into the house to visit the facilities. While I was waiting for Adam, I read a plaque in the kitchen stating that the home dated back to the 1830’s and the original owners were buried on the land. Much of the house is still intact, including the unique chestnut floors in the kitchen.

Adam and I headed out to the back to check out the table grape vines. These grapes are sold in the cheese and fruit platters in the tasting room. I excitedly tested out my birthday present, a new Nikon camera, while Adam was looking around to try and figure out what bird was making this weird call he kept hearing.

august 18 2013 007

august 18 2013 014

august 18 2013 013

august 18 2013 015

The tour was kept to twelve people and once everyone arrived Jay brought out some champagne to kick off the tour.

Bernie told us the basics about the vineyard, including that the vineyard is located in a microclimate making the growing days and temperature during those growing days very similar to Napa Valley. The soils are great and thanks to the limestone and hills that are predominate in the area, rain runs off easily. There are about 69 acres of vines in the vineyard which re-opened in 1994 after Professor Bill Oliver began making wines in the sixties.

We began our walk around the vineyard with a fresh glass of Chardonel, which was a delicious hybrid grape that is similar to chardonnay.

One of the first questions asked was about the foil ribbons on the end of all the rows of the vines.

Red foil designed to keep birds away.

Red foil designed to keep birds away.

“Bird Control,” Bernie explained.

He mentioned that when the sun hits the flapping foil it reflects light keeping the birds away. They also use recordings of bird distress or attack calls.

I looked at Adam and laughed. That was the crazy bird he was looking for!

The next wines we tried were the Catawba and Traminette. Both of these we had tried before. The Catawba is one of Adam’s sister’s (many) favorites. Bernie snipped a few bunches of grapes and let us try the Catawba grapes. They were approaching harvest and were juicy and sweet.

Tasting some Catawba.

Tasting some Catawba.

august 18 2013 024

Next we headed up a large hill which actually serves as a landing strip for pilots that can land on grass. Along the landing strip were new grape vines which were planted this spring. We learned that grapes cannot be harvested until they reach three years of maturity, but, if taken care of, can last thirty years.

Adam in the landing strip, with vines as far as the eye can see!

Adam in the landing strip, with vines as far as the eye can see!

While walking up the hill, I asked Bernie how he got the job as the vineyard manager.

He laughed.

“Yeah. What did you study? Did you come from farming?,” Adam asked.

Two farmers, chatting it up.

Two farmers, chatting it up.

“Nope. Definitely did not come from farming,” Bernie smiled. “That’s a good one for the whole group to hear. I will answer that in a bit.”

Bernie, the vineyard manager, teaching the group about the grapes.

Bernie, the vineyard manager, teaching the group about the grapes.

We continued on the last leg of the walking tour. We passed some Merlot and Cabernet Sauvignon rows. Here, Bernie grabbed a handful of the Cab grapes and handed them out for us to try. These weren’t as sweet as the other grapes and he asked if we tasted green pepper.

The whole group lit up. Yes!

He explained these grapes were not ripe yet and if you ever have a bottle of Cabernet that tastes similar to a green pepper, it means the grapes were not ready for harvest.

As we walked back to the Farmhouse, Adam and I brought up the rear of the group taking a few more pictures and checking out the last few rows of grapes.

I looked at Adam. “You having fun?”

“A blast,” he beamed. “This is a perfect day.”

Perfect Day.

Perfect Day.

A gourmet cheese platter was waiting for us in the farmhouse complete with Indiana cheeses, including one from Fair Oaks Dairy, as well as a glass of Chamboursin, a dry red wine. Adam and I both declared it our favorite of the day.

august 18 2013 039

The final bottle uncorked of the tour was an ice wine. This incredibly sweet wine was paired with Lindt chocolates and reminded me of honey. It was good enough for me to appreciate but was much too sweet for any more than a couple sips. I looked at Adam, who seemed to be feeling the same way, and wished we had split a glass, so not to waste the wine.

Bernie thanked everyone for joining him and asked if anyone had any other questions.

I reminded him that he had not answered mine about how he got his start.

“Oh, that’s right! Thanks for reminding me.”

He told us his career actually began in the military and he took a government job that brought him back to Indiana in 1997. Prior to this he worked as a bomb specialist. During the grape harvest, he volunteered at the vineyard with his wife and became good friends with Bill and Kathleen Oliver.

Over a bottle of wine at the end of a festival in Indianapolis, Bill asked Bernie to be the vineyard manager. Bernie said three jaws dropped that afternoon. His, his wife’s, and Kathleen’s.

Bernie replied, “Thank you for the offer but, I don’t know anything about growing grapes.”

Bill responded “You are a bomb specialist with all ten fingers, I can teach you to grow grapes.” Three weeks later, Bernie accepted the job and has been there ever since.

And, he hasn’t looked back.

“My grandfather was a farmer,” Bernie winked, “And I know he’s sending me a big, old high five from heaven.”

Creekbend Vineyard Quick Facts

http://www.oliverwinery.com/vineyardevents
7508 North Woodall Street
Ellettsville, IN 46429

Tours are only offered a handful of weekends in late summer and book up fast. As mentioned, I made this reservation in March. It’s because I tried last summer and spots were not available.

It’s a walking tour (about one mile total) so dress accordingly. Wear good shoes. Prepare for the weather as it could be chilly or hot. They provide umbrellas if it’s drizzly.

Prices are $40 for an individual or $70 for a couple. Heck of a deal. We tried nearly ten wines, some of which are not offered in the tasting room, were fed a beautiful cheese and chocolate platter, and the tour was given by the incredibly knowledgeable vineyard manager.

It’s a hilly, twisty drive on back roads to the vineyard. Use the map on the website versus trying to use a GPS. According to the vineyard manager over 85% of the time the GPS will get you lost.

Creekbend also offers picnic’s in the vineyard throughout the summer where you can bring your own meal, take a stroll through the vineyard on your own, and purchase estate wines by the bottle or glass for the evening. Sounds amazing!

Even if you can’t make it out to the vineyard, check out the tasting room on 37 just north of Bloomington. It’s beautiful, and a lot of fun.

… We made a stop by the tasting room to purchase a case of the estate wine. We already can’t wait to bring some of these bottles out during special occasions in the year to come!

Checking out the Creekbend brand back at the tasting room.

Checking out the Creekbend brand back at the tasting room.

Creekbend wines back at home.

Creekbend wines back at home.

... 'til next time.

… ’til next time.

Filed Under: Agroturism, Plant Tagged With: Agroturism, Bloomington, Champange, Creekbend Vineyard, Day Date, Indiana, Local Wine, Oliver, Photography, Plant, wine

Pesto Changeo.

August 13, 2013 by theblogbloom.com 2 Comments

You know that article that every woman’s magazine runs at least once a year sharing the buzzwords to watch for so that you avoid “calorie overload” when ordering a meal at a restaurant?

Crispy. AKA Fried.

Smothered. Probably with colossal amounts of cheese.

Creamy. Unnecessarily calorie dense.

So on and so on…

Here are the buzzwords used in menu items that I just can’t avoid:

Goat Cheese. So rich and so delicious.

Truffle. The epitome of decadence.

Avocado. Yes, like much of America, I to, am Avocado Obsessed. “Have you seen my new Avo-CAR-do?” Cracks me up. I love a good food pun.

Pesto. I just can’t get enough of it.

I can’t get enough of pesto at home either. It is great on nearly any kind of meat. Works well as a sauce for pizza or pasta. And even compliments some vegetables.

Thanks to my basil plants looking abundant as ever, I decided to give making pesto a try. My mom makes and freezes pesto often. This allows her to enjoy her basil plants throughout the winter.

I visited her over the weekend and asked for her recipe.

She laughed.

“Oh, that’s easy. Just some oil, garlic, parmesan, pine nuts and your Cuisinart.”

… Easy for the Pesto Pro to say.

Wanting to be a little more precise I looked it up on Google and sure enough, that really was it. And it really was easy. Quick too.

So, I am now a Pesto Pro.

… Or maybe more a Pesto Magician because it seemed like the instant I hit the “On” button my ingredients turned into a beautifully, green and delicious pesto paste.

Here is what I did:

Gather two cups of fresh basil (Basil should be packed pretty well.)

1/3 cup olive oil

½ cup grated Parmesan Romano Cheese

½ cup Pine Nuts (… I read online that you could also use walnuts or almonds. The wonderful Barefoot Contessa uses both walnuts and pine nuts. Things I will try next time.)

3 cloves garlic (I used some from the Farmer’s Market and the cloves were huge! I would tone it down next time if I were working with such big garlic cloves again.)

A touch of salt

I threw it all in the food processor, turned it on and then the magic happened.

7

Instantaneously, I had pesto.

6

I stopped it twice to push down the pesto on the sides with a spatula until it was nearly smooth.

From there you can either put your pesto in the fridge and enjoy it within three days or you can freeze it like I did. (Although, I am sure I would have had no problem finishing it all well before three days were up… the flavor was amazing.)

There are a few ways you can freeze pesto.

I scooped small mounds of the pesto onto a cookie sheet lined with parchment paper and put the sheet into the freezer. Once solid, I removed the mounds from the parchment paper and put them into a ziplock bag. This way I can grab a serving to add to whatever I am cooking.

5

My friend’s mom uses an ice maker mold to freeze the pesto and then stores them in ziplock bags once frozen.

Baby food jars also work well.

I did reserve a little pesto to use with our meal last night. Adam grilled shrimp that I had coated with the fresh pesto. As I scooped the pesto on to the shrimp I told Adam to give it a try.

I also dressed some shrimp with BBQ sauce and others with lime and tequila.

I also dressed some shrimp with BBQ sauce and others with lime and tequila.

As he did his face lit up. “Mmm,” he admired, “You made that?”

Heck yes I did!

Another thing that magically changed last night was me. I went from twenty five to twenty six.

2

My good friend Betsy came up to our house from Indianapolis with these amazing cupcakes from The Flying Cupcake, a local and very successful cupcake chain in Indy. I had the Birthday Cupcake, of course. Adam and Betsy both had the one that looks like a “Ho-ho.”

3

But, what was even more magical than the pesto or slipping into my upper twenties was the awe-inspiring sunset we were blessed with as a backdrop for my celebratory dinner.

Cheers to twenty six!

Filed Under: Plant, Recipes Tagged With: Basil, birthday, cupcakes, garlic, pesto, Plant, recipe, shrimp, sunset

Enjoying a Hiatus from the Grocery Store

August 5, 2013 by theblogbloom.com 3 Comments

Today I had a weird thought.

Outside of a trip to get a couple lemons and some milk, I have not been to the grocery store in two weeks.

For a girl who frequents the super market at least twice throughout any other week this is kind of monumental.

The farmer’s market visit, frozen meat from Adam’s hunting trips last winter and the garden’s current bounty set us up for a great week of easy, cheap meals. It also helped to remind me that things don’t need to be complex to be delicious. So long as I have a little oil, salt and pepper, and some seasonings such as herbs, I am good.

To compliment some bacon wrapped steaks that were still in the freezer from the baby shower in July, I made this recipe with my farmer’s market beets: http://www.foodnetwork.com/recipes/roasted-beets-with-lemon-thyme-dressing-recipe/index.html

I had never made beets, outside of the Chopping Block class, and was surprised how simple it was.

The lemon juice and thyme was a perfect way to bring out the beets natural, sweet flavor. Adam had never eaten a beet before and compared the flavor to sweet corn.

Beautiful Beets.

Beautiful Beets.

One thing to be aware of, beets have a very strong magenta color that can dye your fingers, clothes, table cloth, floor, counter top (etc, etc…), if you are not careful.

Another night, Adam grilled the pork from the Farmer’s Market, and I made this recipe that I found on Pinterest: http://andreasrecipes.com/sauteed-zucchini-with-tomatoes-mushrooms-peppers-and-basil-the-kids-cook-monday/

It was seriously summer on a plate, and it was made with many different garden veggies including summer squash, zucchini, bell peppers and tomatoes. I subbed a little corn shaved off a cob for the mushrooms because we had it.

My basil is still booming, flavorful as ever, and was so perfect and fresh in this dish.

“Chiffonade” is a cutting technique where a leafy vegetable or herb, like basil, is cut into small strips. This can be nearly impossible (… or at least really annoying) to accomplish when cutting a single leaf at a time.

... this is annoying.

… this is annoying.

A great skill I learned at a catering event a couple years ago when I was making bruschetta is to roll a handful of basil leaves as if you were rolling it like a cigar.

Rollin', Rollin', Rollin'...

Rollin’, Rollin’, Rollin’…

Basil Cigar?

Basil Cigar?

Hold the bunch together as you thinly slice the roll and it is so much easier to achieve many little thin strips, quickly.

Ahh, this is better!

Ahh, this is better!

Perfect, easy Chiffonade.

Perfect, easy Chiffonade.

Our favorite of the week didn’t come from the internet or Pinterest, but was made up on a whim. I baked some summer squash in the oven that was dressed with a little grape seed oil, salt, pepper, and finished with a sprinkle of Parmesan. It was easy and tasty.

Here’s what I did:

Preheat the oven to 400 degrees.
Evenly slice, or mandolin, squash into about ¼ inch coins, place onto an ungreased cookie sheet
Drizzle with oil, salt and pepper and toss with hands to coat
Place in the oven for about seven minutes, then flip and cook for about another seven minutes. With about three minutes left sprinkle Parmesan on squash. Parmesan should just melt.
Serve immediately.

I shared this with a woman at work when I was trying to get her to take some zucchini and squash off my hands. (It was beginning to take over my kitchen…) Thankfully, she did, and she even made the recipe for her girlfriends. I received a text from her this morning asking if I could bring her more squash. Apparently, everyone loved it, and she wants to make it again for a party she’s hosting later this week.

Besides the taste and the fact that you probably have all the ingredients in your kitchen every day of the week, this recipe is so great because it is so versatile. You can grill, bake, or sauté not just zucchini or summer squash this way, but it works great with other vegetables like asparagus, brussels sprouts, or cauliflower.

Tonight, I roasted carrots from the garden this way with a little fresh rosemary.

Yummy roasted garden carrots!

Yummy roasted garden carrots!

Side note: Pulling my first carrots out of the ground was maybe one of the most proud moments of the garden so far. I couldn’t see them growing so when I pulled the large, orange roots from the ground I can’t even explain the feeling that came over me. I was thrilled with my carrots. I felt a sense of accomplishment. (And a little relief, as I didn’t know what to expect.)

All of this was followed by a little laughter.

I was super excited about a carrot.

What has my life come to?!

Filed Under: Plant, Recipes Tagged With: Basil, Beets, Carrots, knive skills, Plant, squash

  • « Previous Page
  • 1
  • …
  • 27
  • 28
  • 29
  • 30
  • 31
  • Next Page »

Meet Claire

Hi, thanks for visiting! I am Claire and I have been sharing my life and thoughts on Bloom since 2013. Welcome to 2023's project, The Farmers Market and The Library. For more about me...

Follow Bloom.

RSS
Follow by Email
Facebook
Twitter
Pinterest
Instagram

Be a Bloom Insider

Enter your email address to subscribe to Bloom and receive notifications of new posts and a bi-weekly love letter from Claire by email.

Archives

Copyright © 2025 · Foodie Theme by Shay Bocks · Built on the Genesis Framework · Powered by WordPress