Bloom.

Navigation
  • About

Fried Zucchini Blossoms

July 18, 2014 by theblogbloom.com 5 Comments

Zucchini is a great plant for a newbie -and oldie- gardener.

They are easy to grow.  It doesn’t need too much attention.  Just decent soil.  And there’s nothing outrageously tricky in terms of watering.  They also produce veggies for a long time; Just be sure to pick them before they get huge!  They are the most flavorful when they are maybe 3-4 inches wide and 5-6 inches long.  (This can be a rookie gardener mistake… it’s fun to see this HUGE veggie come out of the garden, but it’s not going to taste as good as it could.)

However… There is one problem with zucchini.

Yes, the produce for a long time, but they also produce A LOT for a long time.

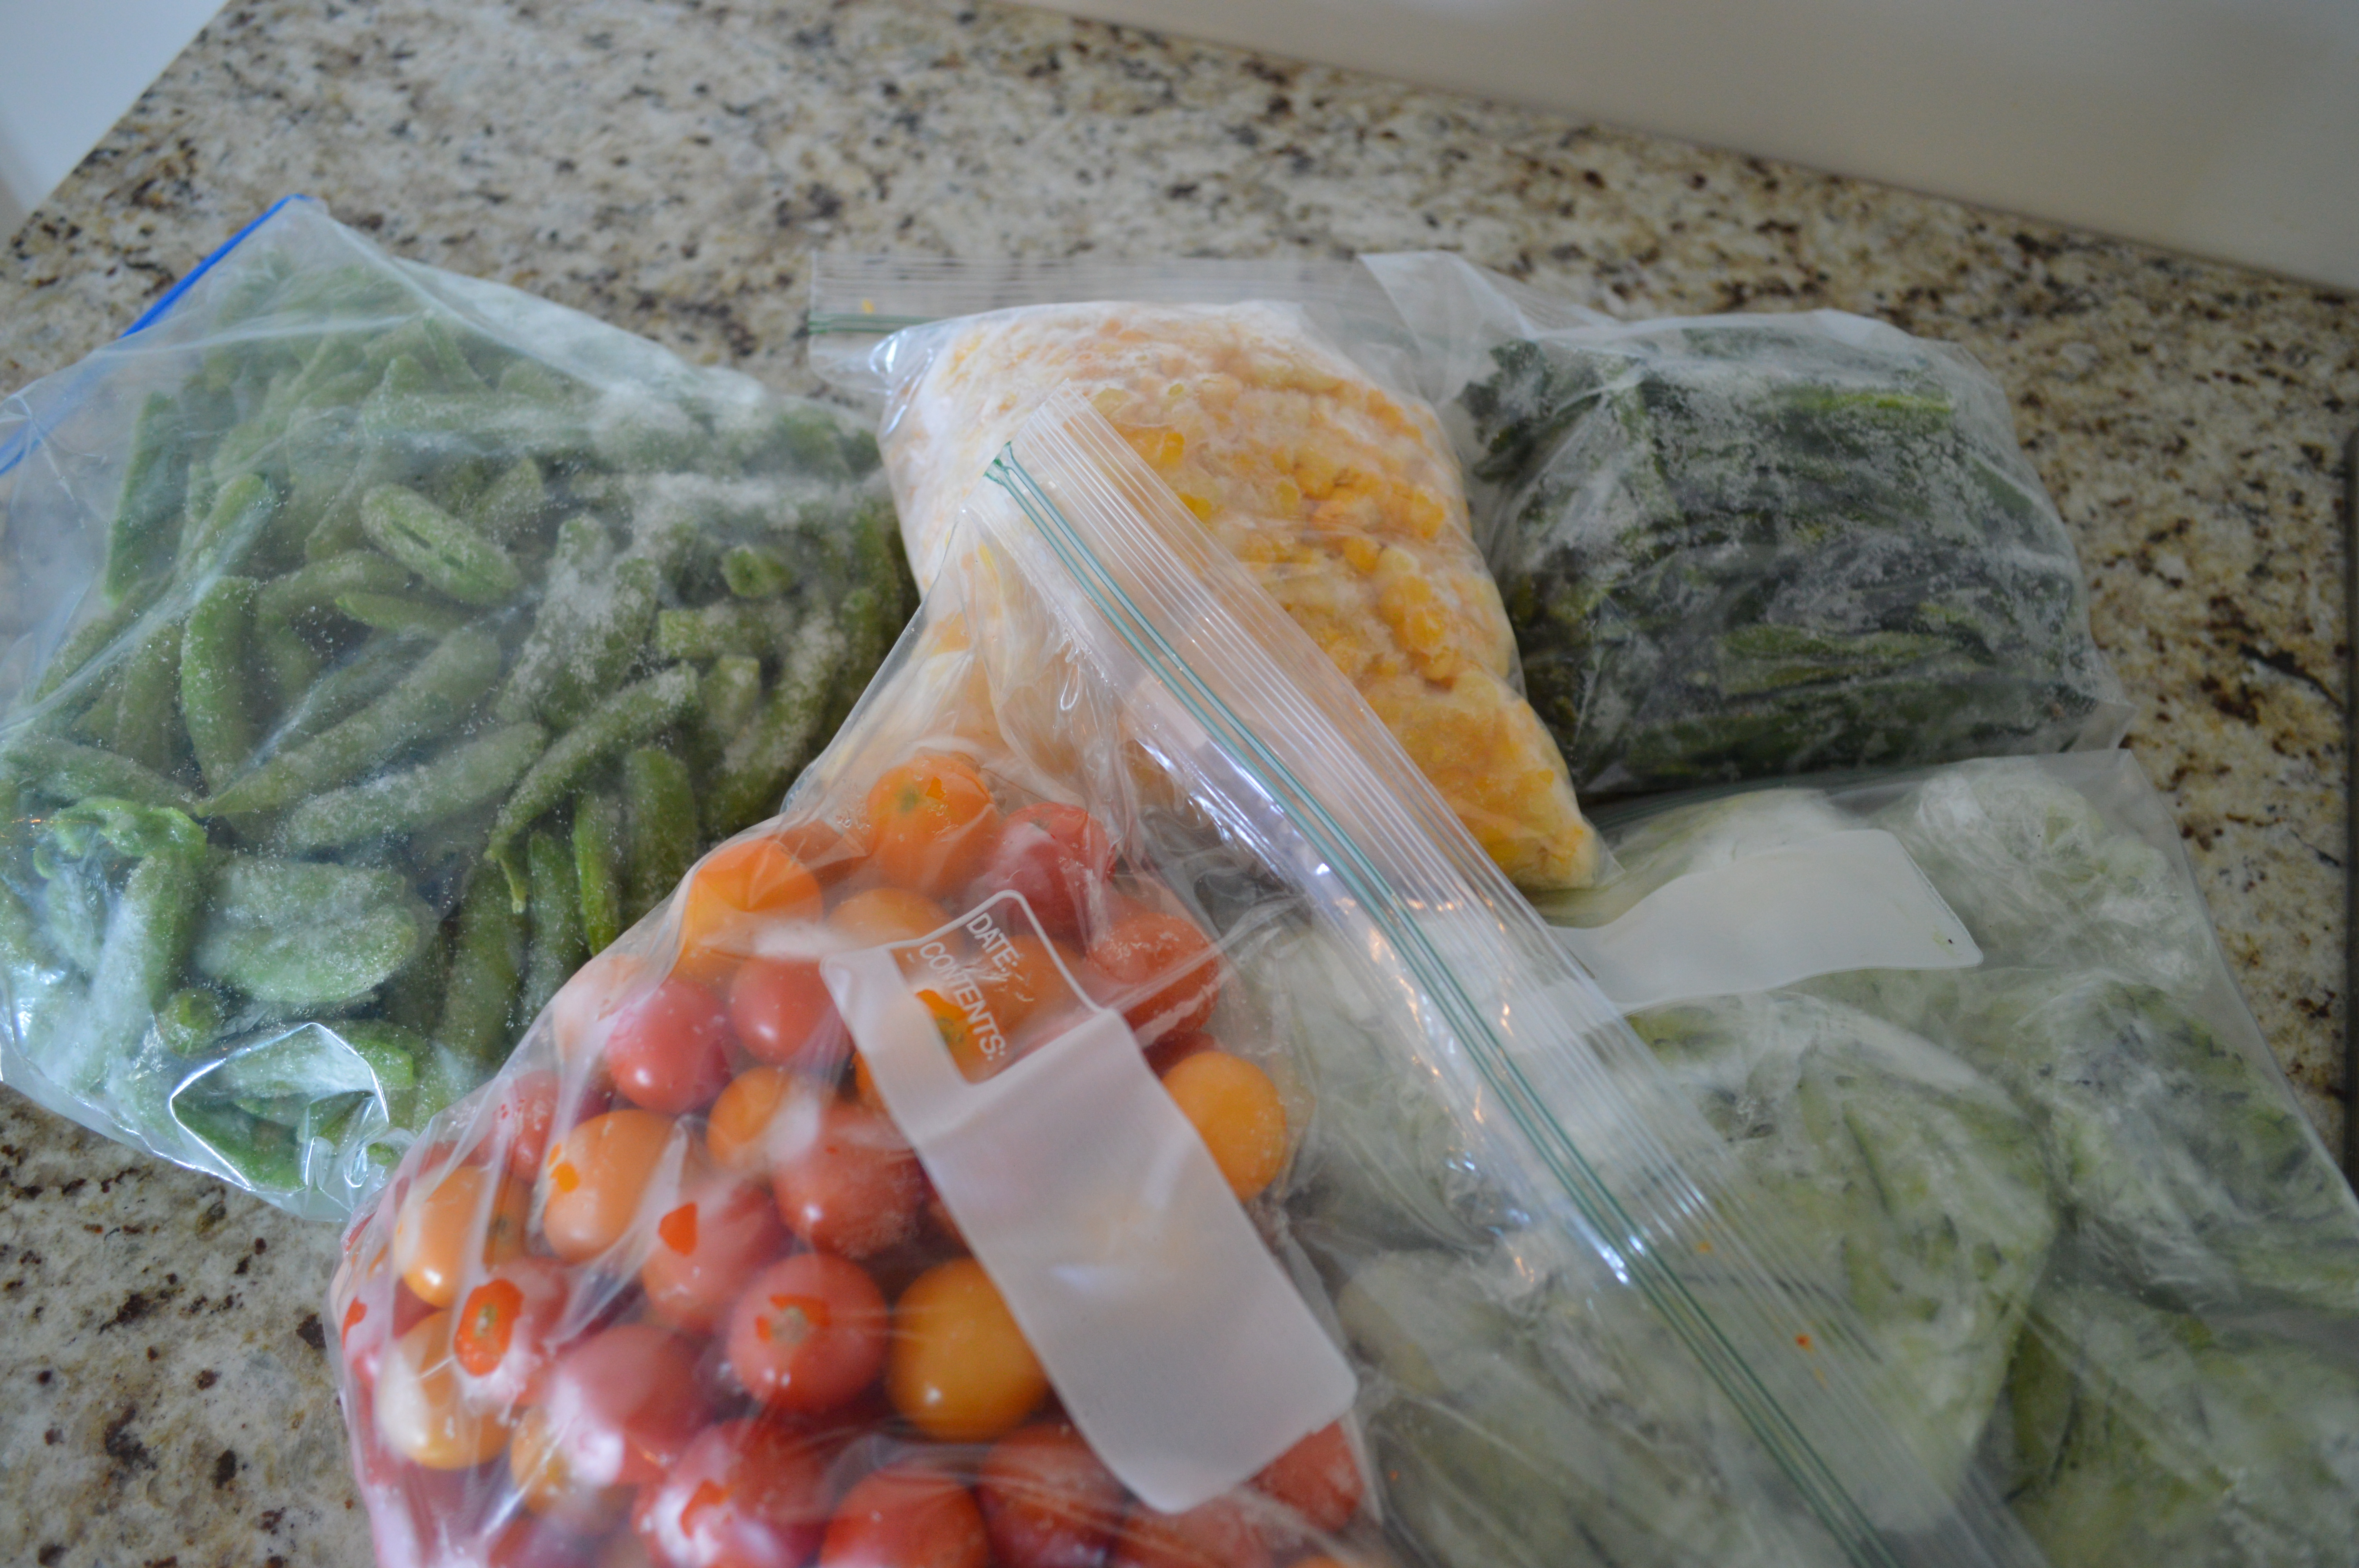
A few nights ago, after staring at about fifteen zucchini’s on my kitchen counter, I began looking around for new zucchini recipes to help make sure we don’t get too bored. (Not even kidding. Fifteen Zucc’s.)

In my searches I kept coming across recipes for zucchini blossoms.  

Zucchini blossoms are the flowers that appear as the plant is producing a fruit.   They are a very beautiful, vibrant orange when in full bloom, but they wilt as the fruit gets larger and ready for harvest.  

021

There are female and male blossoms.  Female blossoms are attached to the zucchini, male blossoms aid in pollination and will not bear a zucchini.

A female blossom.  You can see the developing zucchini.

A female blossom. You can see the developing zucchini.

Male zucchini blossom.

Male zucchini blossom.

Although it wouldn’t help with my growing zucchini collection, I thought with all the big blossoms on my zucchini plants to give Fried Zucchini Blossoms a try.

045

They looked similar to tempura, but tasted almost like a mozzarella stick thanks to the warm, melty cheese I stuffed in the blossom.  My backyard basil added great, subtle pepper flavor and sweetness and the lemon had the right amount of tart to add depth to this fun appetizer.

047

These are great on a summer evening with a glass of cold moscato.


Fried Stuffed Zucchini Blossoms
2014-07-18 17:31:50
Write a review
Save Recipe
Print
The Cheese Filling
  1. 1 Cup Ricotta Cheese
  2. 1/2 cup Parmesan Cheese
  3. 1 Lemon, juiced and Zested
  4. 1/4 Cup finely chopped Basil
  5. S&P
The Batter
  1. 1 1/2 Cup Flour
  2. 1 Tbs. Baking Powder
  3. 1 1/2 cup soda water or beer
  4. 10 Zucchini Blossoms
  5. Vegetable Oil for Frying
Instructions
  1. Wash Zucchini blossoms thoroughly, but do not soak in water. Be sure to look inside the blossom and check for bugs and dirt.
  2. Mix together all stuffing ingredients in a medium bowl then add salt and pepper to taste.
  3. Stuff each zucchini blossom with the filling. Be sure to wrap the petals closed once stuffed to "seal" the blossom.
  4. In another bowl, mix the batter ingredients together, carefully whisking in the beer or soda water.
  5. In a heavy bottom pot or pan (we use a cast iron skillet) heat about two inches of oil until shimmering. Dip the blossoms in the batter mixture and turn until coated. Fry in batches for about two minutes or until the batter is golden brown.
  6. Remove from oil and place on a paper towel lined plate to cool.
  7. Enjoy!
Bloom. https://www.theblogbloom.com/

Filed Under: Recipes Tagged With: backyard Garden, fried zucchini blossom, recipe, Zucchini, zucchini blossoms

Roasted Radishes

July 7, 2014 by theblogbloom.com 6 Comments

If you are thinking about getting your kids involved with gardening 1.  Good for you!  

Adam and I have talked about how we want our kids to have their own garden bed each summer where they can choose what they plant, learn a little responsibility in tending to the bed and reap the benefits of their harvest.  I think it’s awesome for kids to learn how food grows.  

And, 2. You should seriously consider planting radishes.

Radishes grow very quickly in comparison to other plants, which will help encourage and hold the attention of a young person.  This year it took about four weeks from planting a seed to enjoying a little crunch on my salad.

Radishes just about two weeks after planting.

Radishes just about two weeks after planting.

Radishes come in all shapes and sizes.  Word to the wise: as they get bigger, they get spicier. So keep an eye on them.  They also come in various beautiful shades of pinks and reds.

006

They are most prevalent from April to July.

What I like about radishes is that there are so many things you can do with them.  Like I said, they are great in a salad.  I love to just pop them with some veggie dip or hummus.  We have done shaved radishes on a pizza.  You could also add them to a sandwich.  Pickle them so that you could eat them all year long.

The other night I decided to roast our plentiful radishes.

027

Roasting radishes that have maybe gotten too big is great because it cooks the spiciness out of them and makes them much easier to eat.

This recipe is my go to when roasting almost any vegetable.  It is easy, light and made with ingredients that are always in my pantry.  (Or, any typical pantry for that matter.)

It is proof that you don’t need to complicate things to make them good.

026

Roasted Radishes
2014-07-07 19:54:05
Write a review
Save Recipe
Print
Ingredients
  1. 1 bunch Radished, quartered
  2. 1 Shallot, thinly sliced
  3. 2 Tablespoons Olive Oil
  4. Juice of one Lemon
  5. Salt and Pepper
Instructions
  1. Preheat Oven to 375
  2. Toss all ingredients in a medium bowl, spread onto a baking sheet
  3. Cook until tender about 20-25 minutes.
  4. Eat right away.
Bloom. https://www.theblogbloom.com/

Filed Under: Recipes, Uncategorized Tagged With: backyard Garden, gardening with kids, radishes, recipe, roasted radishes, roasted vegetable

Say “Kim-chi!”

April 2, 2014 by theblogbloom.com 4 Comments

This weekend Adam and I went to the Indiana Artisans Marketplace in Indianapolis.

We got tickets through one of Adam’s best friends, Andy. Andy designs and makes beautiful custom furniture. Andy is in business with his dad and they have been a part of Indiana Artisan for a couple years. Their work is often used by designers at show home events and he even has been featured in some log cabin magazines.

You can learn more about their company, Cole and Sons, Inc, and see their work at their website. Like their Facebook page, too!

Adam and I had fun checking out his featured pieces and seeing Andy drumming up new business.

We also had fun seeing all the other artisans creations. There was jewelry, paintings, pottery, wood working and more. Everyone was incredibly talented.

However, one group of artisans really stuck out to Adam and me… the Foodists!

There were wine makers and craft beer brew masters. Lots of honey and candy makers. BBQ sauces and rubs.

And…

And it gets even better…!

THERE WERE SAMPLES.

We had a ball.

And ended up buying quite a bit. I blame the wine samples…

Adam took this picture of our artisan damage.

Ignore the Lowe's receipts in the background.  We are testing back splash ideas...

Ignore the Lowe’s receipts in the background. We are testing back splash ideas…

I am pretty sure that we now have enough barbecue sauce to get us through the summer.

One thing I was particularly excited about was the jar of Kim-chi from Fermenti Artisan. Kim-chi is traditionally a Korean side dish that is made up of different vegetables and seasonings that ferment together in a jar for some time.

I read a lot about Kim-chi last summer when I read Michael Pollen’s Cooked. In Cooked, Michael studies cooking through the four classis elements of the world: Fire, water, air and earth. In the “Earth” chapter he dives into fermentation with sauerkraut and Kim-chi.

Much of it was super scientific and well over my head. And, in the spirit of being honest, to me, that chapter dragged. However, it did make me realize that I needed to try Kim-chi.

My opportunity arrived a few weeks ago when out to eat with girl friends and I spotted it on a menu. It was served with tuna and I was surprised how spicy and tasty it was.

I knew Adam would love it as he is a big fan of all things spicy. I had been looking up recipes to try to make my own, but then I saw it at the artisan marketplace. I knew we had to get some.

We also got some curtido, which the reps at the marketplace said works great in Mexican dishes.

We also got some curtido, which the reps at the marketplace said works great in Mexican dishes.

We used it on Monday night for a take on fried rice using quinoa and shrimp.

Adam and I both had big bites of the Kim-chi right out of the jar before we began cooking. It was spicy just like the Kim-chi I had a few weeks ago, but it didn’t have the typical “pepper” spiciness. It was a fresher spicy… which is ironic considering it is literally rotting vegetables.

011

What might be even more ironic is that these rotting vegetables are actually good for you.

Really good for you.

In fact, Kim-chi is considered a “Super Food.” It’s full of vitamins like many other super foods such as kale, but what makes it different is it has a healthy bacteria culture that helps with digestion and, some studies show, prevents the growth of cancer.

And, as if Kim-chi could get any cooler, Korean’s actually say “Kim-chi!” like American’s say “Cheese!” for a picture!

Kim-chi and Shrimp Fried Quinoa

015

1 cup quinoa, uncooked
2 tablespoons oil (I used Olive… vegetable works.)
1 pound medium shrimp, peeled and deveined (We had large ones in the freezer. I should have cut them into pieces; it was a big bite!)
1 cup heaping Kim-chi
1 tablespoon Chili Garlic Sauce
1 tablespoon fish sauce
1 tablespoon soy sauce
2 eggs, lightly beaten
1 tablespoon rice vinegar
½ lime, squeezed
Salt and Pepper
Minced green onions and lime wedge for garnish

Cook cup of quinoa according to package. Set aside.

Add oil to a large skillet or wok pan. Add shrimp to skillet once oil is hot. Season with salt and pepper. Cook until pink, about three minutes. Remove to a plate and set aside.

012

Add Kim-chi and chili garlic paste to skillet. Stir-fry until they are combined and fragrant. Add in cooked quinoa, fish sauce, and soy sauce. Stir constantly about three minutes.

Push the quinoa mixture to one side of the skillet. Add the eggs and cook, stirring occasionally with a spatula about two minutes.

013

Remove from heat and fold eggs into quinoa mixture. Add the shrimp, lime juice and rice vinegar. Stir to combine.
Season with salt and pepper if desired.

Garnish and serve right away.

014

Filed Under: Plant, Recipes Tagged With: foodist, Indiana, Indiana artisan, Kimchi, local food, recipe

Cleaning Out the Freezer: Sweet Corn Tart

March 19, 2014 by theblogbloom.com 4 Comments

We get about four eggs a day from the hens.  Which is very nice.  I love having fresh eggs.

But, four eggs a day adds up pretty quickly.

006

I have to get a little creative to try to make sure these fresh eggy’s don’t go to waste.

Hardboiled eggs are a staple in the fridge.  They are great for Adam to grab on his way out the door in the morning.  He never had been much of a breakfast eater so the nutrition guru in me is glad he is finally eating something in the morning.

When I am not traveling, I work at home so I am typically able to take a little more time in the morning. I like to make an omelet or fry a couple eggs to make a little breakfast sandwich.

Thanks to my home office, I also get to eat lunch at home.  I love this because it’s another meal that I am able to be in control of what I eat in terms of portions and ingredients.  It also saves me some cash.  And, some “ZZZ’s” since I don’t have to pack a lunch in the morning. 🙂

When I started my Lent resolution of getting through the veggie’s in the freezer I knew the hardest thing for us to get through would be the sweet corn.  We froze tons of it and I try to avoid starchy vegetables. They don’t bring as much to the table in terms of nutrients and health.

The corn freezing adventures of Summer 2013!

The corn freezing adventures of Summer 2013!

photo (72)

Trust me, if taste were the only factor I had to worry about, I would be saying, “Bring on the starchy veg!”

I have been a potato kinda girl my whole life.   Baked, fried, tot, mashed… whatever!

But, I also have had thunder thighs my whole life.  (Literally.)

I can’t help but think that there might be a connection…

So, I decided to focus the sweet corn towards a lunch entrée versus dinner. This way, I have more of the day to burn off the natural sugars found in starchy vegetables like corn.

This tart became a great solution.  It used my plentiful eggs and sweet corn.  I made the crust using this recipe. And just used other odds and ends from the fridge so it cost me nearly nothing.

028

And, it didn’t cost me too many calories either.

Thanks to my tools and knowledge from a couple years of calorie reporting in K-12 nutrition, I would say a 1/4 slice of this tart is about 400 calories.  Not too bad for lunch when you balance it out with a glass of water and piece of fruit.  And, it gets you nearly a week’s worth of lunches!

032

Sweet Corn Tart:

Ingredients

2 slices bacon, chopped

2 cups corn kernels (Frozen works well.  If using ears of corn it will take about four)

½ cup chopped green onions

1 cup 2% milk

¼ cup grated Parmesan Cheese

Pinch of both salt and pepper

2 large egg whites, lightly beaten

1 large egg, lightly beaten

Cooking Spray

Pizza Dough (You could use a mix too.)

Preheat the oven to 375 degrees.

Cook bacon in a skillet until lightly browned.  Add corn and green onions and sauté mixture for about three minutes.

022

Place the bacon, corn and green onion mixture in a large bowl.  Add milk, two tablespoons of Parmesan, S&P, egg whites and egg.  Stir until the mixture is well blended.

Spray a tart or pie pan (10 inch diameter or so is best). Pat dough into the bottom and up the sides of the pan to cover the surface.

Pour bacon mixture into the dough and sprinkle with remaining Parmesan Cheese. Place pie or tart pan on a large baking sheet.

DO put a baking sheet under the pie or tart pan.  You will have a mess otherwise.

DO put a baking sheet under the pie or tart pan. You will have a mess otherwise.

Bake for about 35-45 minutes, or until well set.

Let cool for ten minutes on a wire rack.  Serve right away or refrigerate for up to a week.

I just would zap a piece for about 45 seconds on days that I had the tart for lunch.

026

It also could make a great entrée for a brunch!

Filed Under: Plant, Recipes Tagged With: Cleaning Out the Freezer, Corn, Healthy Eating, recipe, sweet corn

Cleaning Out The Freezer: Zucchini Sandwich Cookies

March 9, 2014 by theblogbloom.com 4 Comments

This past week Ree Drummand, The Pioneer Women, posted this photo of her Mason jar collection.

photo (5)

It made me laugh. Here is mine…

018

019

I see you, Ree.

PS- Who wants pickles?!

Digging through my glass jar collection inspired me to do some major spring cleaning and the timing also coincided very well with Lent. A great time for making changes, simplifying and setting goals… among other things. So I decided that, from now until Easter, Adam and I will deep clean and/or declutter a different area of the house each day.

It’s surprisingly going really well! Today we even took on our closet and were able to take three department store bags of old clothes to Goodwill.

One area of the house that isn’t assigned a specific day but we are focusing on this Lenten season is the freezer.

Now, I understand the typical thing to do during Lent is to fast, eat less of something or totally give up some kind of food, like dessert or carbs or whatever. But, we still have quite a bit of frozen garden vegetables that we need to go through.

We have some sweet corn, a little bit of sliced poblano peppers, cherry tomatoes, sliced zucchini and grated zucchini in the freezer and it’s only a matter of time before there is more. So, opposed to basically everyone else during Lent, we are going to make an effort to eat.

And in the spirit of continuing to be totally weird and different, I figured why not kick off this abnormal Lenten goal with a dessert.

It’s rare for me to bake. And, if I do bake, it’s even more rarely a sweet treat.

But, grated zucchini is great for baked desserts. One of Adam’s favorite desserts is Chocolate Zucchini Cake and I made it for his birthday in December. It also works really well in chocolate chip cookies.

In July I froze a bunch of zucchini's in 1/2 cup portions to make for easy baking.

In July I froze a bunch of zucchini’s in 1/2 cup portions to make for easy baking.

This cookie was kind of inspired by the chocolate chip cookie recipe and also by a Martha Stewart recipe where she makes it super decadent and turns it into a sandwich cookie.

045

What is nice about baking cookies is that I typically have all the ingredients in the pantry so I can bake them on a whim. Although, yesterday I was missing chocolate chips. But, with the cream cheese icing filling they didn’t need them… unless you really want them.

They were sweet and had a great balance of spice with the cinnamon, which compliments zucchini really well.

036

Couple good baking tips for the newbie’s and/or novice:

– It takes a little planning, but makes sure ingredients like eggs, butter, and cream cheese are room temperature. It’s easier to incorporate into the dough, makes more even cooking and a lighter texture.
– More planning. Make sure your oven is completely preheated before putting in baked goods. This also helps ensure more even and thorough cooking.
– The icing recipe below is also great for red velvet cakes!

Zucchini Sandwich Cookies

048

Cookies:
1 cup flour
1 teaspoon ground cinnamon
½ teaspoon Baking Powder
½ teaspoon baking soda
Pinch of salt
1 ½ sticks of butter, divided and room temperature
½ cup sugar
½ cup light brown sugar, packed
1 large egg
½ teaspoon vanilla extract
1 cup grated zucchini
1 cup rolled oats
½ cup walnuts or chocolate chips (if desired)

Sandwich Filling:
8 ounces of cream cheese, room temperature
1 cup powdered sugar

Preheat oven to 350.
Mix together flour, cinnamon, baking soda and powder, and salt in bowl.
Beat one stick of butter and sugars until combined and fluffy. Beat in the egg and vanilla.
Beat in dry mixture into the sugars. Mix in the grated zucchini, oats and nuts and/or chocolate chips.
Refrigerate for one hour.
If making sandwiches you want the cookies to be similar in size, so use an ice cream scoop to place on a greased or parchment paper lined cookie sheet at least one inch apart.
Bake twenty minutes, until edges are golden brown.
Cool completely on a wire rack.
To make sandwich filling, mix cream cheese and powdered sugar together. Spread on cool cookies to create sandwiches.

Check back often the next few weeks for many more recipes as we make our way through the freezer!

Filed Under: Plant, Recipes Tagged With: Frozen Vegetables, garden vegetables, recipe, Zucchini

Egg Series Day 5: Colorful Eggs and Baked Eggs in an Avocado

January 23, 2014 by theblogbloom.com 6 Comments

The first thing I noticed about our backyard eggs after the chickens started laying last October was how different the yolks were in comparison to the commercial eggs I grew up with.

The yolk in our hen’s eggs is an incredibly vibrant golden yellow.

Our egg is on the left.  An egg from the grocery store is on the right.

Our egg is on the left.

Our fresh egg, holding it's shape.

Our fresh egg, holding it’s shape.

A grocery store egg.  The color is faint and the yolk's shape is weak.

A grocery store egg. The color is faint and the yolk’s shape is weak.

They also hold their shape much better than grocery store egg’s yolks.

The color in the yolks is based on the chicken’s diet. Some plants have stronger natural pigments creating the bright orange colors in our pasture raised eggs.

Hens that produce eggs for commercial use do not have access to plants with these color creating pigments, but producers sometimes will add things like marigold petals to their feed to enhance the yolks colors.

Our hens produce brown eggs. The color of the eggs is based on the breed of the chicken. There are actually hundreds of chicken breeds all over the world and they create eggs with a wide, wide range of colors. Blue, green, grey, pink… and more!

There is no change in the taste of the egg based on the color of the shell. However, I have found that there is a taste difference between fresh eggs and commercial eggs. It’s a hard taste to explain, but there is much more flavor, texture and chew to a fresh egg making it incredibly tasty!

In November, I started a new job where I travel to college campuses often, but when I am not traveling I work out of my home.

I love that I have been able to ditch my daily sixty mile commute and don’t have to wear makeup everyday, but I think my favorite thing about working from home is being at home for lunch. It lets me make smart food choices… and save a couple bucks!

This is one of my favorite quick lunches to make at home, but it could be a great breakfast or even a big snack.

Baked Egg in an Avocado

Preheat oven to 425.

010

Slice avocado in half, scoop out the pit and a bit of the meat to make room for the egg. This bit of avocado can top the eggs after it’s all cooked.

011

Place avocado halves into a baking dish so they are level and secure.

Pour an egg into each avocado.

013

Add salt and pepper.

015

Cook for twenty five minutes.

I topped on avocado with paprika and the other with srrachia, experimenting with different flavors. I liked the paprika best. Parmesan cheese has been a topping I have tried and liked in the past.

020

Okay, okay.

I’ll address it. I get it. Your thinking, “Hey Claire, late blog today. What’s up with that, huh?” (I know you couldn’t possibly have anything more important than Bloom… insert sarcasm here.)

Yes, I have been posting all the other Egg Series posts around the middle of the day. This is because I have proofread my writing from the night before as I eat lunch.

But, today was one of those days where I was traveling for work and got to spend much of the day at my alma mater.

I have done work on the campus for years, which I do love because I love the university and the people affiliated with it… but, because I am there so often I sometimes wonder about what it would be like to drive up to campus and have it feel different or special.

The feeling I am envious that my girlfriends, who make it back once every other year, feel.

Today it was.

Today, campus was different.

My home, my favorite place in the world, saw evil this week.

It has been bruised and its people have been exposed to the cruelty that is in this world.

But also today, as I drove the streets I could drive in my sleep, I saw what makes my university special.

Pride.

Community.

Greatness.

Love.

Despite everything that happened on Tuesday, Purdue University is strong.

1622687_10103300447214258_1426220134_n

And in that sense, nothing has changed.

Filed Under: Plant, Recipes Tagged With: Egg Series, fresh eggs, Purdue, recipe

Taste of Summer in December

December 28, 2013 by theblogbloom.com 1 Comment

Last week, Adam looked out at the very snowy backyard and said, “I wish it was summer. I miss the garden. I wish we could go out there and work in it.”

He has been saying things like this for the last two months just about every other day. He has mentioned that he misses having variety fresh vegetables to eat. He even has been looking into green houses so we could have produce growing throughout the year.

… I think the root of this particular instance was that he didn’t want to go to spinning.

But, we did.

And, thank goodness we did because we had a feast waiting for us.

It was Adam’s Birthday!

016

Inspired by his desire for summer and fresh garden produce, I dug deep into our freezer and prepared a meal entirely using produce that came from our garden.

014

… With the exception of steaks. It was his birthday after all.

Our freezer is still pretty well stocked thanks to the time and effort we made to preserve vegetables from this summer’s garden. For Adam’s birthday meal I was able to use snap beans, cherry tomatoes, grated zucchini, sweet corn and poblano peppers. And a couple of the backyard eggs!

005

Here is what I made:

Balsamic Peas and Tomatoes with Feta

In the summer, I do this as a raw salad. It’s light and has great crunch with the vibrant flavors. But, because the vegetables were frozen, I sautéed them. Warm, this combination of flavors is excellent because the feta melts just a little for a touch of creaminess.

010

1 Tablespoon of olive oil
1 clove garlic, minced
1 cup snap peas
1 cup cherry tomato
¼ cup balsamic vinegar
Salt and Pepper
Feta Cheese crumbles

Heat olive oil over medium high heat. Add garlic and cook until fragrant and begins to golden.

Add frozen peas and tomatoes, stir to coat with garlic and oil. Lower heat to medium and cook for three minutes. Add balsamic, salt and pepper, and cook for three more minutes, stirring occasionally.

Plate and top with crumbled feta cheese.

Spicy Skillet Corn

In case you are new here… Adam likes spicy food. And, this corn dish packs some heat!

011

1 Tablespoon Olive Oil
½ red onions
1 ½ cup frozen corn
½ cup frozen poblano pepper, diced
½ tablespoon cayenne pepper
Salt and Pepper to taste

Heat olive oil in a skillet over medium high heat. Add red onion and stir to coat with oil. Add corn, peppers and cayenne pepper, stir to combine with oil and onions. Cook until vegetables are tender.

Serve immediately.

Zucchini Cake

Zucchini Cake is essentially just chocolate cake, but the grated zucchini makes the cake super moist. Plus, you are getting some veggies while eating cake… life doesn’t get much better than that!

I have seen recipes for Zucchini Cake with lots of different seasonings added to the cake batter, such as cinnamon or ground cloves. It gives the cake good flavor, but for this occasion I kept it simple because I made Bourbon Butter cream Frosting. I did this wanting to give it a little “manly” touch (Adam’s a big fan of bourbon, if he is drinking a cocktail) and thought plain old chocolate cake would be best with the flavors of the spririt.

This recipe is based on the recipe Adam grew up with thanks to his mom. (… And, it probably was made for her by her mom!) Her recipe also calls for cinnamon, nuts and chocolate frosting and is fantastic.

Love/Romance Tip: Find out favorites from your man’s childhood and cook them. Often.

017

3/4 cups oil
2 cups sugar
3 eggs
1 teaspoon vanilla
1/2 cup milk
2 1/2 cup flour
1 tsp baking powder
4 T baking cocoa
1 1/2 teaspoon salt
2 cups grated zucchini (I froze grated garden zucchini’s in ½ cup portions. Made this SUPER easy.)

006

Combine oil and sugar. Add eggs, vanilla, and milk. Mix well. Mix in dry ingredients. Stir in zucchini.

Bake in a greased pan (I used two cake pans) at 350 for 1 hour.

Once cool top with this:

Bourbon Butter Cream Icing

009

3 egg whites
2/3 cups sugar
Two sticks of butter, room temperature
1 (… or two) tablespoon bourbon, room temperature

Mix egg whites and sugar in a mixing bowl. Heat mixture to combine, stirring occassionally. (I placed my Kitchenaid bowl over a simmering pot of water. The steam heated the sugary mixture.)

Once combined, remove from heat and hook up to mixer. Mix on medium speed, add butter, one tablespoon at a time until combined and fluffy. Add bourbon, mix throughout.

We also had some champagne from our August trip to Oliver Winery to complete our "Summer" Celebration!

We also had some champagne from our August trip to Oliver Winery to complete our “Summer” Celebration!

Filed Under: Plant, Recipes Tagged With: birthday, Dessert, Frozen Vegetables, garden vegetables, local food, recipe, Side Dish

Sunday Funday.

September 8, 2013 by theblogbloom.com 5 Comments

Happy First Football Sunday!

… Or Merry Christmas, if you are speaking with my husband.

Adam looks forward to this day all year long.

With harvest picking up, Sunday’s are his only day to relax and not worry (…too much) about work.

Adam and I have established a little bit of a tradition for early Sunday afternoon football games that date back to my first apartment in Indianapolis. It’s fabulous. We take our time waking up, make brunch, throw something in the crock pot for an early dinner after the game, all while drinking Bloody Mary’s.

011

Adam has spent the last few years trying to perfect the Bloody Mary.

And he really has done some research. He has befriended bartenders and expert tailgaters at football games and NASCAR races. (AKA all the professionals in this field.)

Ingredients have included everything from Pepper and Bacon vodka, pickle juice, horseradish, Worcestershire sauce, pickled okra, bacon and many others.

016

PS- it’s been a really hard job being the taste tester for all these cocktails…

Adam’s grandmother recently shared her recipe for tomato juice with me after seeing how tomatoes were taking over my counter tops. While reading through the ingredients, I thought how it would make a great Bloody Mary base.

When I shared this with Adam, his passion for the perfect Bloody Mary came to life and he instantly got to work canning his own Bloody Mary mix.

009

Here is what he did:

021

Ingredients:

Approximately 20 Tomatoes (Adam used a few different kinds, including Roma and Beefsteak)
Two cloves garlic, minced
Two yellow onions, minced
Three ribs celery, chopped
1 Bell pepper, chopped
1 Poblano pepper, chopped (Any spicy pepper, like a jalapeno, would work)
1/3 cup prepared horseradish (Not horseradish sauce)
1 ½ teaspoons of crushed red pepper flakes
1 tablespoon Tobasco (Any red pepper sauce could work)
¼ cup sugar
1/3 cup lemon juice
½ tablespoon salt
½ tablespoon celery salt

Heat tomatoes in boiling water for about three minutes. Place immediately into ice water bath. Core, skin and cut tomatoes into wedges.

Add all ingredients, including blanched tomatoes, to a large stock pot. Cook over medium heat. Simmer for 40 minutes, stirring occasionally.

Vegetables should cook down and turn to juice.

Strain (we used a mesh strainer), pushing out as much juice as possible. After straining, return juice to the pot and bring strained tomato juice to a boil.

Put juice into 1-quart jars. (Make sure jars are clean and sanitized before processing begins. Ensure all lids are clean and unused.)
Process in boiling water bath with a half inch of water over the top of the sealed jar for forty minutes.

Remove from water bath and place on cooling rack for at least four hours. Make sure each jar seals. If jar does not seal, consume the mix in the next three days.

Today we tried to Bloody Mary mix for the first time. We mixed in about a shot glass of vodka and a splash of spicy pickle juice.

009

Perfectionist Adam said he liked them, but he still needed to work on it as he dug through the fridge for more Tobasco.

... annoying photographer.  I know...

… annoying photographer. I know…

I, however, thought they were great. I loved the fresh flavor. It didn’t taste watered down or too salty. The pickle juice was perfect. There was enough spice to keep it interesting. Perfect.

024

And the Colts won! So, who knows?! Maybe this Bloody also has a splash of luck.

027

Filed Under: Canning and Preserving, Plant, Recipes Tagged With: Bloody Mary, Canning, cocktail, football, Plant, recipe, Tomato

Natural, Roasted Chicken. It’s What’s for Dinner.

August 21, 2013 by theblogbloom.com 7 Comments

It’s hard to believe that it really is late August.

School has started and is in full swing.

The sun is down before nine.

The corn is tall.

And the garden is full of produce.

Like these peppers.

002

And tomatoes.

003

Tomatoes.

009

Tomatoes!

009

With so much naturally raised produce in the kitchen I decided to cook the naturally raised chicken from my Farmer’s Market trip in July for dinner on Monday night.

I had never cooked a whole chicken and used the website 100 Days of Real Food as a stepping stone. I visit this site often as it is a great resource for cutting out over processed food from your diet. The author takes a realistic and relatable approach as she has (precious) kids and she doesn’t want to “worry” about food, but rather be confident in her family’s food choices.

On the website there is a post about roasting a whole chicken: http://www.100daysofrealfood.com/2013/05/14/recipe-how-to-roast-whole-chicken-safely-defrost-meat/

Perfect.

A chicken seasoned with lemons, garlic and rosemary.

Even more perfect. Some of my favorite flavors and I already had local rosemary and garlic in the house.

The post begins with how to properly defrost a chicken. She mentions that even though she has lived to tell about defrosting meat on the counter, the USDA recommends that meat should be defrosted slowly in the refrigerator.

… Something that made this ServSafe certified, hospitality professional proud.

Once defrosted, I mixed the herbs, seasonings, and oils together in a small bowl.

The next order of business was to remove the “giblets or bag of ‘parts’ that may be stored inside the chicken.”

The chicken man at the market had mentioned the “giblet bag” was in there. I remember thinking when I made the purchase, “Oh wow. That’s nice. He bagged those up and put them back in. I bet there are people who want to keep those.”

I looked in my defrosted chicken’s butt. I didn’t see any evidence of a ziplock baggie or saran wrap like I was expecting.

Weird.

I opened the rear end more. A sleek brown, jelly-ish mass was in plain sight.

I had just read the chapter in “The Omnivore’s Dilemma” where Michael Pollan processes free range chickens on Joel Salatin’s Virginia farm. Pollan wrote about removing the chicken’s insides after the bird bleeds out.

I knew what I was looking at… it was the bird’s liver.

There was no actual “bag.”

I had been lied to…? Maybe he just forgot to bag up this one…?

Or, it’s an expression. Slang, if you will.

… For chicken organs.

I also remembered from my read that removing these organs needs to be done carefully. Pollan warned that a ruptured gall bladder can be a big mess.

“What the heck am I supposed to do?” I thought, desperately wishing Adam was home. He could handle this.

I looked at the clock. Adam wouldn’t be home for about an hour. And the bird would take that long in the oven. I couldn’t wait.

So, I did what every girl who didn’t know what 4-H was until she was eighteen would do: I Googled it.

The first page I saw said to “Gently reach in and simply remove the giblets.”

Seriously? That’s all you got, Google?!

After many other failed searches and confusing youtube videos, I decided to suck it up.

“Like a band aid,” I told myself, sticking my hand in the bird’s rear end. I wrapped my fingers around the bundle in the cavity of the chicken, wincing, eye’s shut and gave it a pull.

“Ohhhhmyyyygodddd,” I squealed out loud as my hand emerged.

Browns, pinks, yellows and blues made up the still slightly frozen mass. (Thank God. Had that been any squishier we would have had issues.)

Just be glad I didn’t take a picture.

Once I recovered (and threw the giblets away), I brushed the bird with the herbed oil marinade, stuffed the lemon peels in the chest cavity, and placed him in the oven for about an hour.

001

Right around the time Adam got home from work the chicken had reached 170 degrees. I let it rest on the stove top while I chopped up some tomatoes and cucumbers to serve as a side with a splash of red wine vinegar. Light and easy.

The aroma of the rosemary, garlic, and lemon married well with the chicken, filled the kitchen and demolished any traumatizing mental images of giblets.

010

By the time I plated everything I couldn’t wait to give it a try.

It seems crazy, but the natural, free range bird did taste different than the chicken breasts from the grocery store that I am used to. It was moist, flavorful, and felt as though I could really taste the chicken.

012

I am looking forward to having more natural birds from our own backyard this winter.

… And having someone else do the processing.

Filed Under: Plant, Recipes Tagged With: August, Chicken, Cucumber, Farmers Market, food blog, free range chicken, garlic, michael pollan, naturally raised, Pepper, Plant, recipe, Rosemary, Tomato

Pesto Changeo.

August 13, 2013 by theblogbloom.com 2 Comments

You know that article that every woman’s magazine runs at least once a year sharing the buzzwords to watch for so that you avoid “calorie overload” when ordering a meal at a restaurant?

Crispy. AKA Fried.

Smothered. Probably with colossal amounts of cheese.

Creamy. Unnecessarily calorie dense.

So on and so on…

Here are the buzzwords used in menu items that I just can’t avoid:

Goat Cheese. So rich and so delicious.

Truffle. The epitome of decadence.

Avocado. Yes, like much of America, I to, am Avocado Obsessed. “Have you seen my new Avo-CAR-do?” Cracks me up. I love a good food pun.

Pesto. I just can’t get enough of it.

I can’t get enough of pesto at home either. It is great on nearly any kind of meat. Works well as a sauce for pizza or pasta. And even compliments some vegetables.

Thanks to my basil plants looking abundant as ever, I decided to give making pesto a try. My mom makes and freezes pesto often. This allows her to enjoy her basil plants throughout the winter.

I visited her over the weekend and asked for her recipe.

She laughed.

“Oh, that’s easy. Just some oil, garlic, parmesan, pine nuts and your Cuisinart.”

… Easy for the Pesto Pro to say.

Wanting to be a little more precise I looked it up on Google and sure enough, that really was it. And it really was easy. Quick too.

So, I am now a Pesto Pro.

… Or maybe more a Pesto Magician because it seemed like the instant I hit the “On” button my ingredients turned into a beautifully, green and delicious pesto paste.

Here is what I did:

Gather two cups of fresh basil (Basil should be packed pretty well.)

1/3 cup olive oil

½ cup grated Parmesan Romano Cheese

½ cup Pine Nuts (… I read online that you could also use walnuts or almonds. The wonderful Barefoot Contessa uses both walnuts and pine nuts. Things I will try next time.)

3 cloves garlic (I used some from the Farmer’s Market and the cloves were huge! I would tone it down next time if I were working with such big garlic cloves again.)

A touch of salt

I threw it all in the food processor, turned it on and then the magic happened.

7

Instantaneously, I had pesto.

6

I stopped it twice to push down the pesto on the sides with a spatula until it was nearly smooth.

From there you can either put your pesto in the fridge and enjoy it within three days or you can freeze it like I did. (Although, I am sure I would have had no problem finishing it all well before three days were up… the flavor was amazing.)

There are a few ways you can freeze pesto.

I scooped small mounds of the pesto onto a cookie sheet lined with parchment paper and put the sheet into the freezer. Once solid, I removed the mounds from the parchment paper and put them into a ziplock bag. This way I can grab a serving to add to whatever I am cooking.

5

My friend’s mom uses an ice maker mold to freeze the pesto and then stores them in ziplock bags once frozen.

Baby food jars also work well.

I did reserve a little pesto to use with our meal last night. Adam grilled shrimp that I had coated with the fresh pesto. As I scooped the pesto on to the shrimp I told Adam to give it a try.

I also dressed some shrimp with BBQ sauce and others with lime and tequila.

I also dressed some shrimp with BBQ sauce and others with lime and tequila.

As he did his face lit up. “Mmm,” he admired, “You made that?”

Heck yes I did!

Another thing that magically changed last night was me. I went from twenty five to twenty six.

2

My good friend Betsy came up to our house from Indianapolis with these amazing cupcakes from The Flying Cupcake, a local and very successful cupcake chain in Indy. I had the Birthday Cupcake, of course. Adam and Betsy both had the one that looks like a “Ho-ho.”

3

But, what was even more magical than the pesto or slipping into my upper twenties was the awe-inspiring sunset we were blessed with as a backdrop for my celebratory dinner.

Cheers to twenty six!

Filed Under: Plant, Recipes Tagged With: Basil, birthday, cupcakes, garlic, pesto, Plant, recipe, shrimp, sunset

  • 1
  • 2
  • Next Page »

Meet Claire

Hi, thanks for visiting! I am Claire and I have been sharing my life and thoughts on Bloom since 2013. Welcome to 2023's project, The Farmers Market and The Library. For more about me...

Follow Bloom.

RSS
Follow by Email
Facebook
Twitter
Pinterest
Instagram

Be a Bloom Insider

Enter your email address to subscribe to Bloom and receive notifications of new posts and a bi-weekly love letter from Claire by email.

Archives

Copyright © 2025 · Foodie Theme by Shay Bocks · Built on the Genesis Framework · Powered by WordPress